

Table of contents
Hello everyone! 👋 Welcome In this blog we will delve into the realm of AWS WAF & Shield – two formidable weapons in the arsenal of AWS services dedicated to fortifying your digital defenses. In this blog, we'll embark on a hands-on exploration, unraveling the potential of these services to revolutionize your software deployment and elevate your security posture.
Note: Before getting started with the project you need to have an AWS Tier account for setting up your AWS account if you are using it for the first time, you can check out this video so without further ado let's walk through practical implementations and real-world scenarios, providing you with the skills and insights needed to safeguard your applications effectively.
What is WAF?
AWS WAF stands for Web Application Firewall which empowers to shield your web applications from a myriad of online threats, ensuring robust protection against common vulnerabilities and malicious attacks.
When someone tries to access your website, AWS WAF steps in to check if their request follows the rules you've set. If it meets the criteria you've defined, AWS WAF tells the system to either let the request through, block it, or take another action you've configured.
Overview
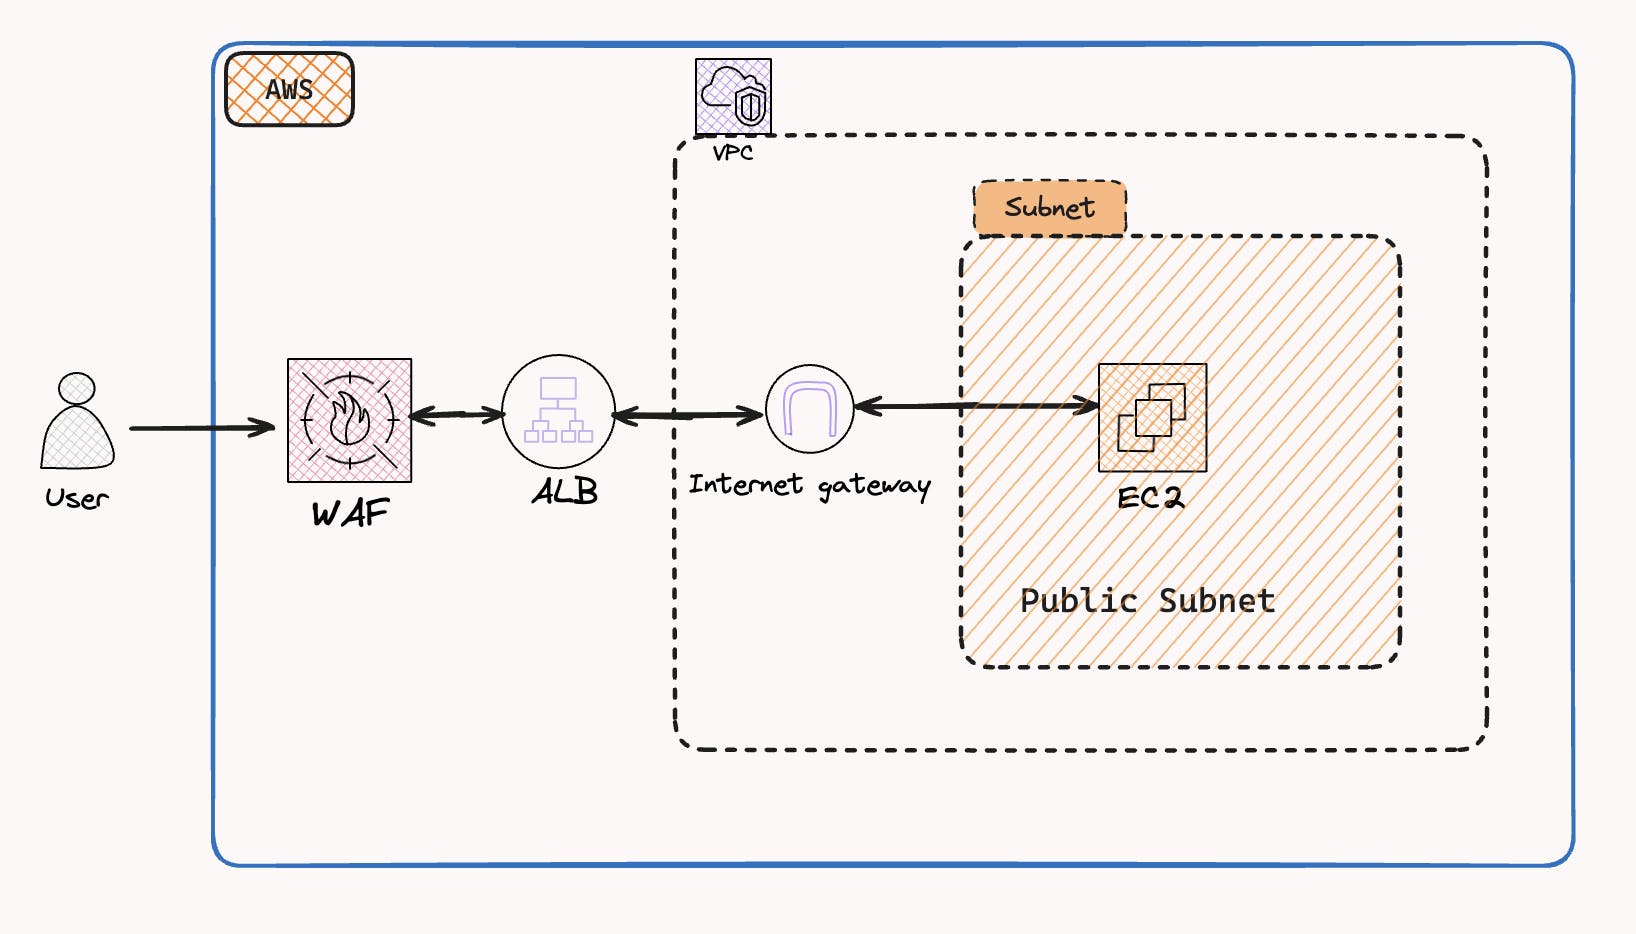
Scenario
From the above flowchart, we gonna have a hands-on demonstration, where we'll secure a sample Apache server using AWS WAF. The application is deployed on an Amazon EC2 instance, and an Application Load Balancer (ALB) directs traffic to it. As part of this engaging demo, we gonna implement AWS WAF, serving as our Web Application Firewall. It stands guard, inspecting every incoming request to ensure it aligns with our predefined security rules.
We will specifically focus on implementing a CAPTCHA service. This feature will be configured to apply exclusively to our specified IP address. When accessing the website URL, our IP address will trigger the CAPTCHA challenge. Solving the CAPTCHA puzzle becomes a prerequisite for viewing the website content. So let's get our hands dirty.
Setting up VPC
Let's initiate the process by establishing a VPC (Virtual Private Connection) for our hands-on demonstration.
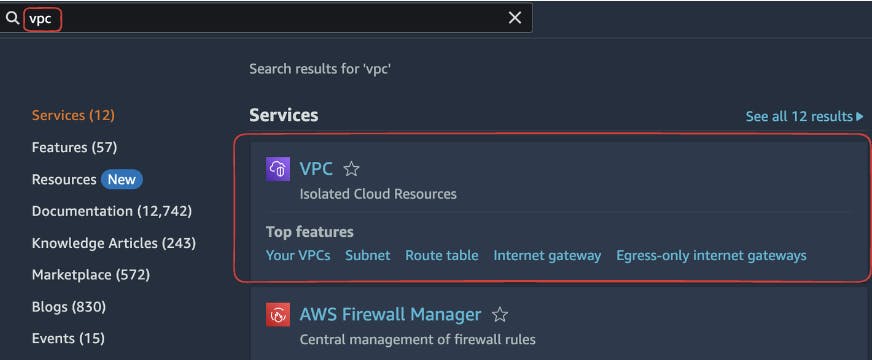
In the AWS Management Console, locate and access the VPC dashboard, which is the central hub for configuring your network settings.
Further, Click on "Create VPC" to commence the VPC creation process.

In the ensuing form, provide essential details for your VPC:
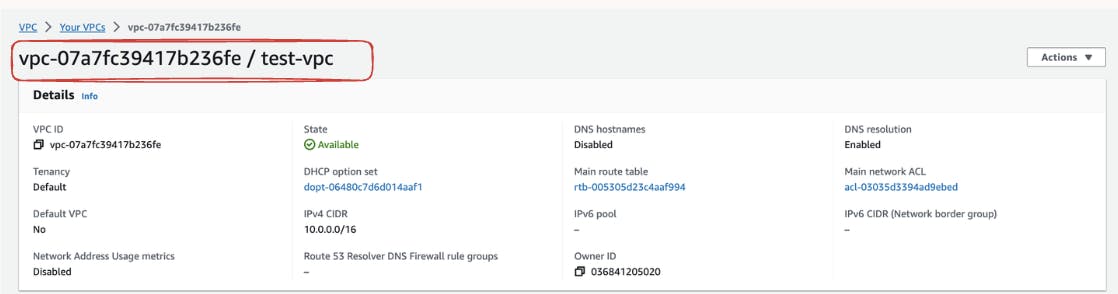
Name: Choose a meaningful name, such as
test-vpc.IPv4 CIDR Block: Specify the IP range for your VPC, for example,
10.0.0.0/16.Adjust other settings as per your requirements.

Click "Create VPC" to finalize the setup. Your VPC will be created promptly and will be ready for use.
Setup Internet Gateway
In the AWS Management Console, access the "Internet Gateways" section by typing "Internet Gateways" into the search bar and selecting the corresponding result.

Click on "Create Internet Gateway" and assign it a meaningful name. For our demonstration, let's name it "
test-ig." Confirm the creation, and your Internet Gateway is ready.
Further attach Internet Gateway to our VPC-
Choose the Right VPC Under "Actions," select "Attach to VPC."
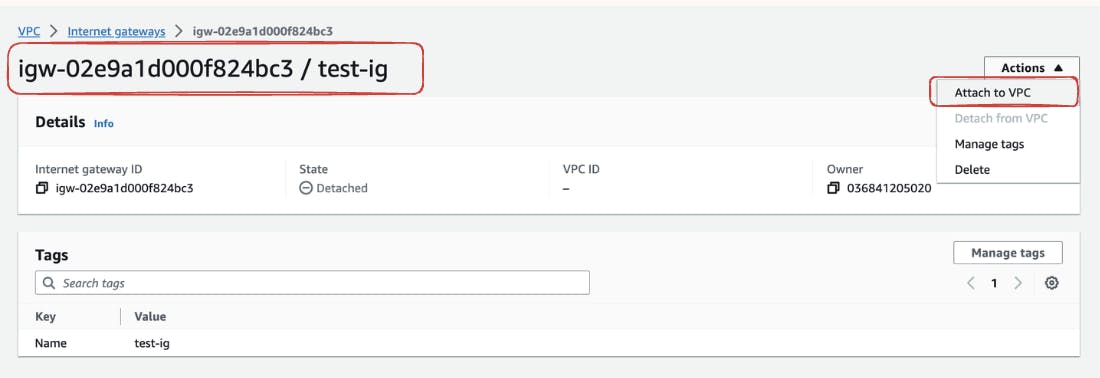
In the dropdown menu, choose the VPC you want to associate with the Internet Gateway. For our demo, we will link "
test-ig" to our existing "test-vpc."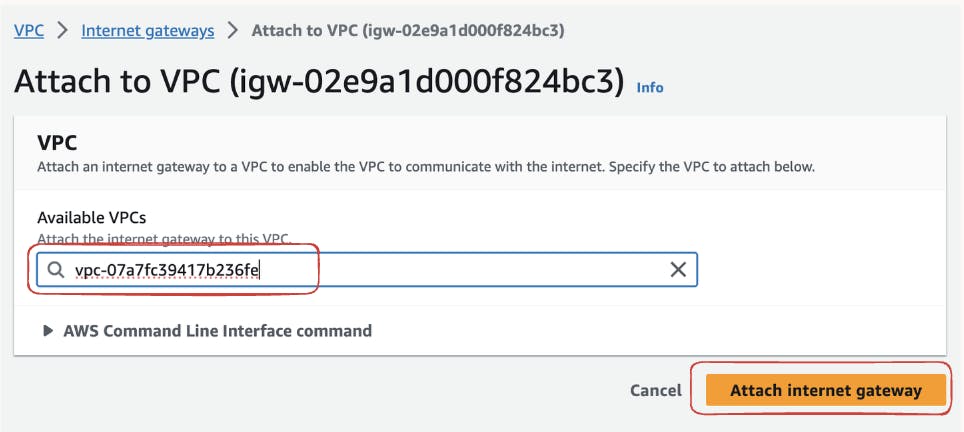
Further, click on "Attach Internet Gateway," finalizing the association between the Internet Gateway and your VPC. This step is crucial for enabling communication between your VPC and the internet.
Setup Subnet
Head to the AWS VPC Dashboard, Click on "Subnets" in the VPC Dashboard, and initiate the creation of subnets to segregate your network traffic efficiently.
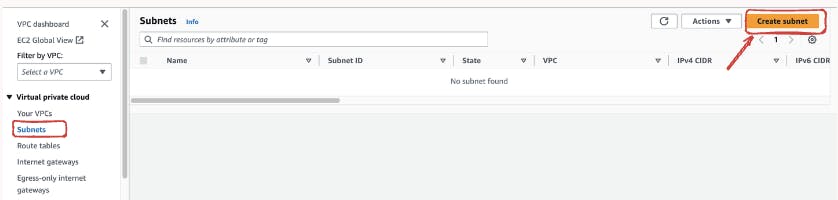
Click the "Create Subnet" button to initiate the creation of a new subnet. Specify the relevant details for the subnet including the VPC name and CIDR block. For this demonstration, we gonna create two subnets. Start but defining the CIDR blocks for your subnets, ensuring that they fall within the range of
10.0.0.0/16to10.0.1.0/24. This allows for a total of 256 IP addresses in each subnet. Additionally, assign the subnets to specific availability zones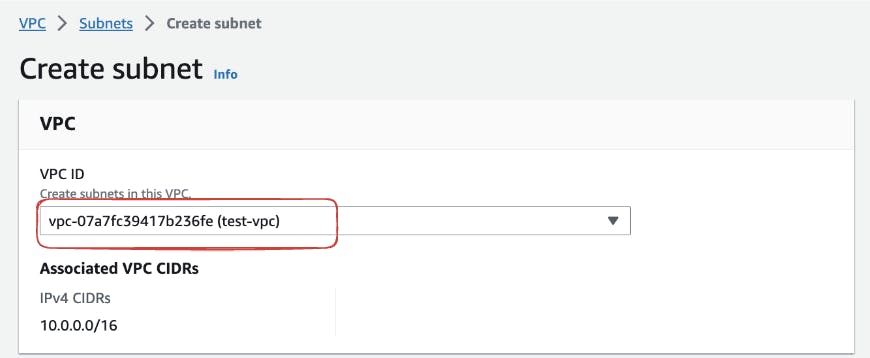
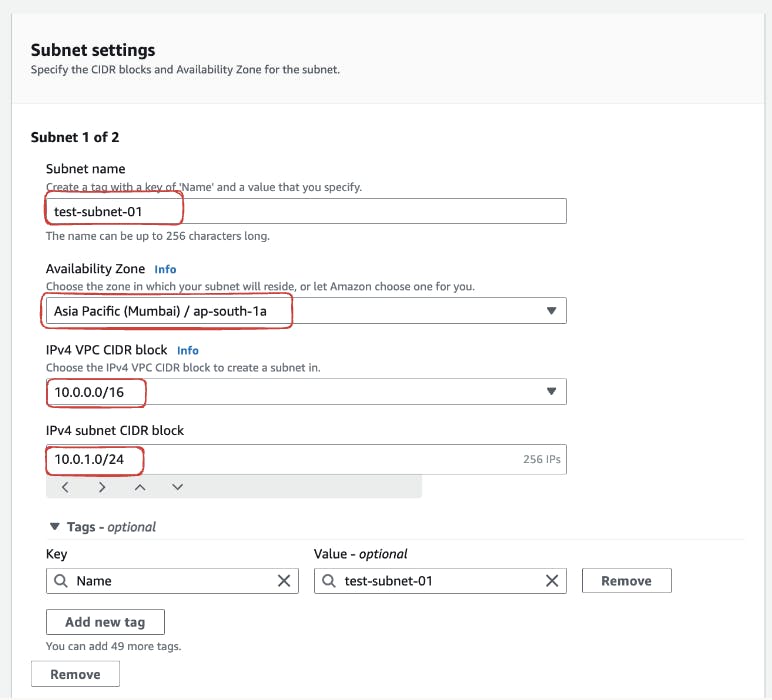

Review your subnet configurations and click the "Create Subnet" button to confirm the creation. You'll now have successfully established subnets within your VPC, providing the necessary segmentation for your network resources.

Create Route Table
Access "Route Tables" section within the AWS VPC Dashboard. Begin by creating a new custom route table to tailor routing configurations to your specific needs. Also select our vpc named "
test-vpc"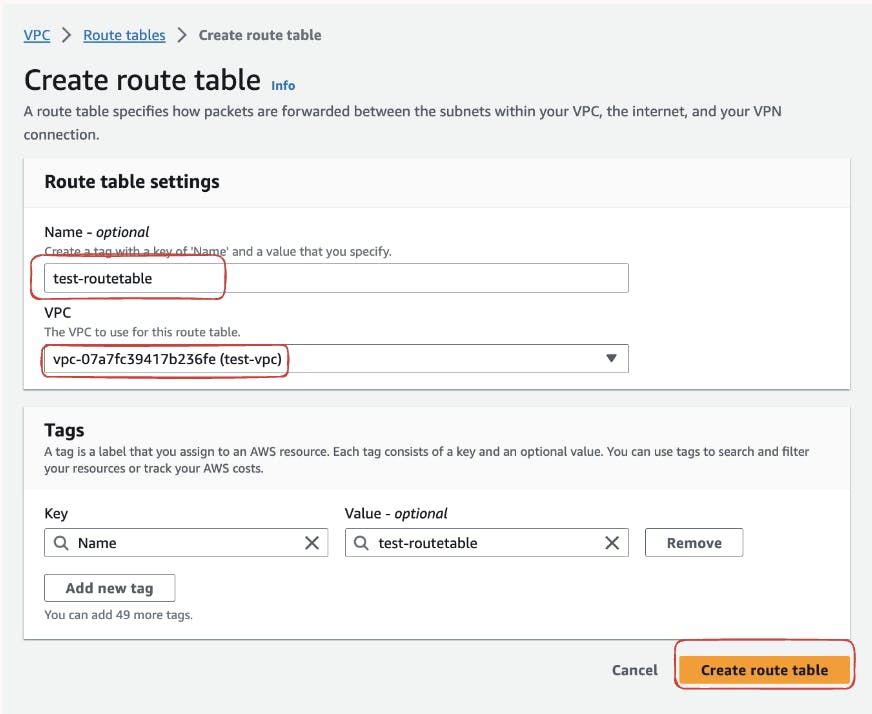
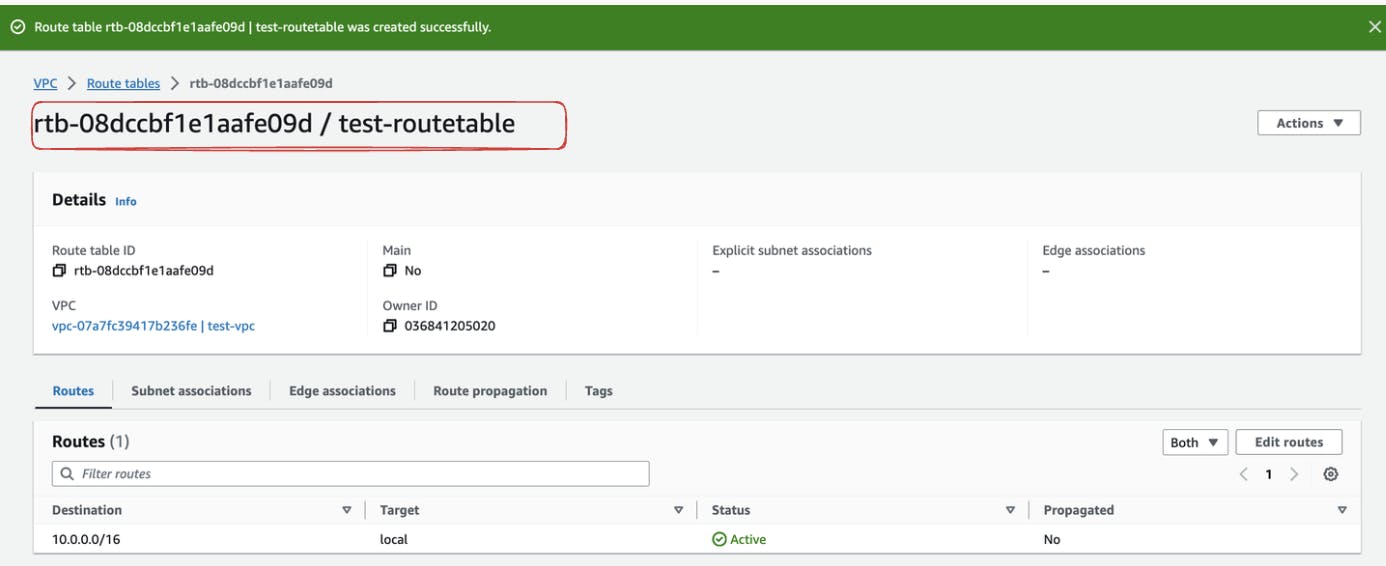
After the successful creation of the route table now we need to associate the custom route table we created with the subnets we created earlier. This step ensures that your subnet follows the routing rules you've specified. For these go under the Subnet Association section and click on "Edit Subnet Association".
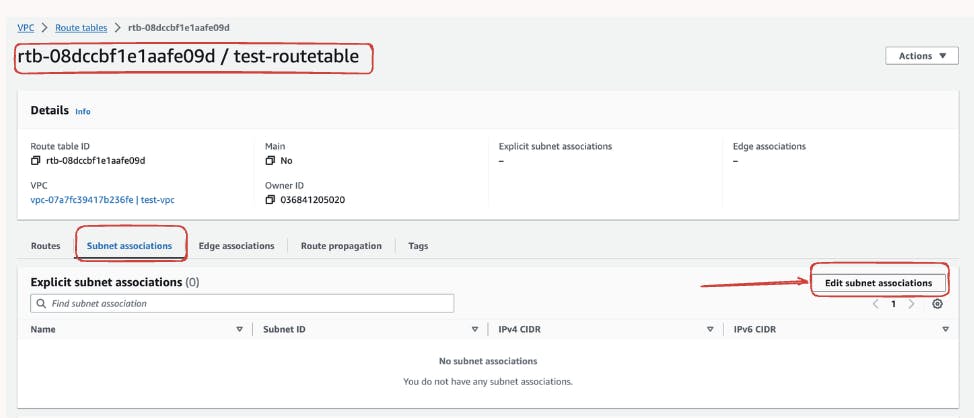
Now Select the subnets
test-subnet-01andtest-subnet-02and "click the save association". After selecting the appropriate subnets, save the changes. Your custom route table is now effectively associated with the designated subnets, ensuring that routing rules are applied consistently across your application infrastructure.
The custom route table, specifically tailored to our application's requirements, plays a pivotal role in directing traffic seamlessly across different components within your VPC.
Configuring EC2 instance
Now we will proceed to the EC2 Dashboard and launch a new instance within our
test-vpc. This instance will serve as part of our application infrastructure.
Click on the "Launch Instance" button to initiate the instance creation process. For our demonstration purposes, we will name the instance as "test-waf-instance". Choose the Ubuntu as the operating system for the instance.

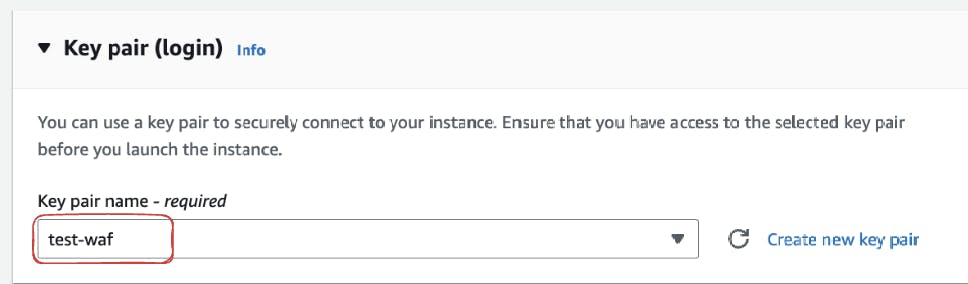
Further, create a new key-value pair for secure SSH access. This key pair ensures secure communication with your EC2 instance
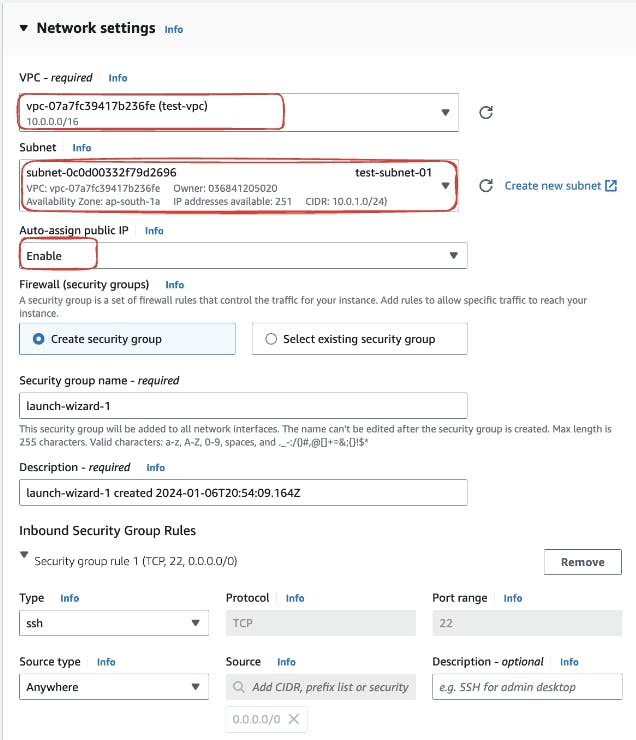
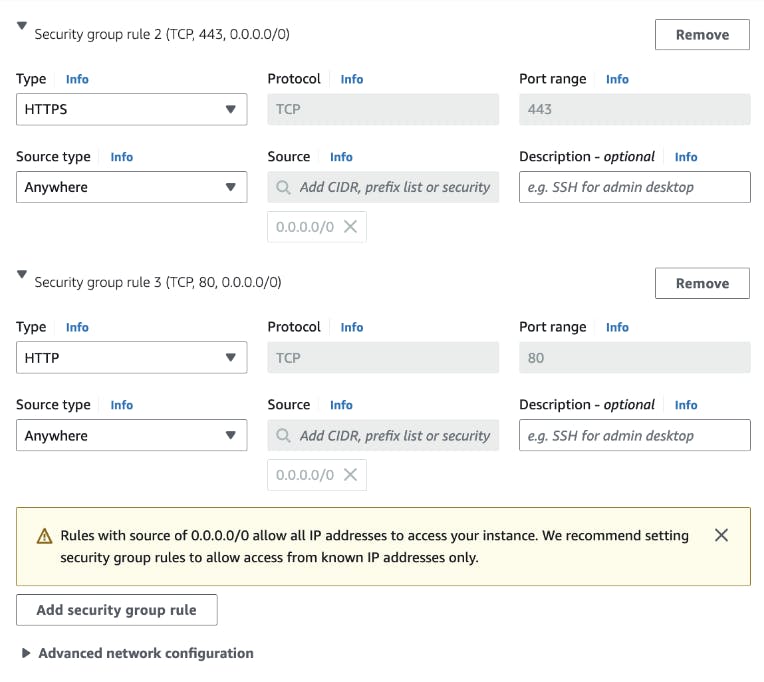
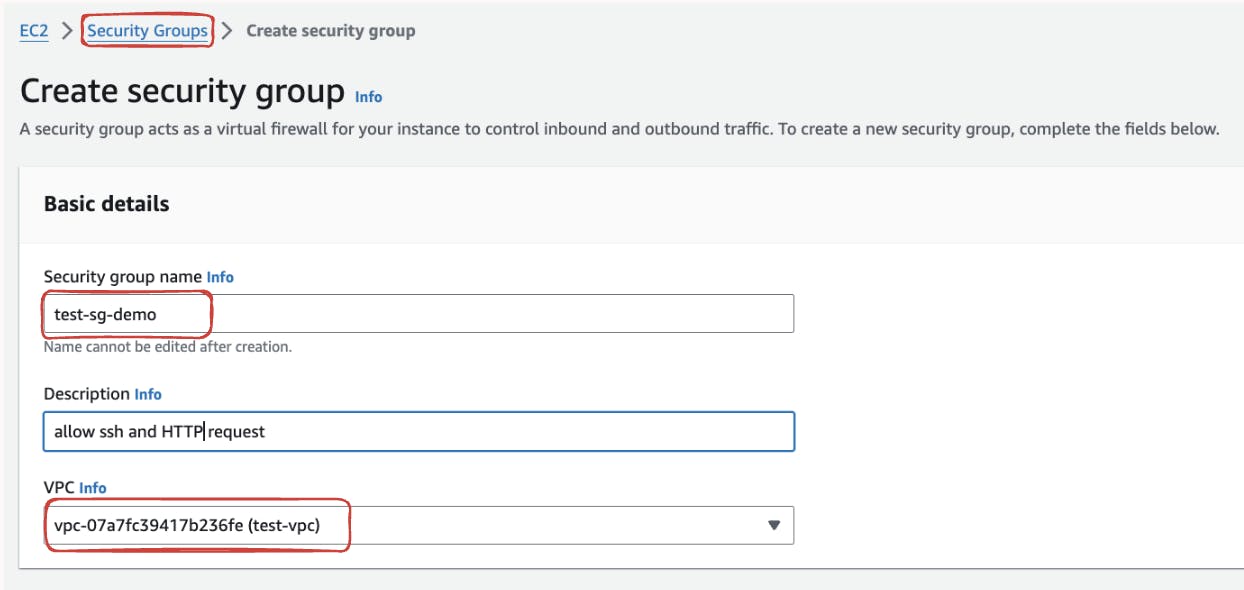
For Networking, click on "Edit" to configure the instance within our test-vpc. Ensure the proper selection of subnets to align with your VPC settings. Additionally, we need to also create security groups that allow inbound traffic for SSH, HTTP, and HTTPS. This ensures controlled and secure access to your instance.
Further To enhance the functionality of our instance, we will add a custom user-data script. This script automates the setup of an Apache web server, a fundamental component of our application infrastructure. Finally, Click on "Launch Instance"
  #!/bin/bash
  sudo apt-get update
  sudo apt-get install apache2 -y
  sudo service apache2 start
  sudo systemctl enable apache2
Implementing LoadBalancer
But Prior to completing the ALB configuration, we need to create Target Groups to specify the instances to which the ALB should route traffic.
Target Groups are a crucial part of load balancing, defining the targets (instances) that will receive incoming requests.
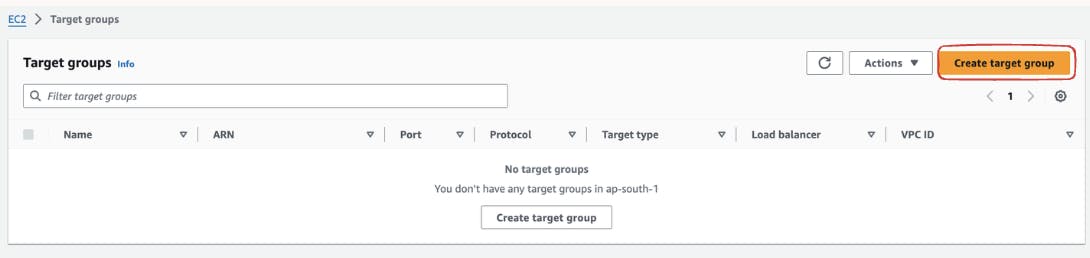
Initiate the creation of a new Target Group by selecting the "Create Target Group" option within the Target Groups dashboard.
Specify the essential details for your Target Group. For instance, select the target type as "Instance" since we're dealing with EC2 instances. For a demonstration, name the Target Group, for instance, "test-waf-tg"
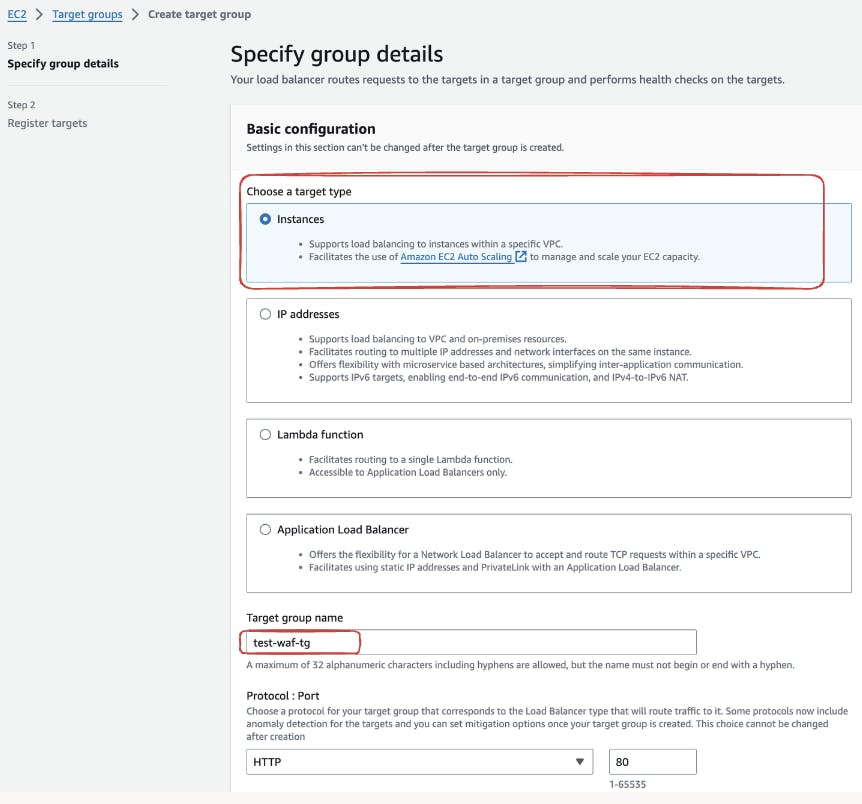
Further navigate to the VPC section and choose the appropriate VPC (Virtual Private Cloud) for your deployment. This ensures that your Target Group is associated with the correct network configuration.

Now, it's time to register your instances with the Target Group. Select the instances you want to include and ensure they are marked as "Include as pending below."

Click on "Create target group" to finalize the Target Group creation. This step completes the configuration, and your Target Group is ready to be associated with an Application Load Balancer.

Now it is time to create a load balancer. Head to the AWS Console, navigate to the "Load Balancers" section, and initiate the creation of a new load balancer by selecting "Create Load Balancer."

Opt for the "Application Load Balancer" type. Provide a meaningful name, such as "test-lb," to identify your load balancer. Under "Network mapping," select the desired VPC, in our case, "test-vpc." Choose the applicable subnet to ensure the load balancer operates within the specified network.


For enhanced security, create a new security group by selecting "Create a new security group". Configure this security group to allow HTTP and SSH connections tailored to your "test-vpc." Associate this security group under the security group section.
In the "Listeners and routing" section, select the target group created earlier, namely "test-waf-tg." This step ensures that the load balancer routes traffic to the specified target group.


Once satisfied with the configuration, click on "Create Load Balancer" to initiate the creation process. AWS will set up the Application Load Balancer based on your specified parameters.

Creating ACL
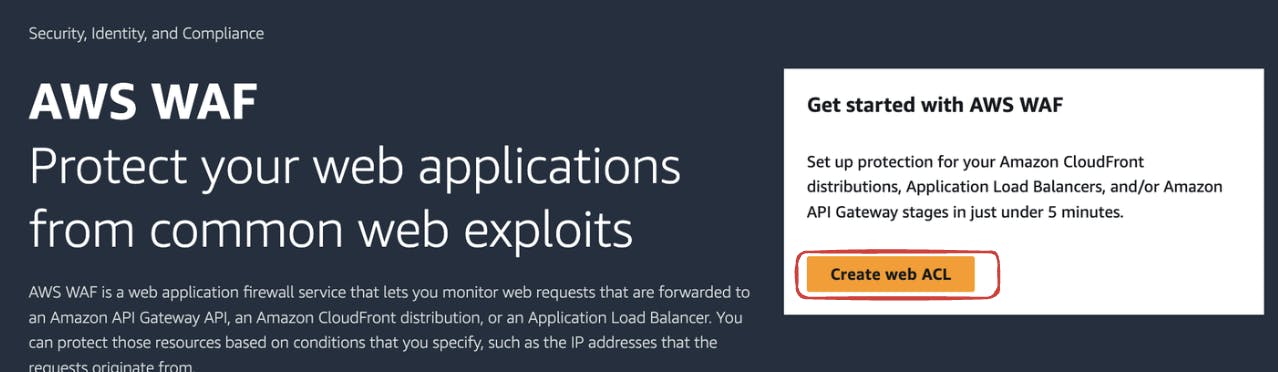
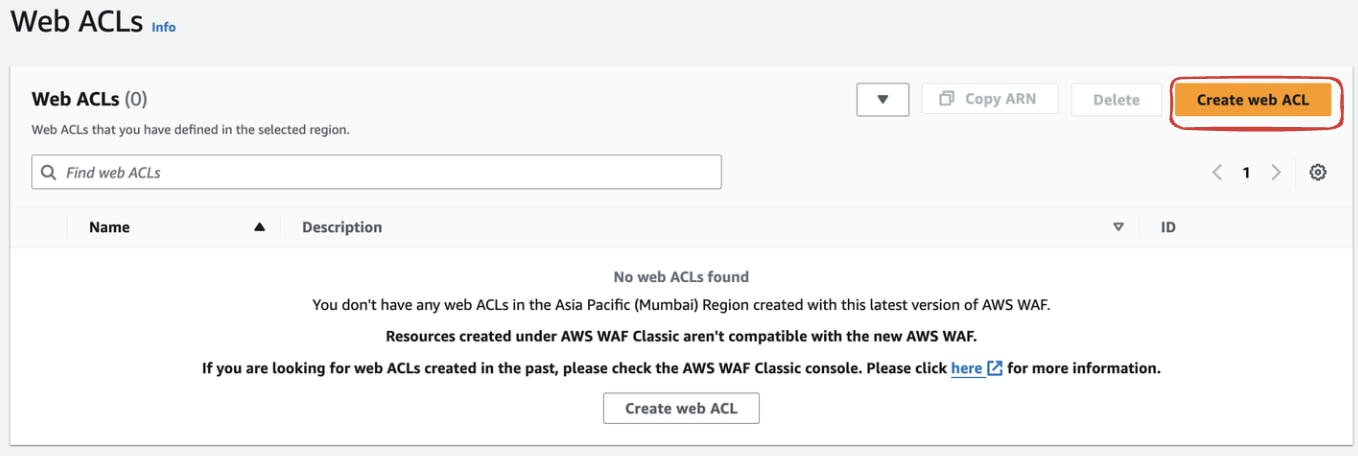
Navigate to the AWS Management Console and locate AWS WAF & Shield. Initiate the creation of a new Access Control List (ACL) by clicking on "Create ACL"
In this step:
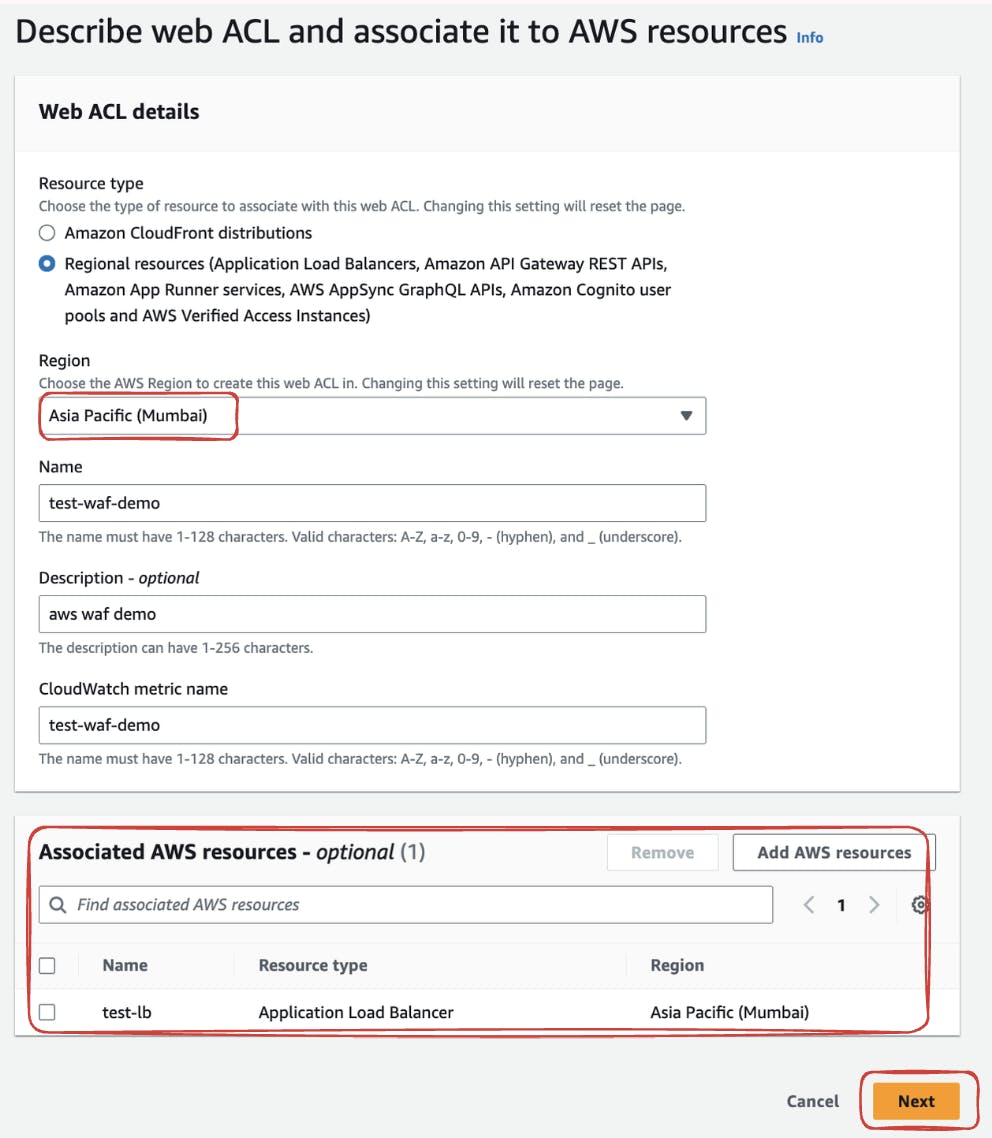
Provide a distinctive name such as "test-waf-demo" and Select the appropriate region corresponding to your VPC deployment.
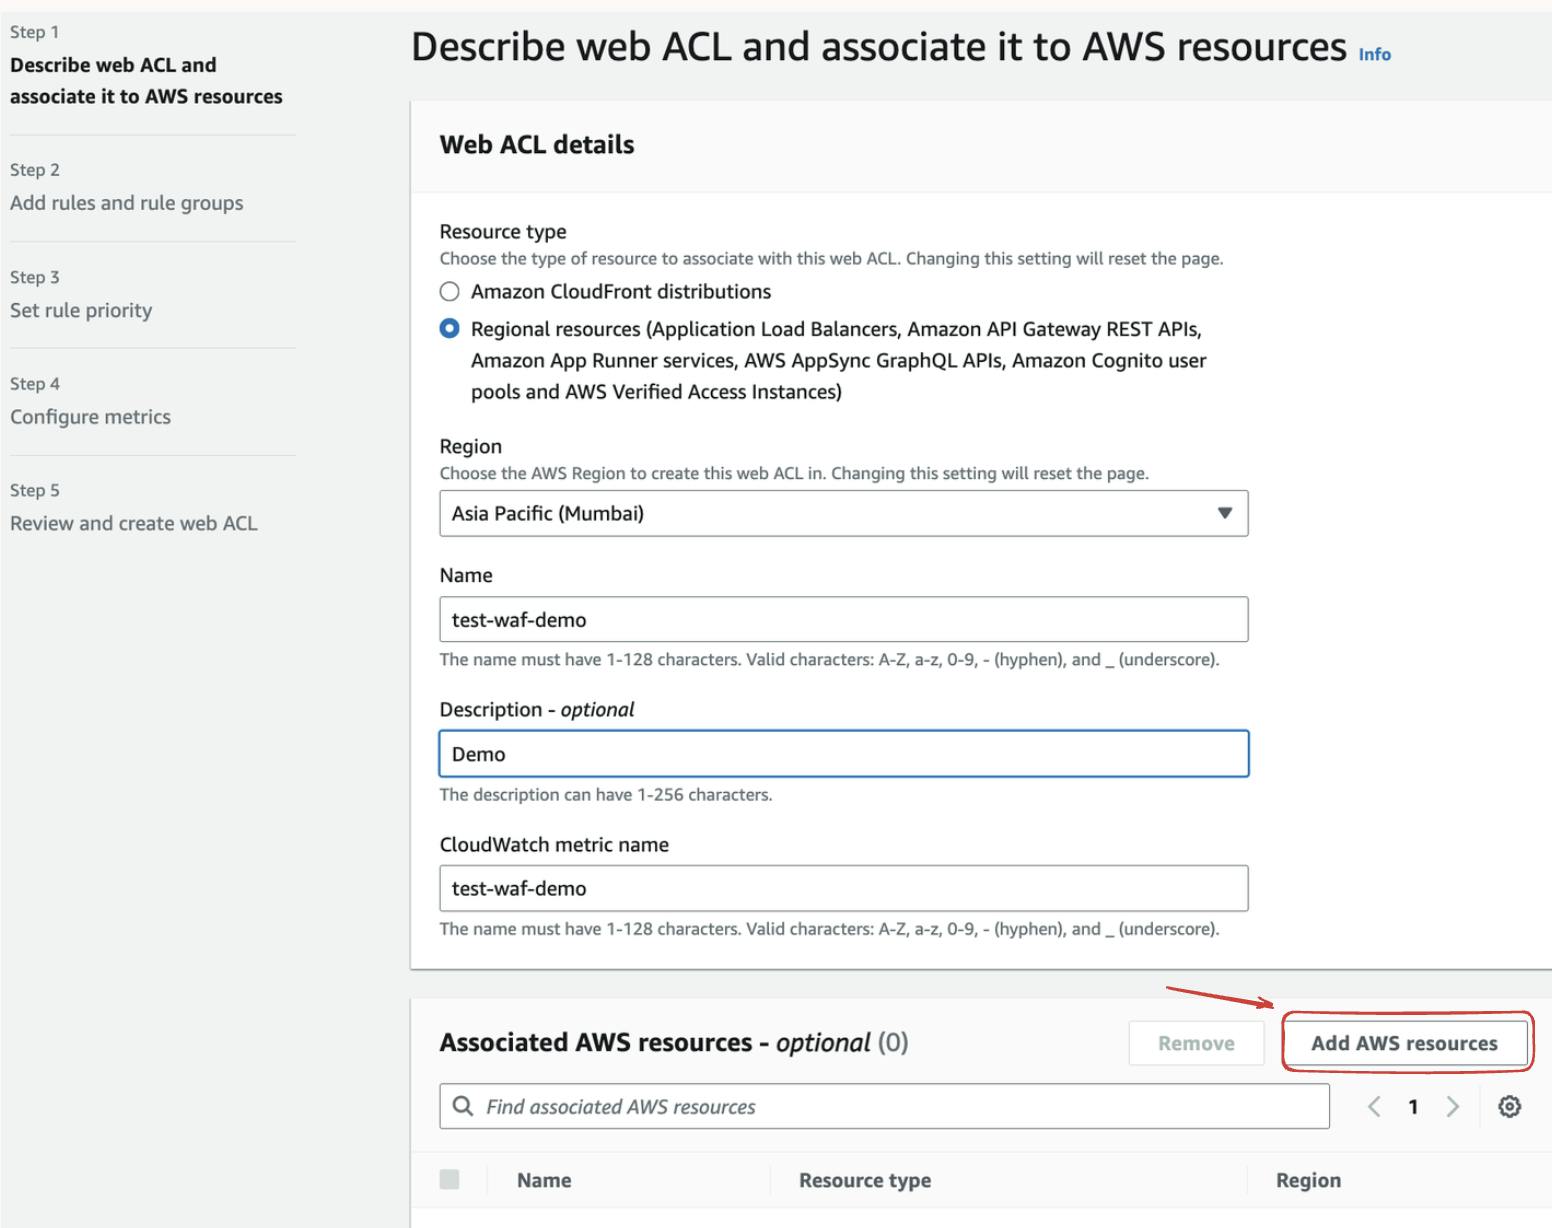
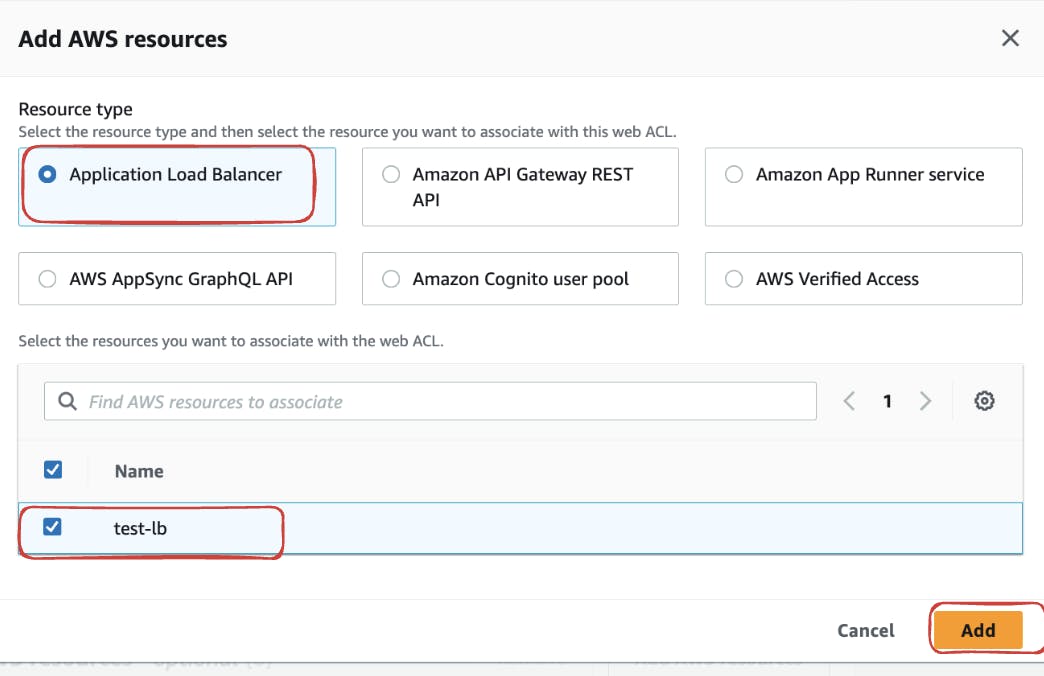
Further, Click on add AWS resources to the ACL. Specify your Application Load Balancer (ALB) as an AWS resource. This ensures that WAF is deployed specifically on the designated ALB.
Proceed to Step 2 to add rules and rule groups to your Web ACL. For this demonstration, we'll create a custom rule utilizing IP sets.
Create IP Set Resource
Navigate to the Web ACL section and click on "Create IP Set"
Assign a relevant name and choose the region for deployment keep it the same as that of the VPC region.

Populate the IP address section with the desired addresses or IPs that warrant specific treatment. For our demo, we gonna make use of our own IP address
152.59.13.200/32
Utilizing IP Sets: IP sets function as a powerful component of AWS WAF, allowing you to define specific IP addresses or ranges.
- In our scenario, IP sets will be employed to block specific IPs and implement captcha functionality on our server.
Adding Rule
After successfully creating the IP set, the next step involves adding rules and rule groups to your AWS Web Application Firewall (WAF) Access Control List (ACL). Here's a straightforward guide:
Add Custom Rules and Rule Groups:
Navigate to the AWS WAF & Shield console and access your created ACL.
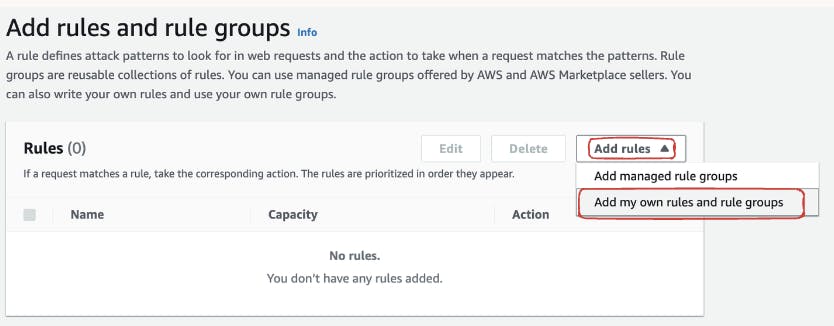
In the ACL configuration, click on "Add Rules" and choose "Add my own rules and rule groups.
Select IP Set and Set Action:
Choose "IP sets" and associate your recently created "test-ipset"
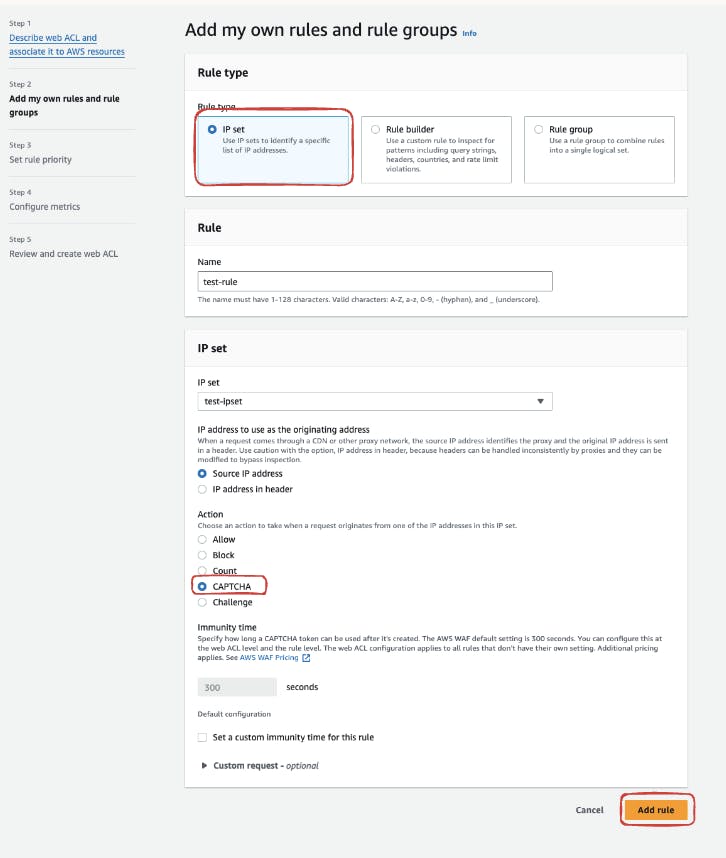
Assign the desired action, such as "CAPTCHA," which triggers when a request originates from one of the IP addresses mentioned in the set.

Click "Add Rule" to finalize the rule creation.
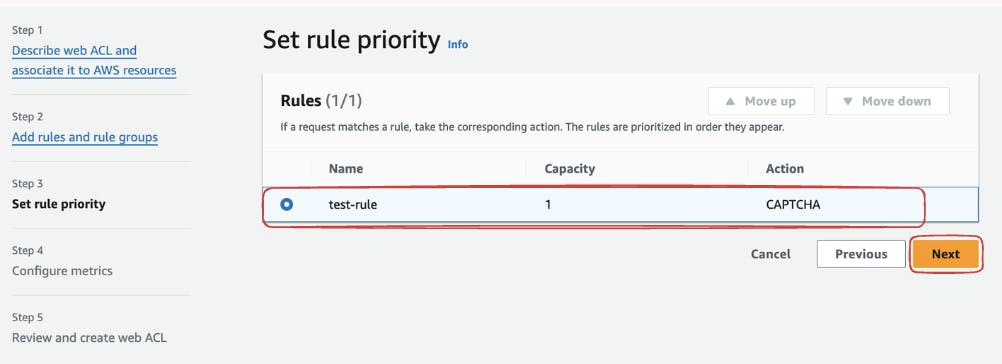
- Set Rule Priority:
After adding the rule, set its priority to define the order in which rules are evaluated.
Review the summary to ensure the correct association of rules and IP sets.
- Create ACL:
Once the rules are configured, review the ACL summary.

Click "Create ACL" to apply the changes.
By following these steps, you've successfully added custom rules and rule groups to your AWS WAF ACL. This tailored configuration enhances your web application's security by selectively applying actions based on defined criteria.
And here's the Output to our server:


Conclusion
By incorporating AWS WAF into our web application infrastructure, you establish a robust defense mechanism against various online threats. The ability to customize rules, utilize IP sets, and integrate captcha ensures a tailored and secure experience for your users.
Thanks for reading any Feedback is welcome!! :)
Follow me here on Hashnode or Twitter/LinkedIn to stay up-to-date with my latest blog posts and hands-on tutorials.