Scaling Made Simple: A Practical Guide on AWS AutoScaling Groups
Harnessing the Power of Dynamic Scalability in the Cloud


Hey there, cloud enthusiasts! 👋 Today, we're delving into the dynamic world of AWS AutoScaling Groups, where your infrastructure can scale effortlessly to meet demand, ensuring your applications stay responsive and cost-effective.
Note: Before getting started with the Project you need to have an AWS Tier account for setting up your AWS account if you are using it for the first time, you can check out this video
Have you ever binge-watched your favorite series on Netflix during a lazy weekend, only to find the platform slowing down during peak hours? Imagine if Netflix couldn't seamlessly handle the surge in viewership during prime time. That's where AWS AutoScaling Groups swoop in as silent heroes, ensuring uninterrupted streaming experiences for millions of users worldwide.
In this dynamic landscape of cloud computing, AutoScaling Groups serve as the backbone of scalability, effortlessly adjusting resources to match fluctuating demands. From streaming services like Netflix to e-commerce giants like Amazon, AutoScaling Groups are the secret sauce behind their ability to stay responsive and cost-effective, even amidst skyrocketing traffic.
In this blog, we're going to learn more about one feature that is under the hood of most of AWS's offerings i.e AWS AutoScaling Groups, exploring how it revolutionize cloud infrastructure management and empower your applications to thrive in the face of unpredictable workloads.
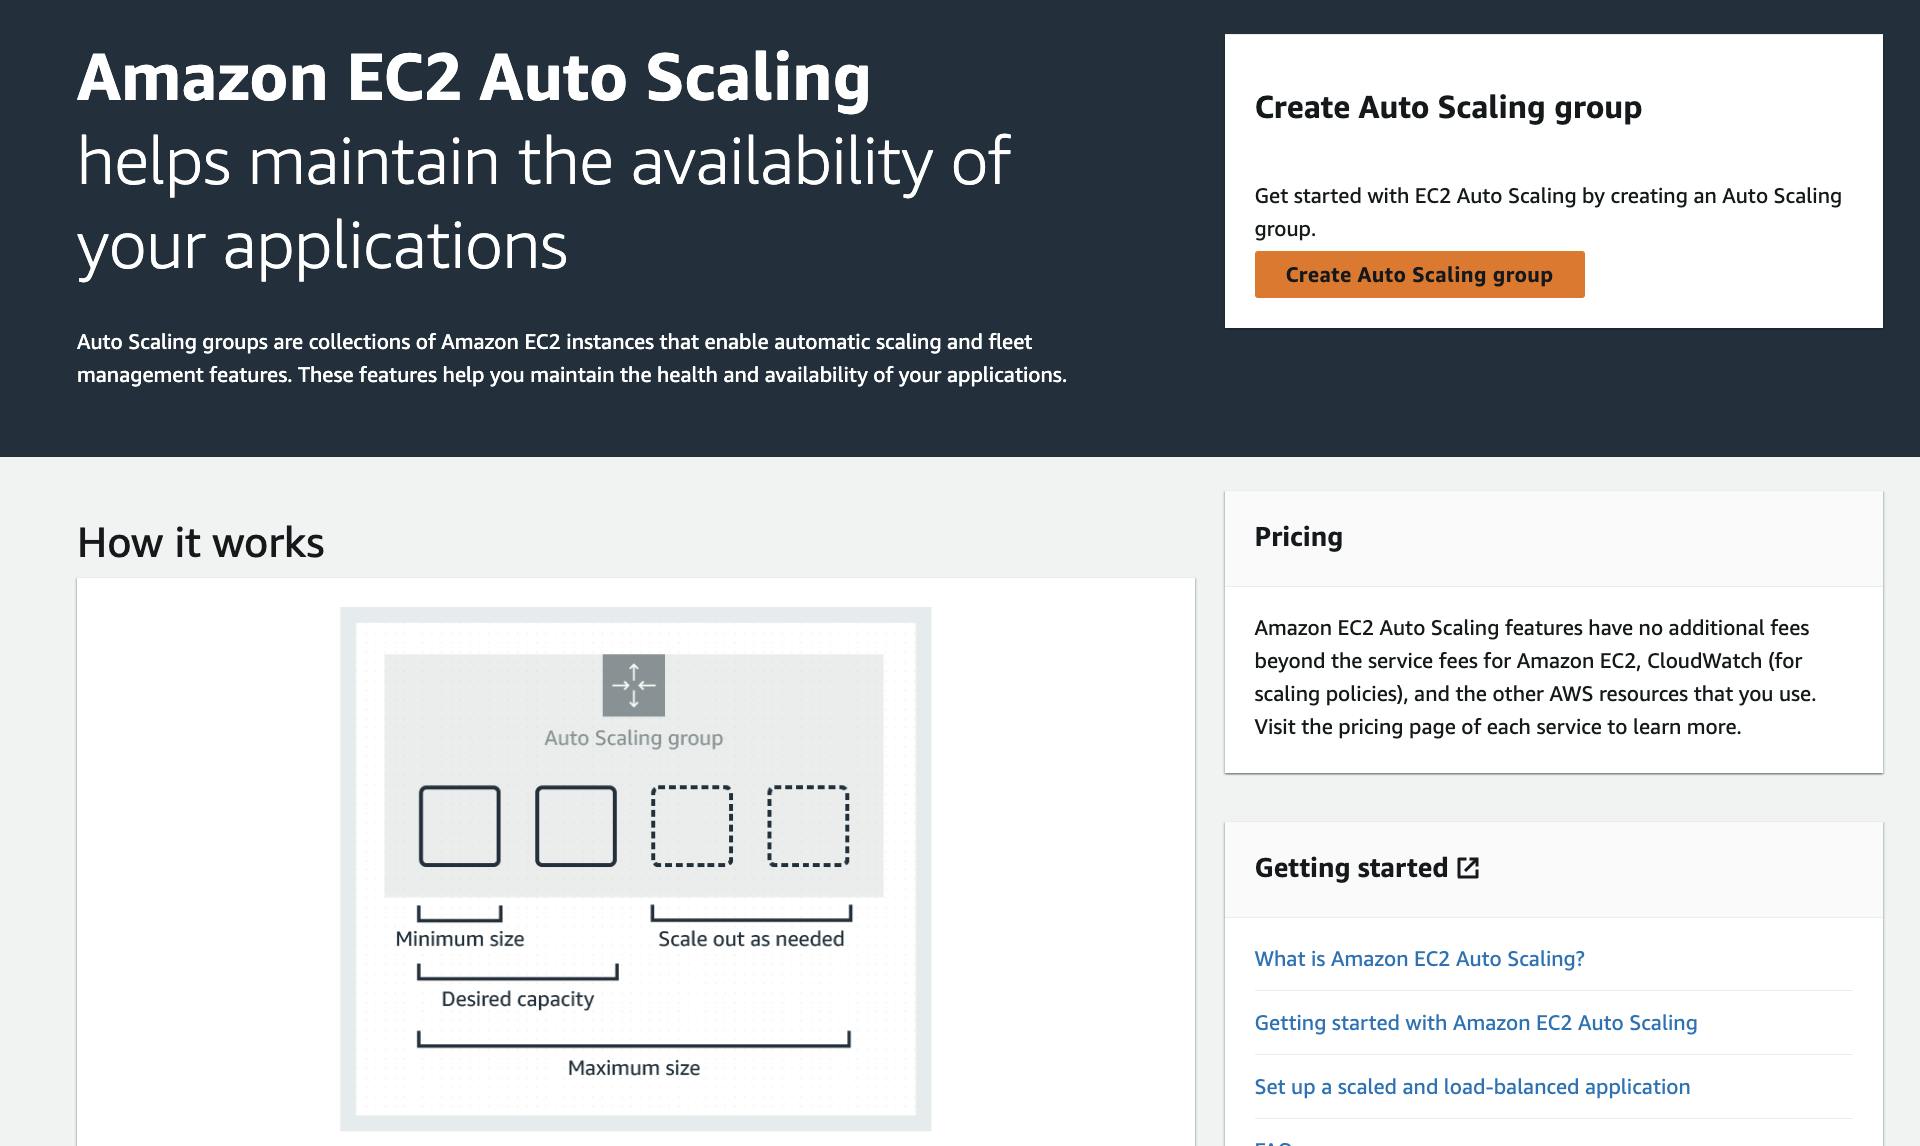
What is AWS AutoScaling Groups?
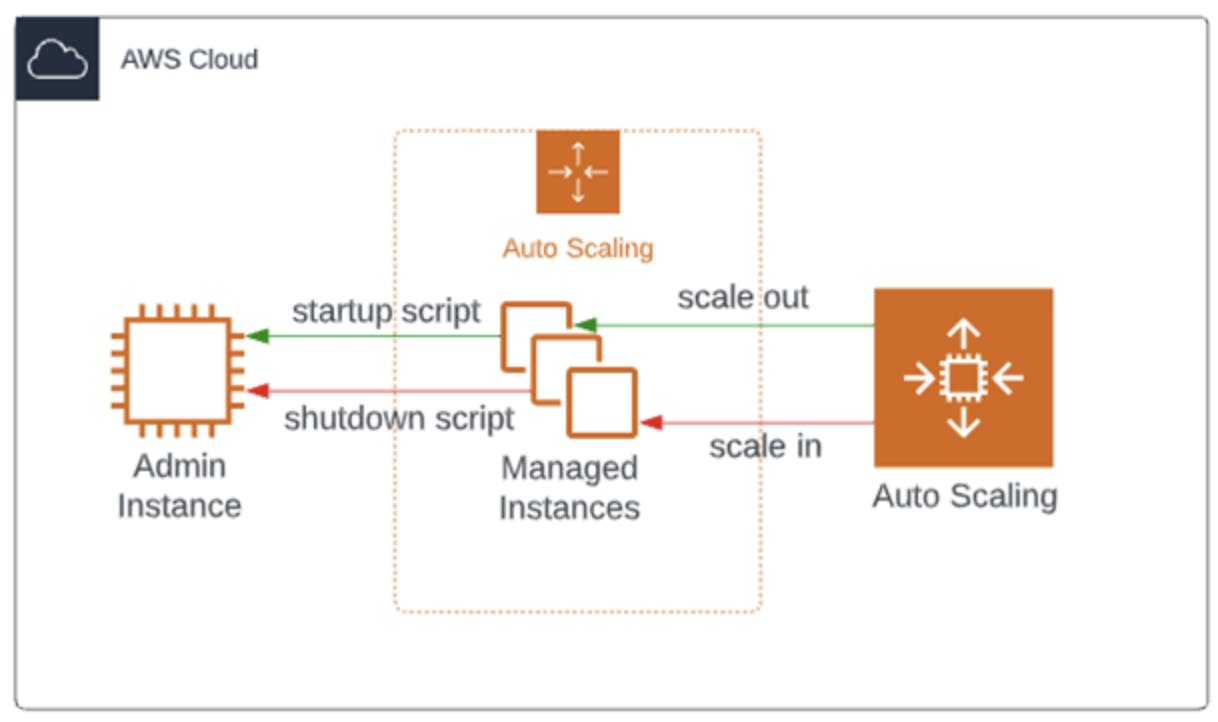
AWS AutoScaling Groups are a game-changer in the realm of cloud computing. They offer a dynamic and automated way to manage the compute capacity of your applications. Think of AutoScaling Groups as your virtual fleet managers, constantly monitoring your application's workload and adjusting the number of instances to match demand.
Why are AutoScaling Groups Required?
Imagine you're running an e-commerce website. During peak shopping seasons, such as holidays or flash sales, your traffic spikes exponentially. Without AutoScaling Groups, you'd either need to provision a large number of instances in anticipation of these spikes, leading to wasteful spending during off-peak times, or risk your application becoming unresponsive during peak periods.
AutoScaling Groups eliminate this dilemma by automatically scaling your compute resources based on predefined policies. When demand increases, new instances are spin up seamlessly to handle the load. Conversely, during quieter periods, instances are terminated to avoid unnecessary costs.
By leveraging AutoScaling Groups, you can ensure your application remains responsive, resilient, and cost-efficient at all times, regardless of fluctuations in demand.
Now let's dive into a hands-on demonstration to see how AWS AutoScaling groups work in action. In this demo, we'll walk through the process of setting up a VPC, subnets, Application LoadBalancer, Launch Templates, AutoScaling Group and observe how it dynamically adjusts the instances to changes in demand.
Scenario
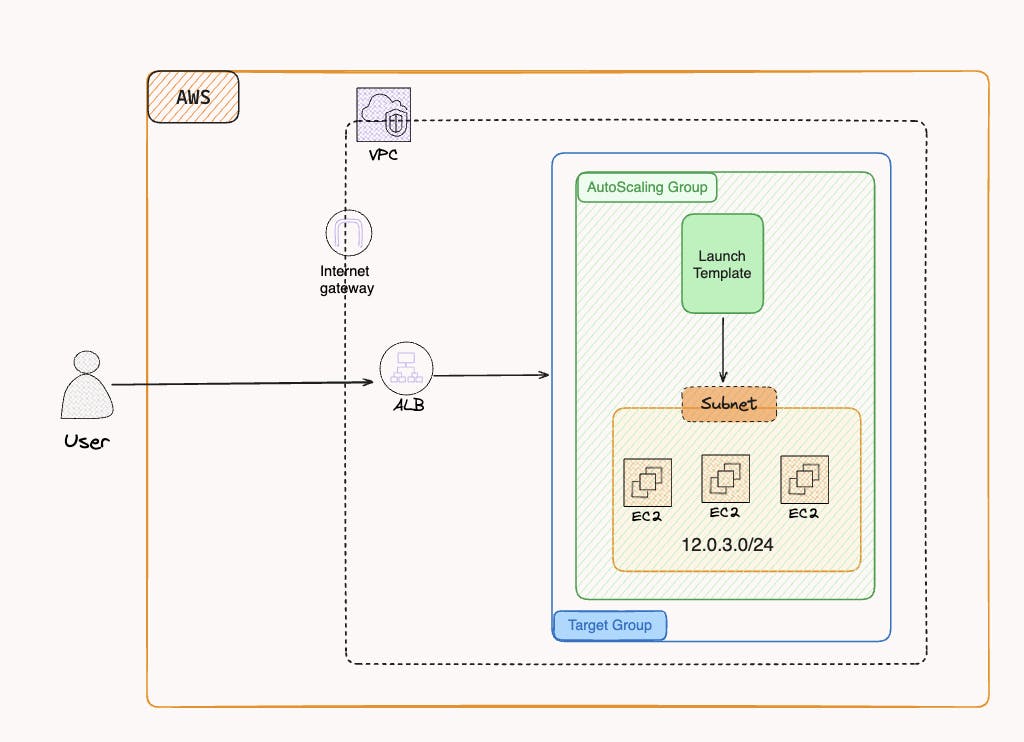
From the above flowchart, we gonna have a hands-on demonstration, where we'll implement an auto-scaling group for our EC2 instance which consists of a sample Apache server. From configuring VPCs and subnets to orchestrating load balancers and launch templates, every aspect is covered to showcase the seamless scalability and efficiency offered by AWS services. So let's get our hands dirty.
- Setting up VPC
Let's initiate the process by establishing a VPC (Virtual Private Connection) for our hands-on demonstration.
In the AWS Management Console, locate and access the VPC dashboard, which is the central hub for configuring your network settings.
Further, Click on "Create VPC" to commence the VPC creation process.
In the ensuing form, provide essential details for your VPC:
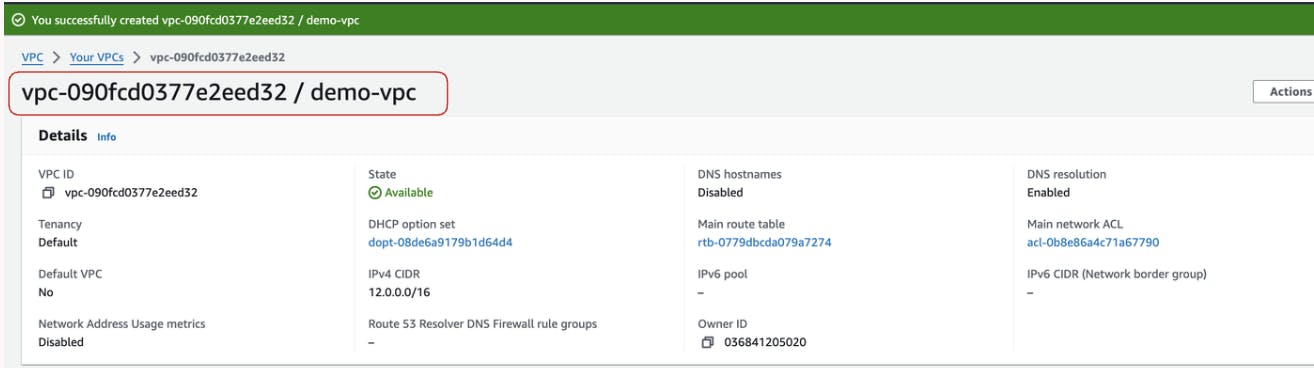
Name: Choose a meaningful name, such as demo-vpc.
IPv4 CIDR Block: Specify the IP range for your VPC, for example, 12.0.0.0/16.
Adjust other settings as per your requirements.
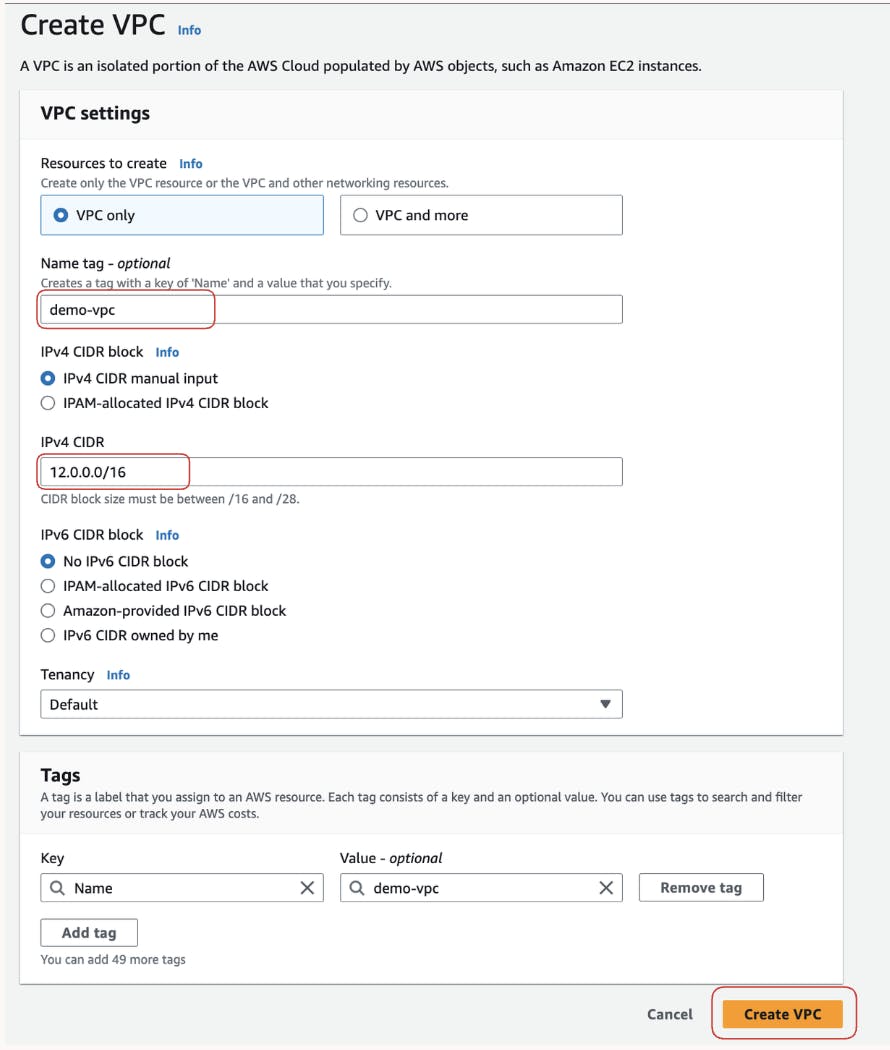
Click "Create VPC" to finalize the setup. Your VPC will be created promptly and will be ready for use.
Setting up Internet Gateway
In the AWS Management Console, access the "Internet Gateways" section by typing "Internet Gateways" into the search bar and selecting the corresponding result.
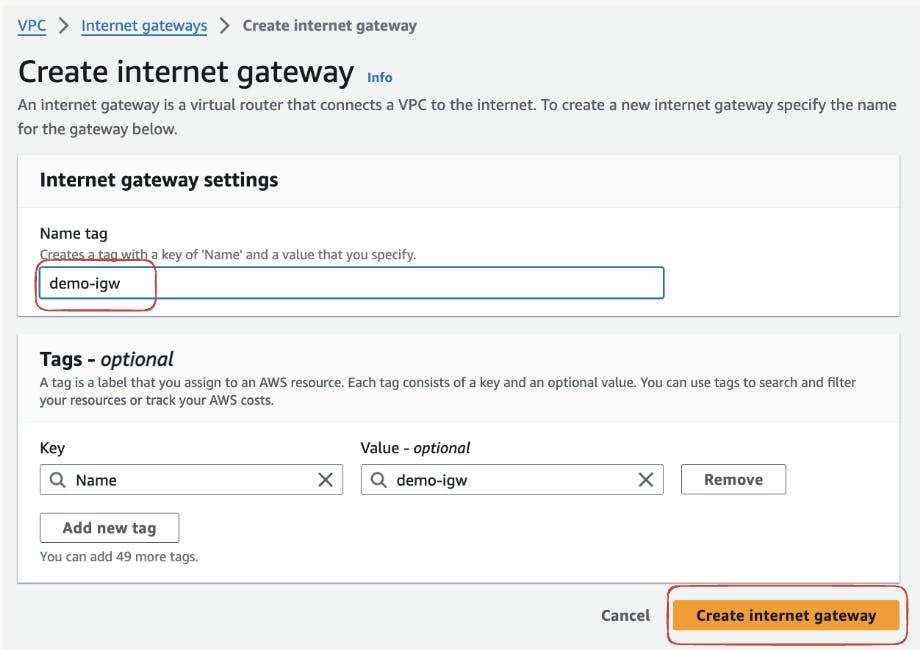
Click on "Create Internet Gateway" and assign it a meaningful name. For our demonstration, let's name it "demo-igw." Confirm the creation and your Internet Gateway is ready.
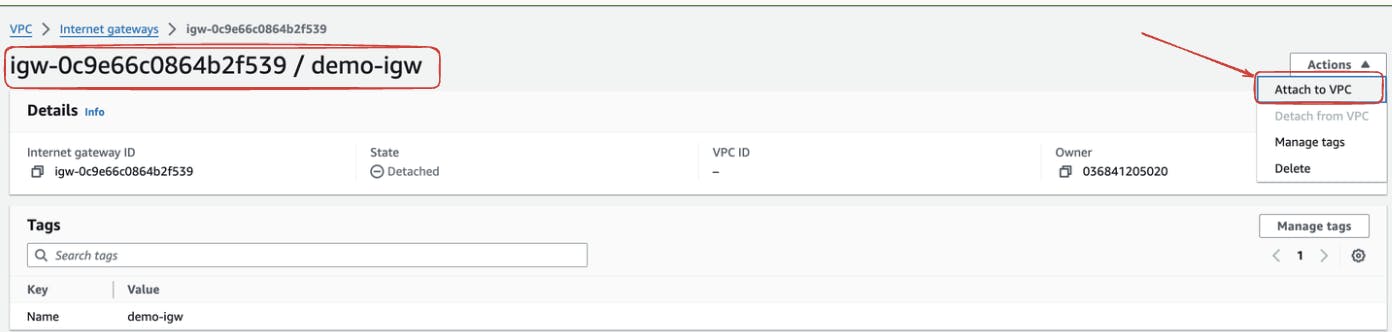
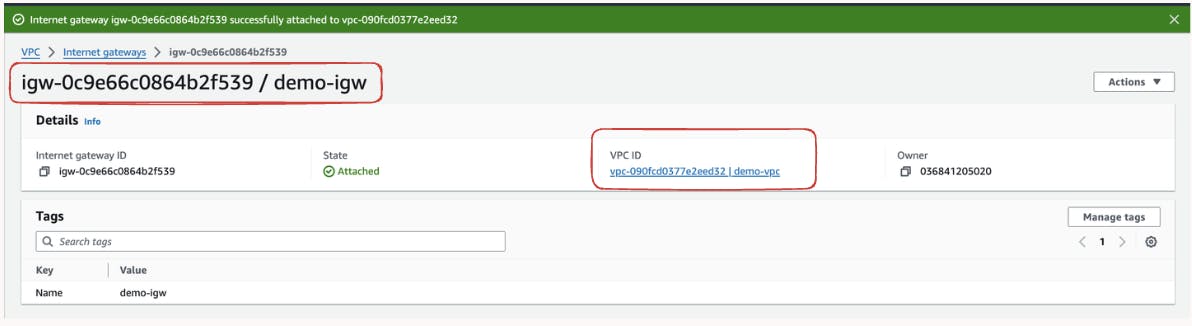
Further we need to attach the Internet Gateway to our VPC- so that ..
Choose the Right VPC Under "Actions," select "Attach to VPC."
In the dropdown menu, choose the VPC you want to associate with the Internet Gateway. For our demo, we will link "demo-igw" to our existing "demo-vpc."
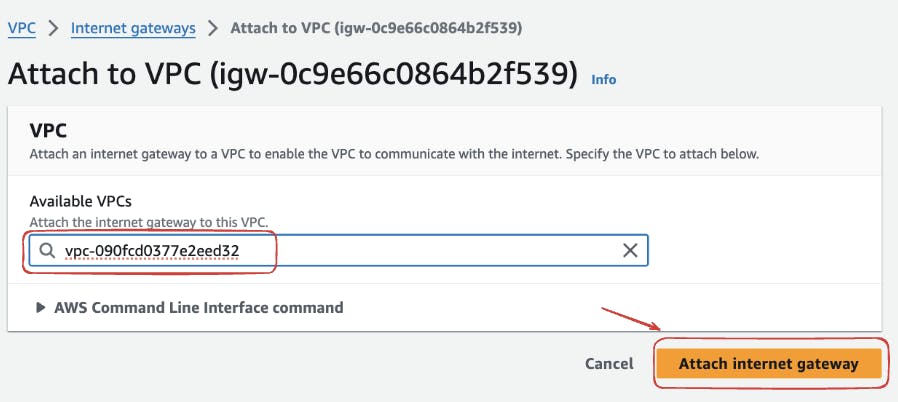
Further, click on "Attach Internet Gateway," finalizing the association between the Internet Gateway and your VPC. This step is crucial for enabling communication between your VPC and the internet.
Next step to Setup Subnet
Open the AWS VPC Dashboard, Click on "Subnets" in the VPC Dashboard, and initiate the creation of subnets to segregate your network traffic efficiently.
Click the "Create Subnet" button to initiate the creation of a new subnet. In our demo, we gonna create two public subnets and it should specify the relevant details including the VPC name and CIDR block. Start but defining the CIDR blocks for your subnets, ensuring that they fall within the range of 12.0.0.0/16 to 12.0.3.0/24. This allows for a total of 256IP addresses in each subnet. Additionally, assign the subnets to specific availability zones

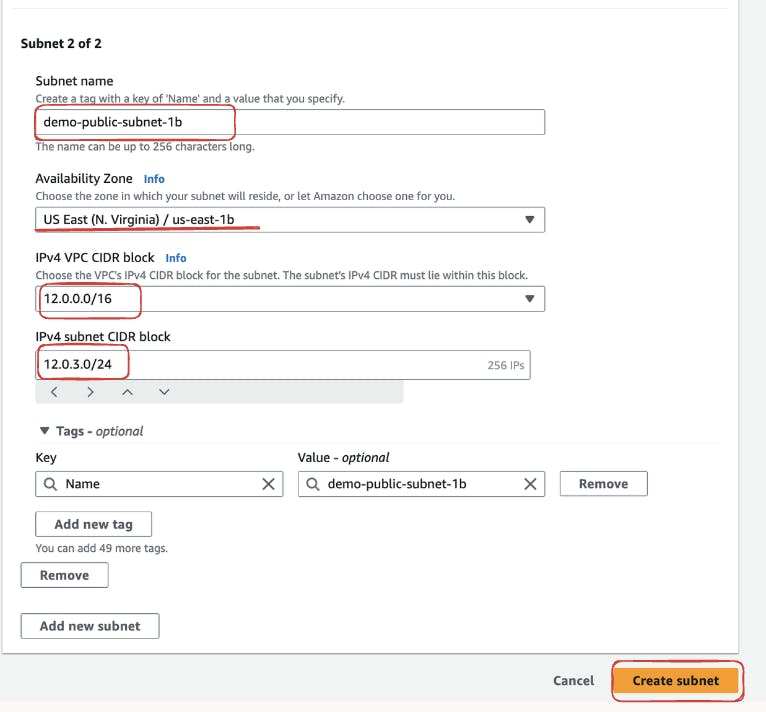
Review your subnet configurations and click the "Create Subnet" button to confirm the creation. You'll now have successfully established subnets within your VPC, providing the necessary segmentation for your network resources.

Create Route Table
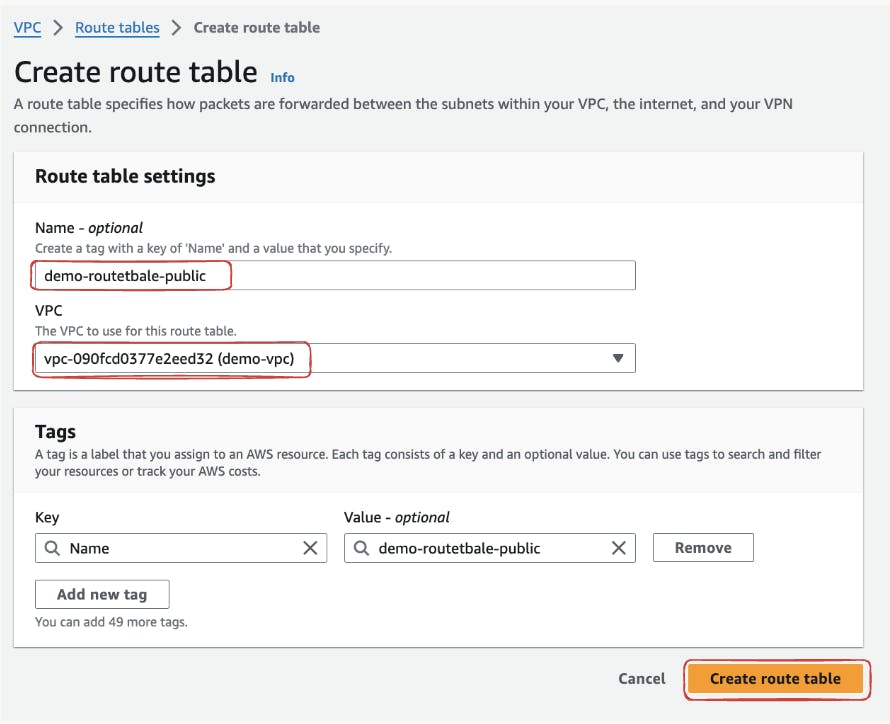
Access "Route Tables" section within the AWS VPC Dashboard. Begin by creating a new custom route table to tailor routing configurations to your specific needs. Name it "demo-routetable-public " select our vpc named "demo-vpc"
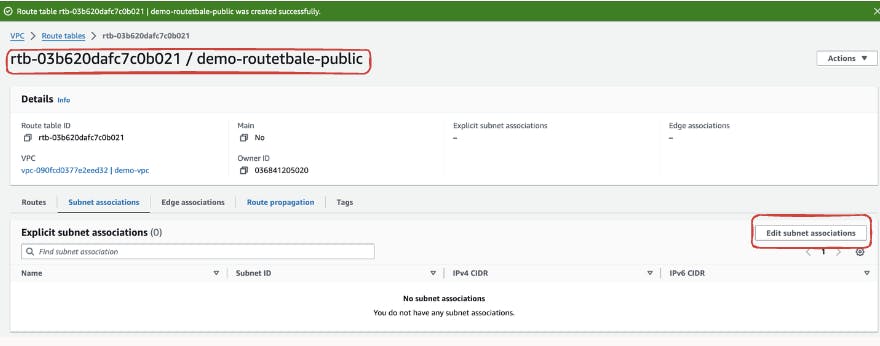
After the successful creation of the route table now we need to associate the custom route table we created with the subnets we created earlier. This step ensures that your subnet follows the routing rules you've specified. For these go under the Subnet Association section and click on "Edit Subnet Association".
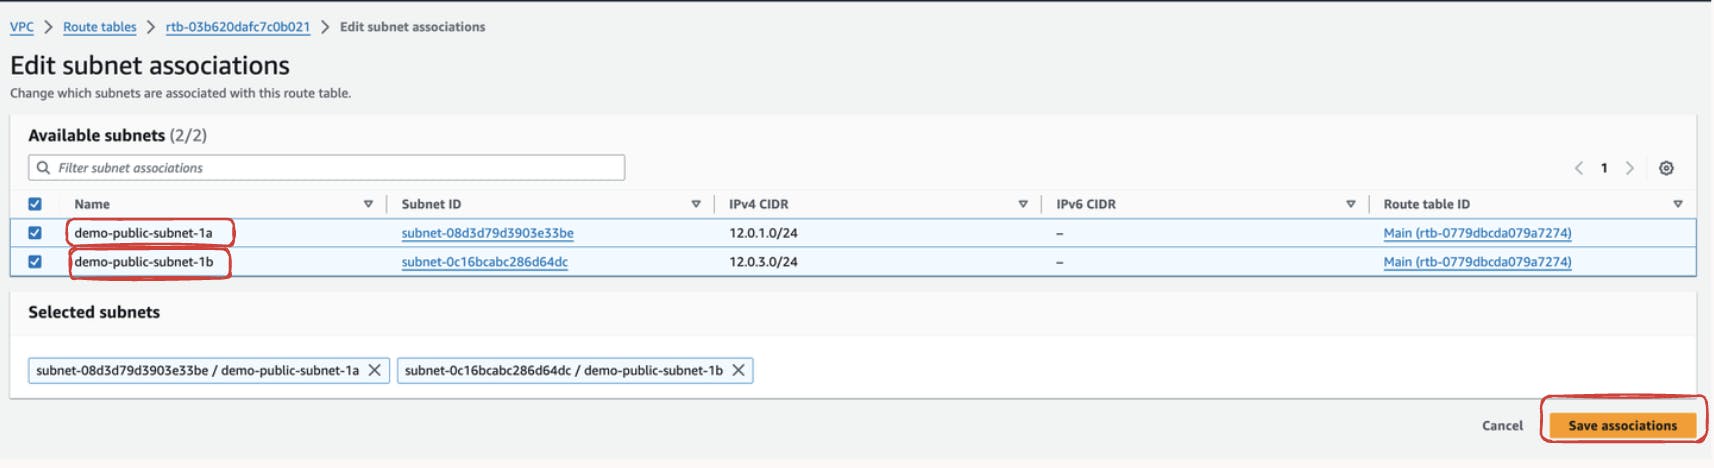
Now Select the subnets demo-public-subnet-1a and demo-public-subnet-1a and "click the save association". After selecting the appropriate subnets, save the changes. Your custom route table is now effectively associated with the designated subnets, ensuring that routing rules are applied consistently across your application infrastructure.
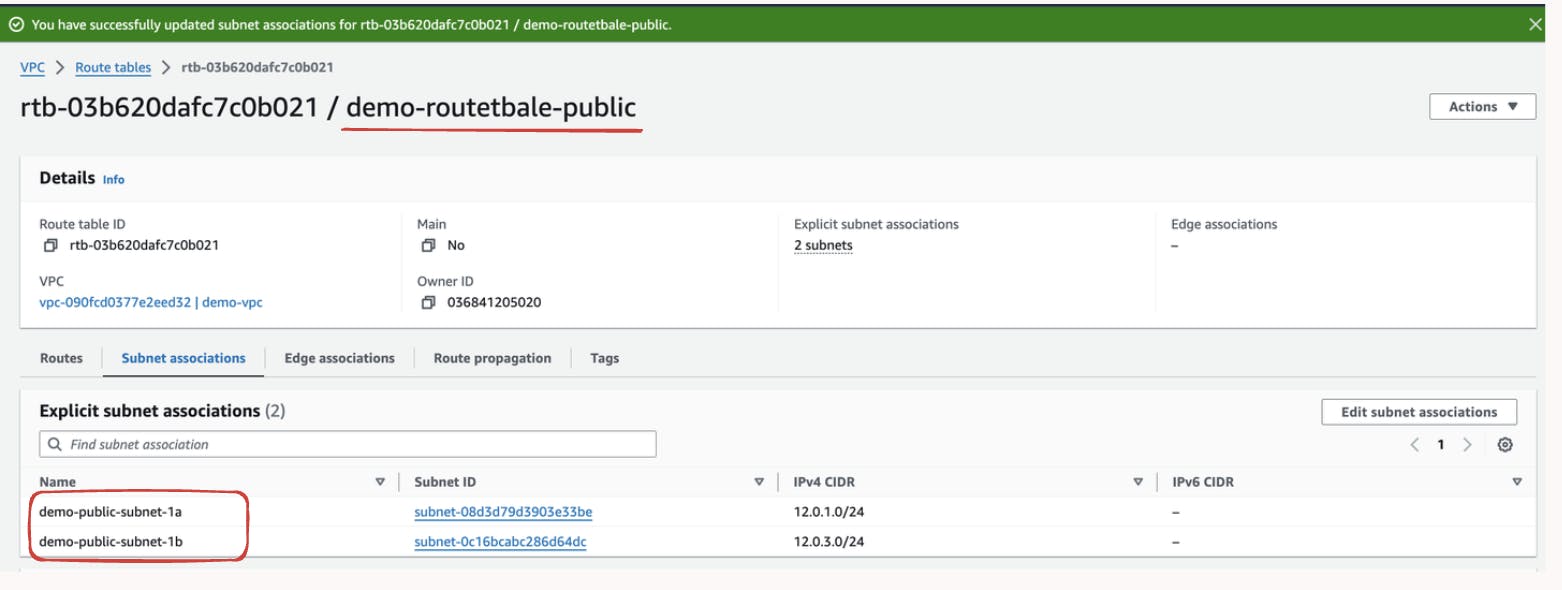
The custom route table, specifically tailored to our application's requirements, plays a pivotal role in directing traffic seamlessly across different components within your VPC.
Configuring Target Groups
Target groups are an essential component when setting up an Application Load Balancer (ALB) for distributing incoming traffic among the instances in our Auto Scaling group. Follow these steps to configure target groups:
Navigate to the Amazon EC2 dashboard in the AWS Management Console.
In the navigation pane, under "Load Balancing" select "Target Groups."
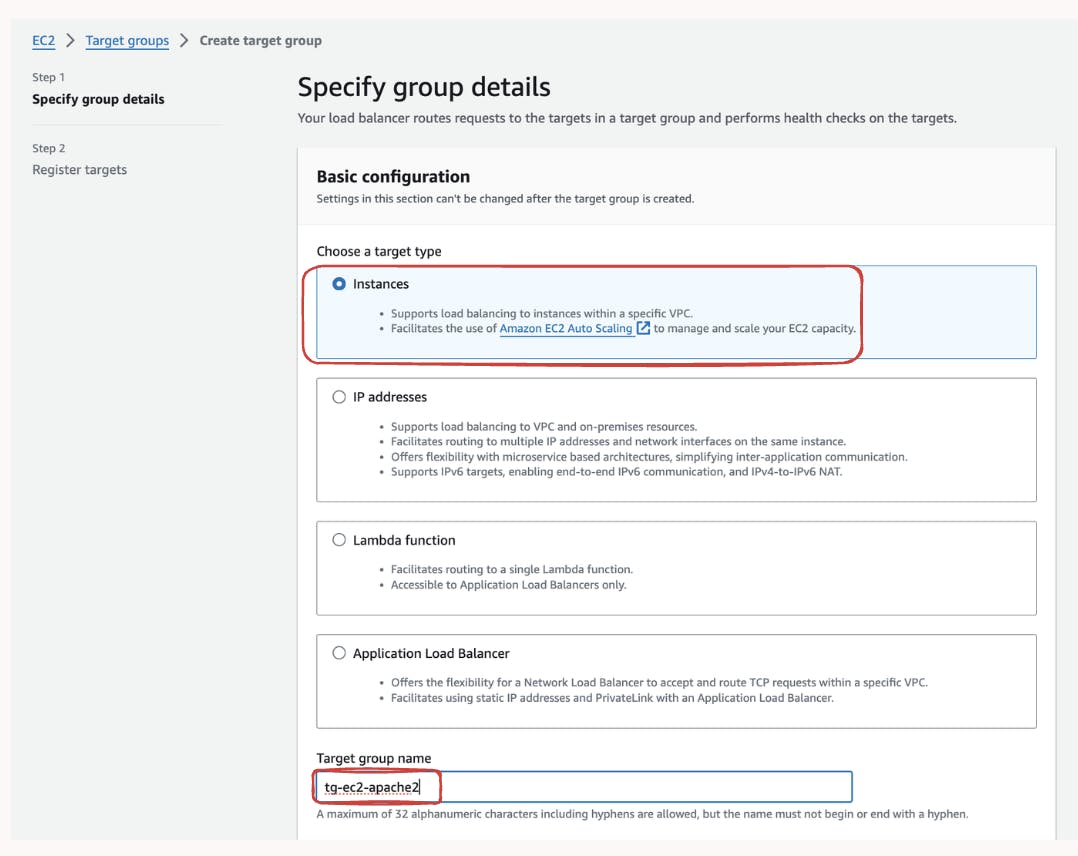
Click on the "Create target group" button and choose the target type based on your requirements. For our demo, we gonna use HTTP traffic, and further select "Instance" as the target type since we gonna have EC2 associated with our LoadBalancer.
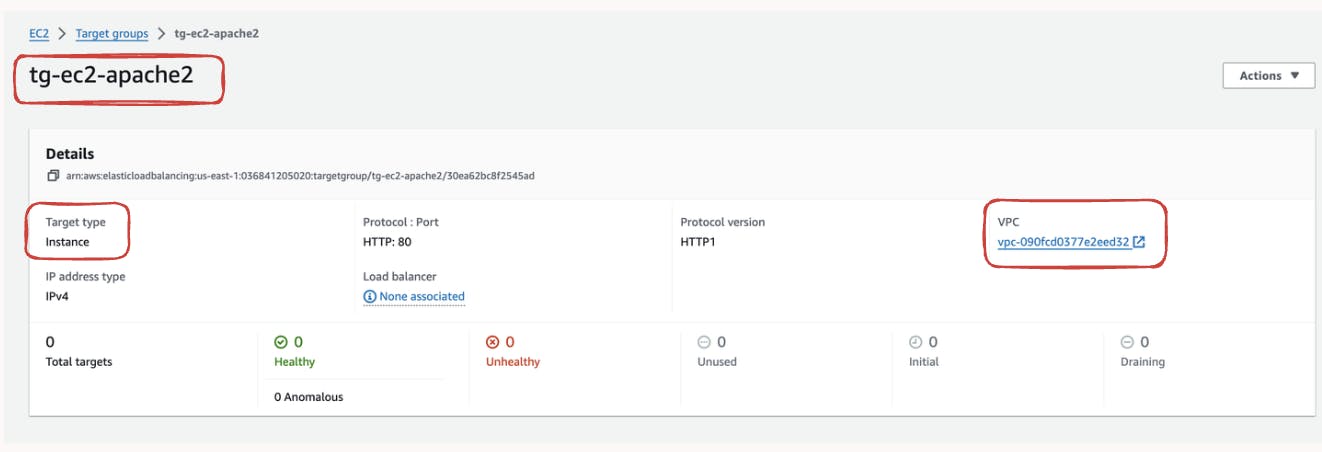
Then provide a name for the target group "tg-ec2-apache2"
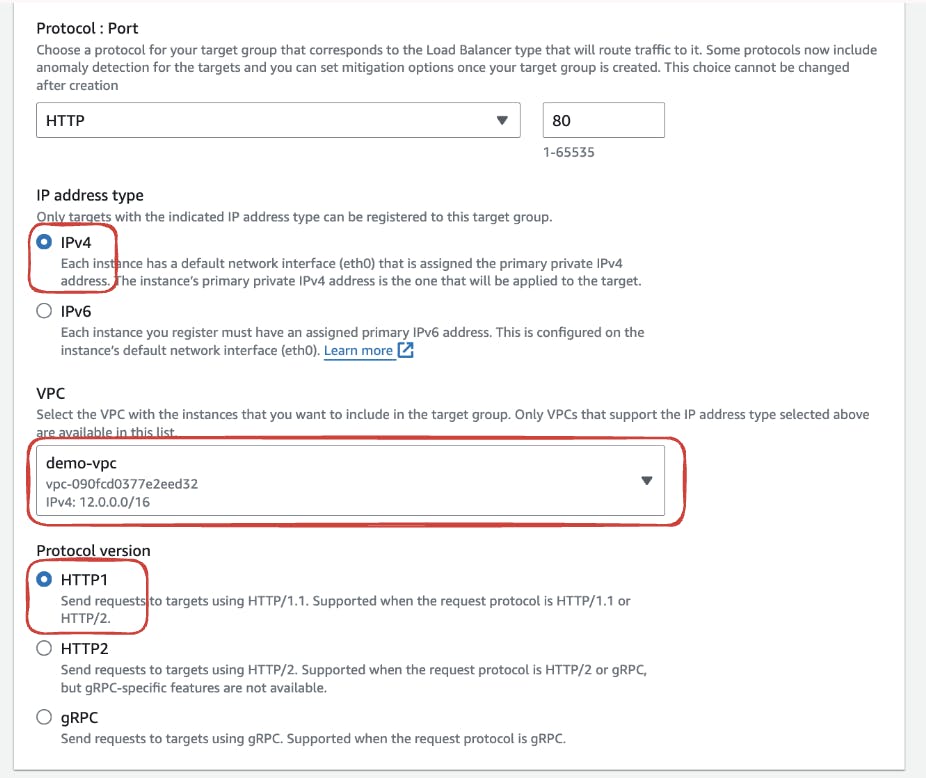
Specify the protocol and port on which your instances will receive traffic. For example, if you are serving HTTP traffic on port 80, choose "HTTP" as the protocol and port 80.
We will configure health checks to be default then click on "Next" to proceed.
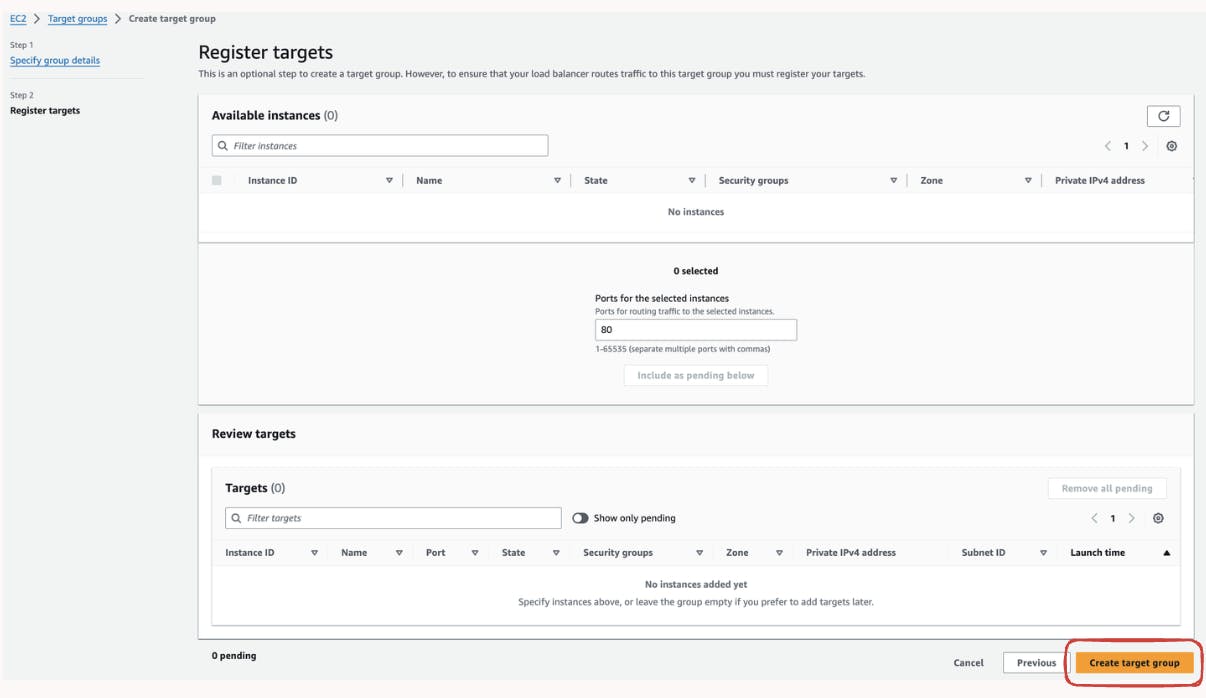
Now we need to Register targets, for that select the instances that you want to include in the target group. But in our case, we have not launched an instance so we will keep it the default and click on "Create target group" to finalize the configuration.
Setting Up Loadbalancer
Configuring an Application Load Balancer (ALB) is crucial for distributing incoming traffic among the instances in our Auto Scaling group.
Navigate to the Amazon EC2 dashboard in the AWS Management Console. In the navigation pane, under "Load Balancing," select "Load Balancers.
Click on the "Create Load Balancer" button and choose "Application Load Balancer" as the type of load balancer.
Further provide a name for your load balancer, such as "demo-alb." Specify the scheme for your load balancer. Here we want to distribute our traffic over the internet, so we gonna select "internet-facing."

Now we need to configure listeners which will specify the ports on which the load balancer will listen for incoming traffic. For example, you can configure a listener for HTTP traffic on port 80.
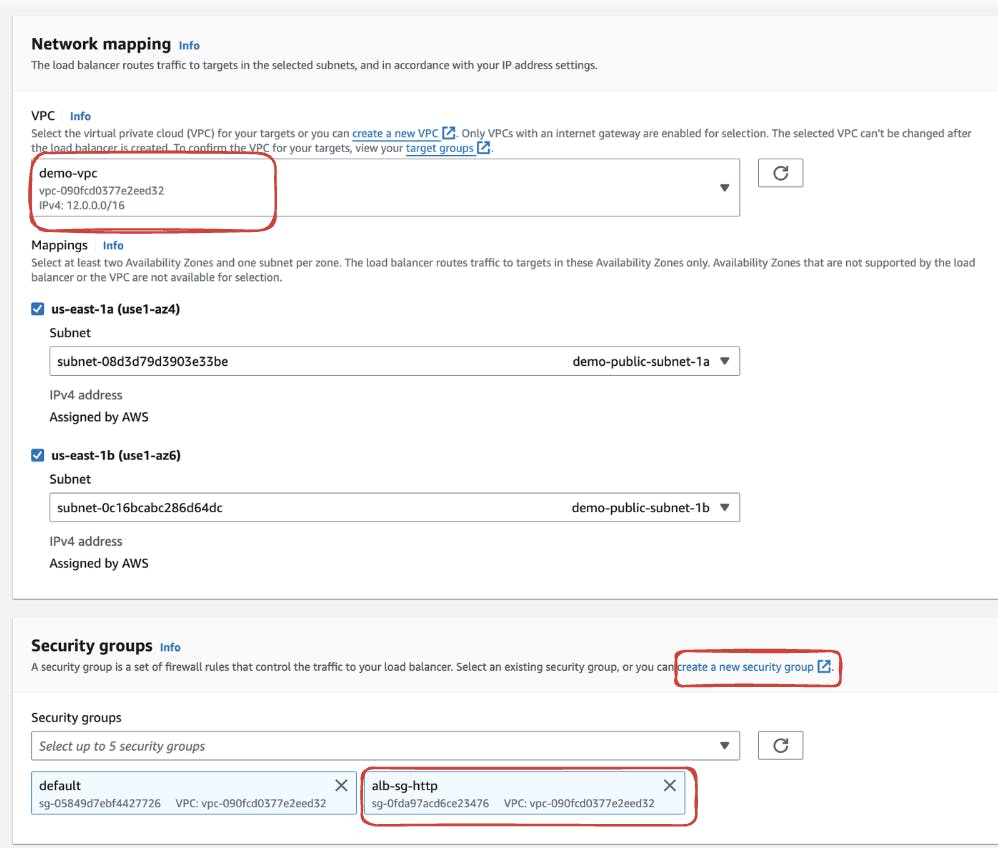
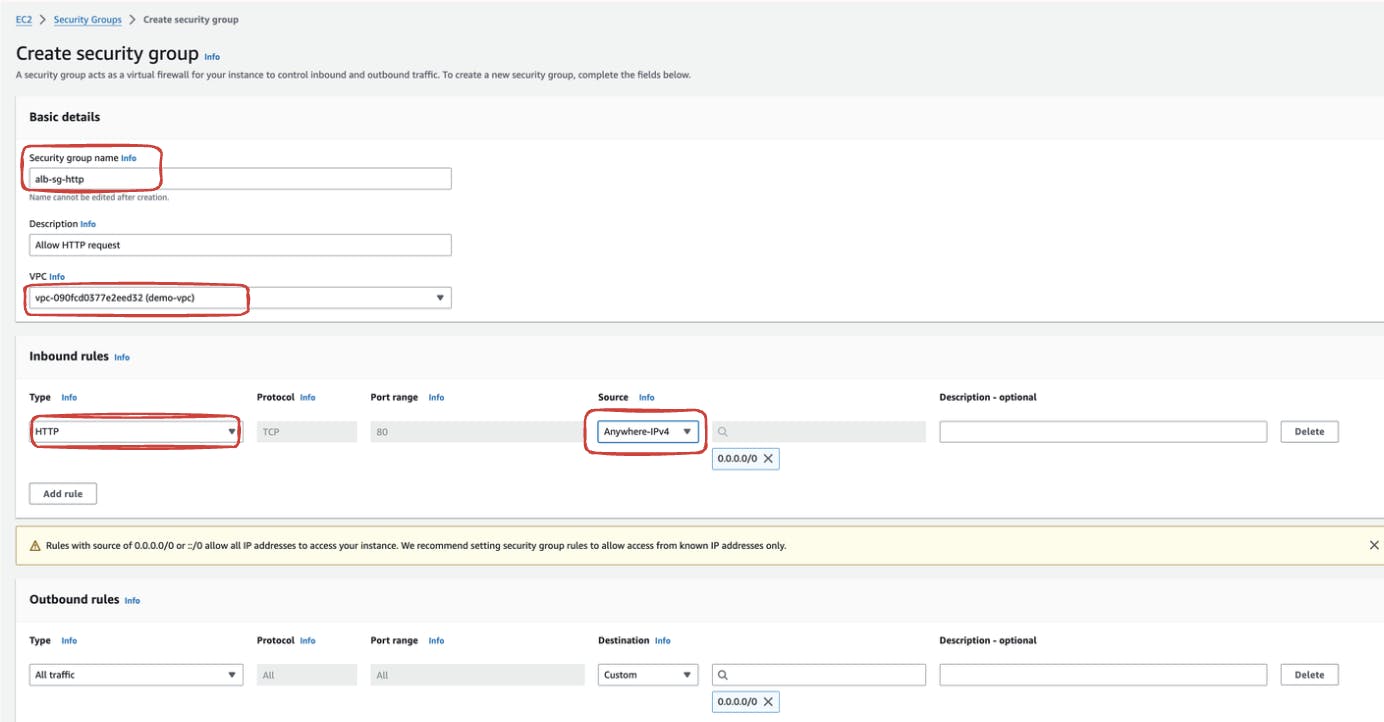
Further, we need to create a security group will allowed traffic to and from the load balancer. Click on "Next: create a new Security Settings" to proceed.
Now we need to specify listeners and routing for that we need to associated our tg-ec2-apache2 target group for routing requests to the instances in your Auto Scaling group.

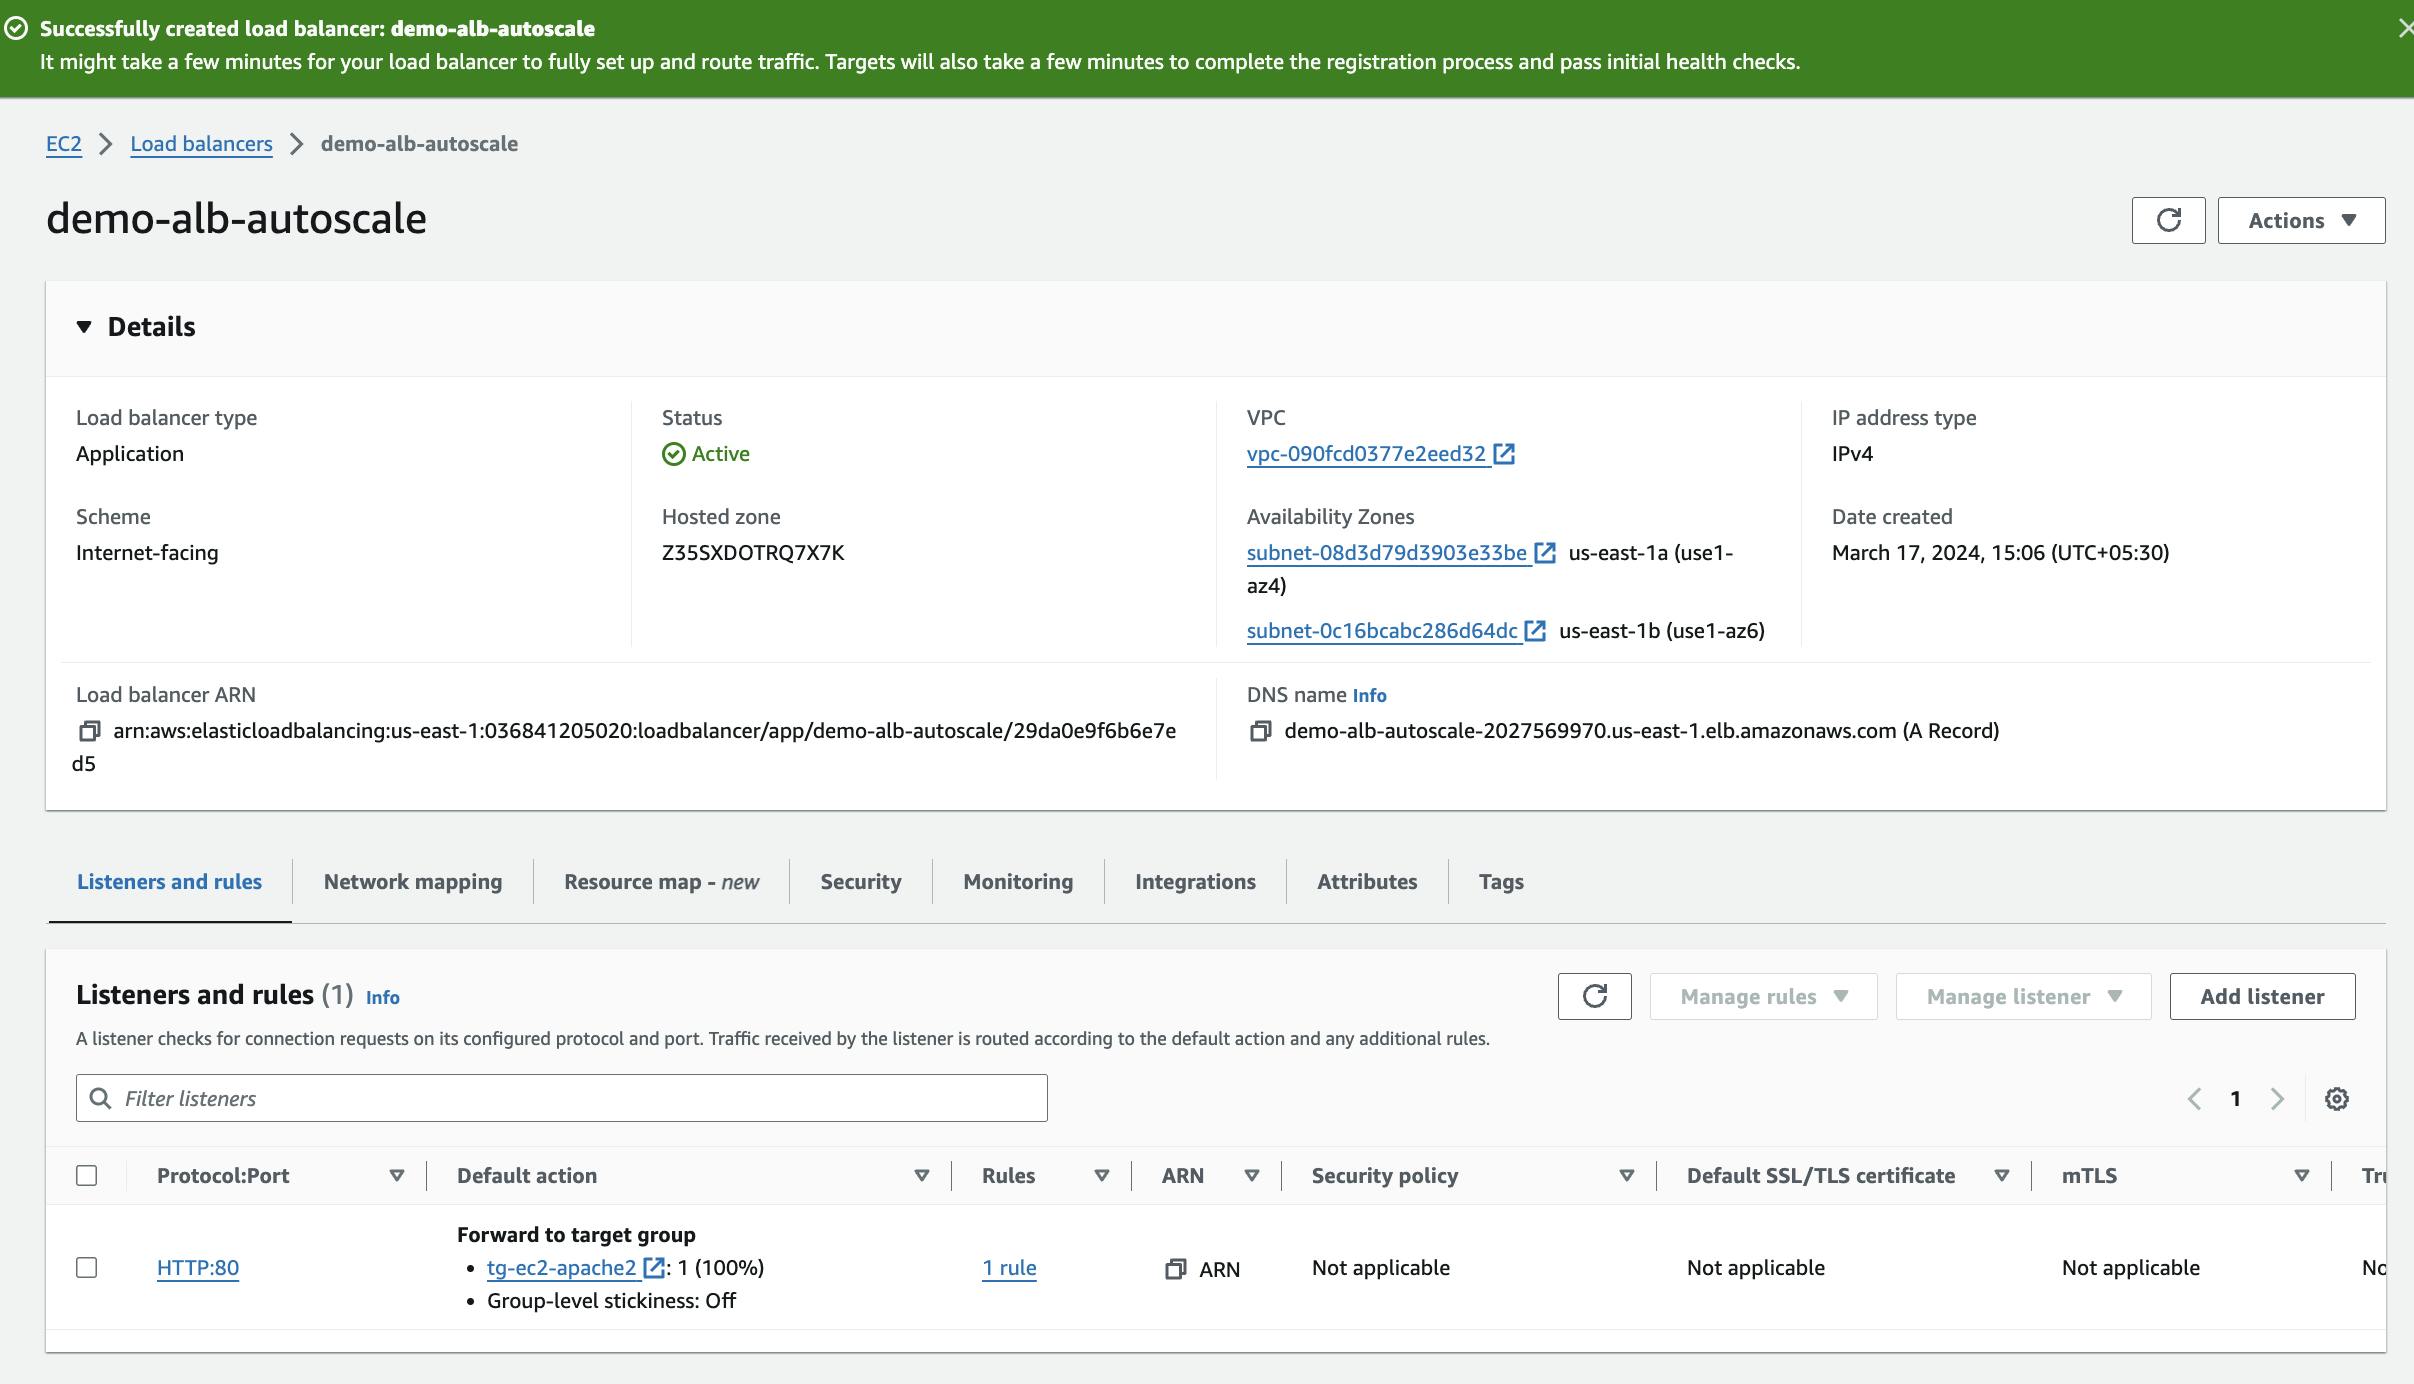
Once satisfied with the configuration, click on "Create Load Balancer" to initiate the creation process. AWS will set up the Application Load Balancer based on your specified parameters.
Designing and Creating Lauch Template
Navigate to the AWS Management Console and locate AWS AutoScaling. Initiate the creation of a new Access Control List (ACL) by clicking on "Create"
In the Auto Scaling dashboard, click on "Launch Configurations" in the navigation pane. Click on the "Create launch configuration" button.
Start by providing it an name for our demo we gonna use "asg-ec2-demo" further we need to configure launch template.
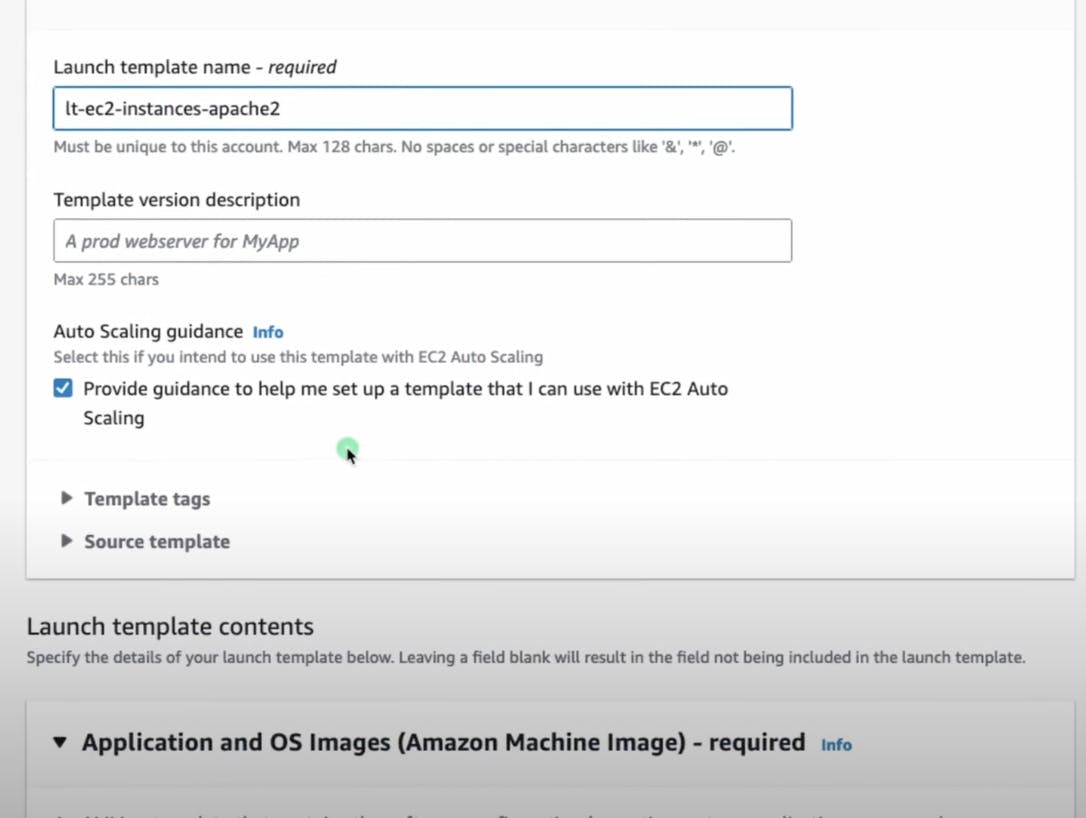
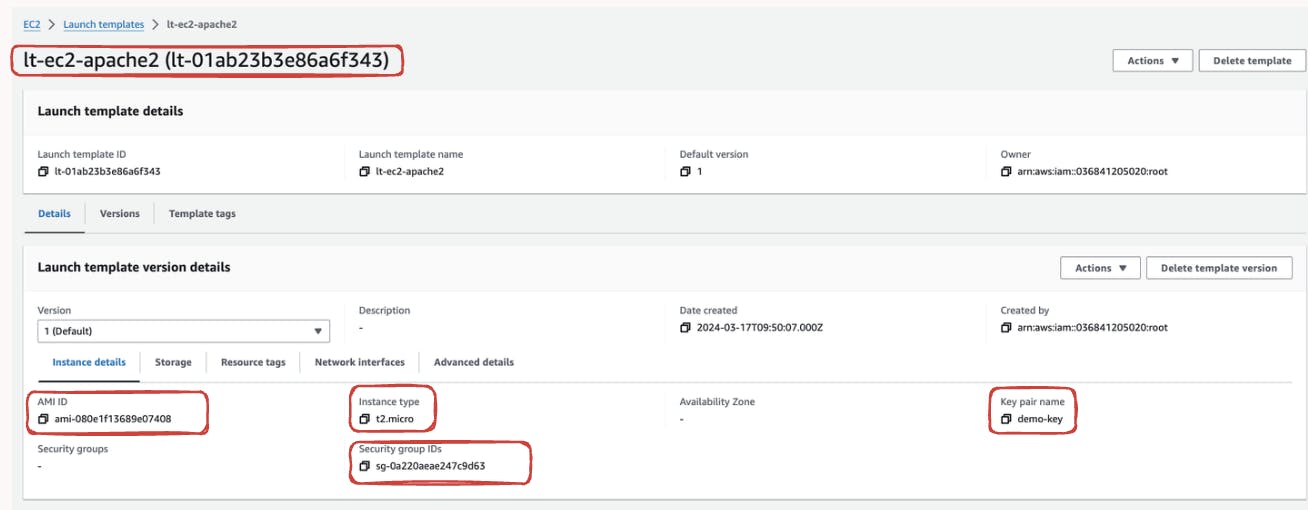
Launch Templates is a configuration template that defines the parameters for launching instances within EC2 . It serves as a blueprint for creating instances with predefined settings, such as the AMI (Amazon Machine Image), instance type, key pair, security groups, storage volumes, and other configuration options.
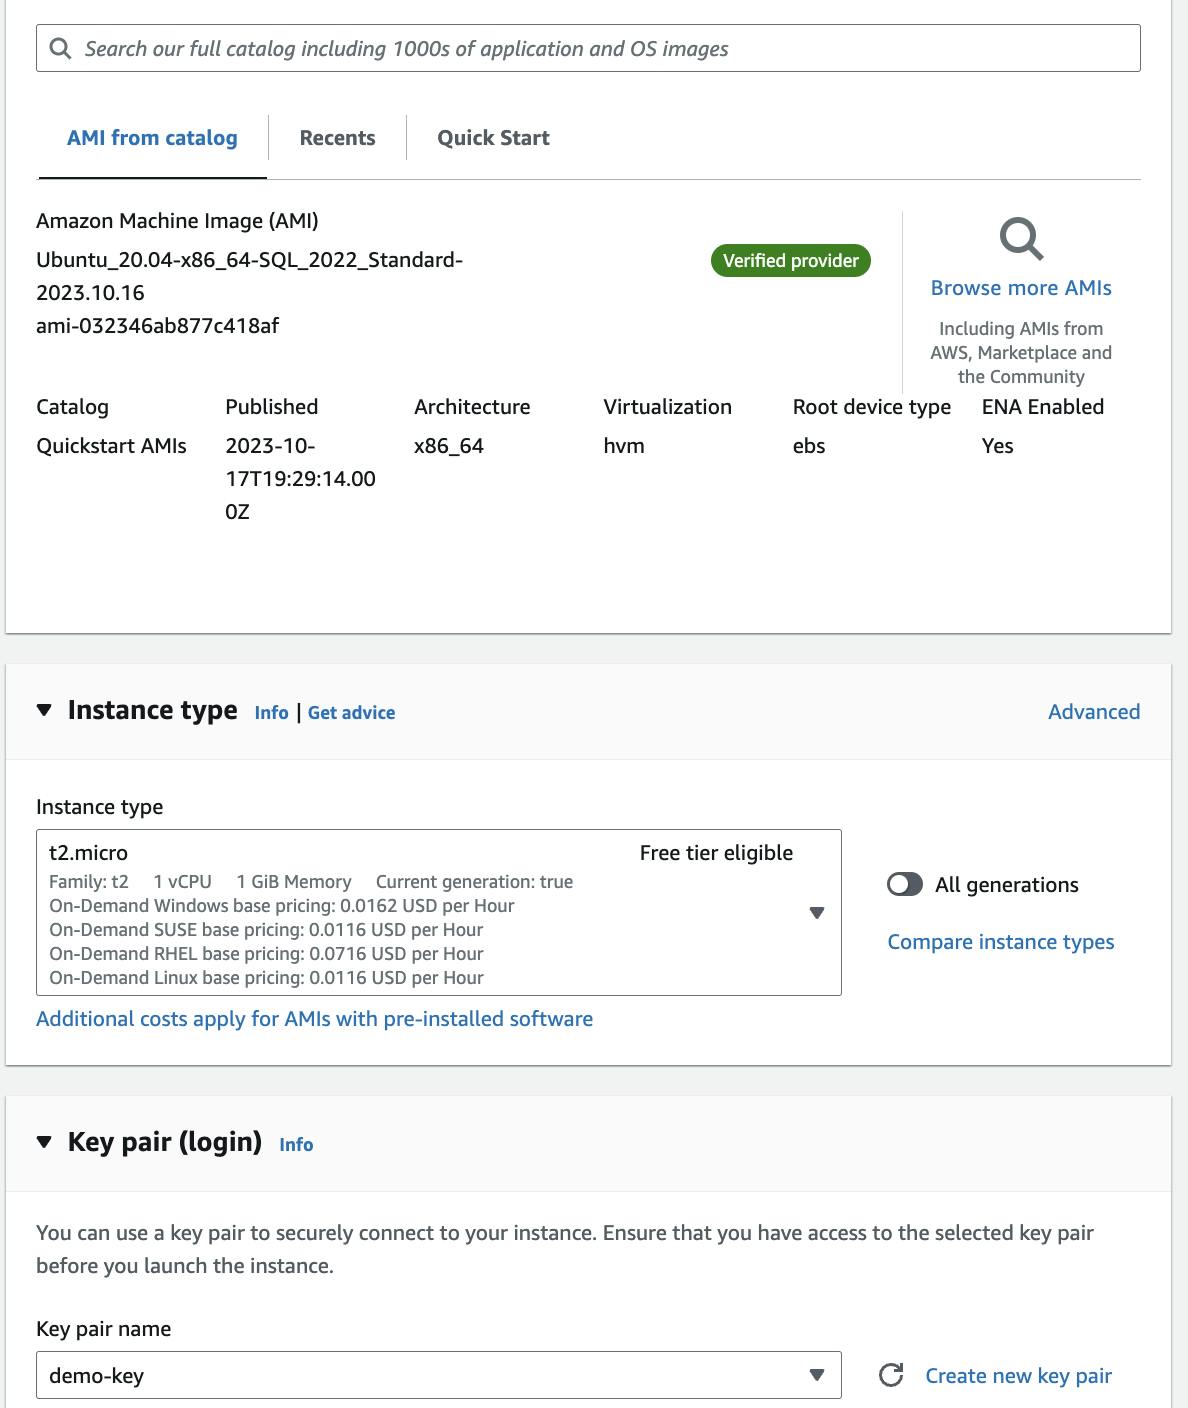
Click on create an launch template, a new tab will be opened then we will start by naming it It-ec2-intance-apache-2 further select Ubuntu AMI Image since we gonna make sure our instance in built using ubuntu.
Also we gonna use t2.micro as our instance type and plus you can also create an key-pair to further ssh into your session
Further for network mapping select our respective region which we had configured prior when creating vpc in our demo we had preferred us-east-1 .
Now for security group we need to create an new one so that whenever our instance will spin up they should have ssh and HTTP access and for that click on "create security group"
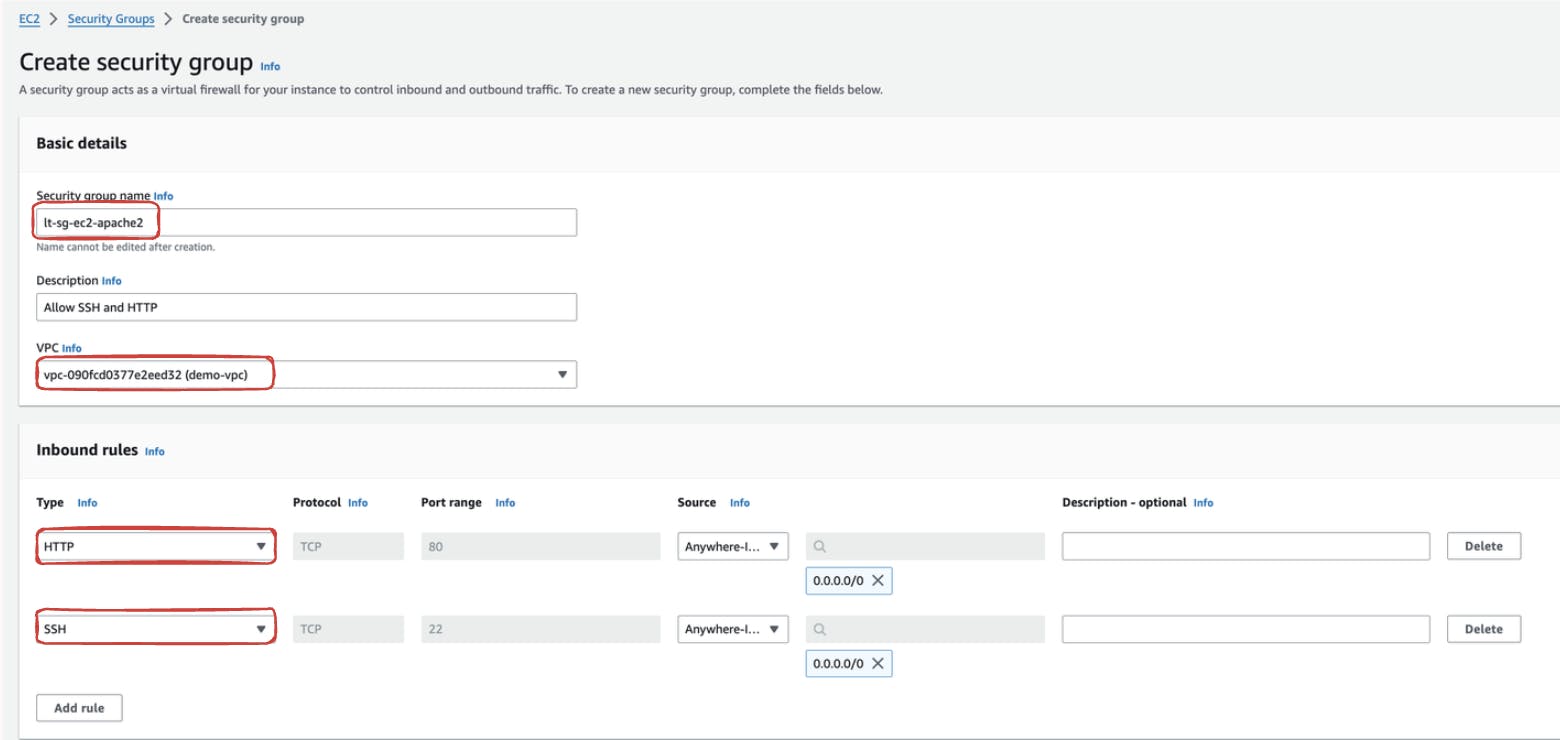
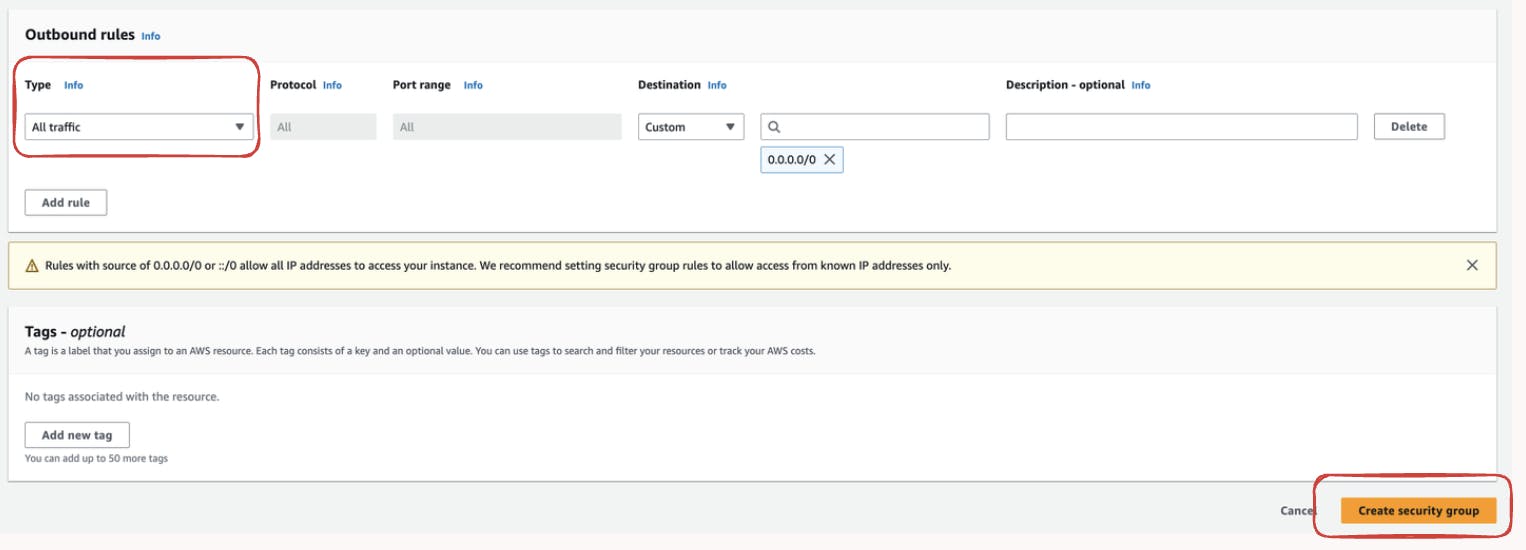
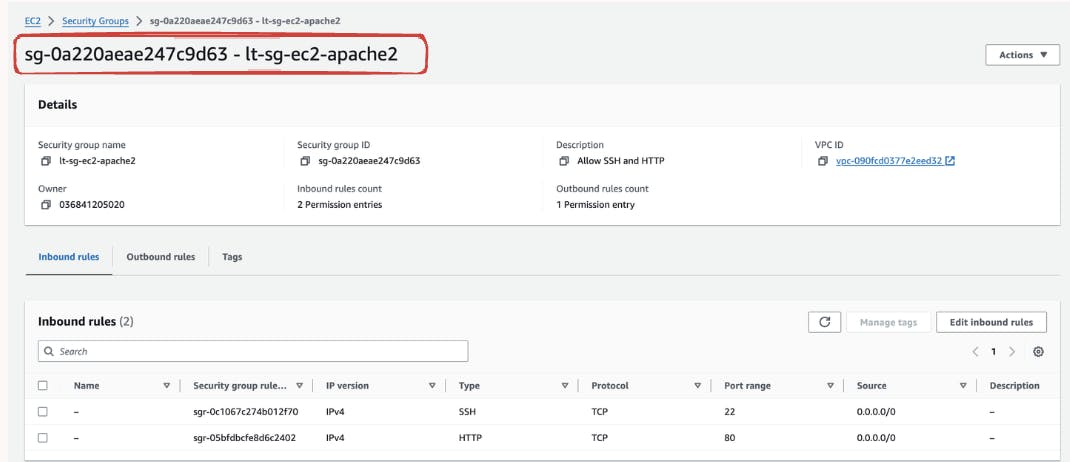
Finally our sg is ready to be used and configured in our launch template.
Further we will go back to our *launch template tab over there add our recent created security group also further we need to also configure an *userdata script in Advanced details section
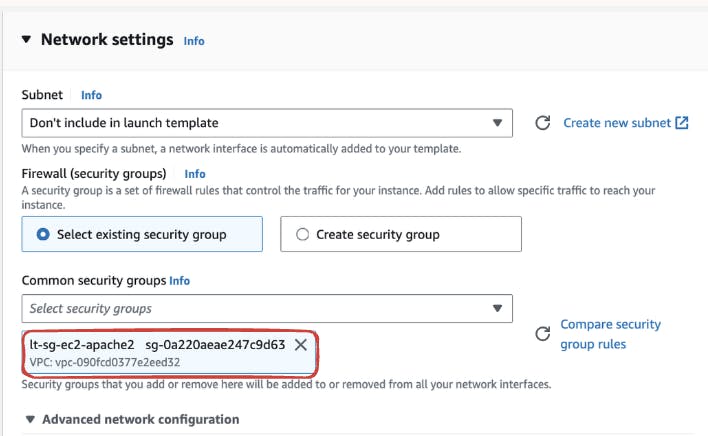
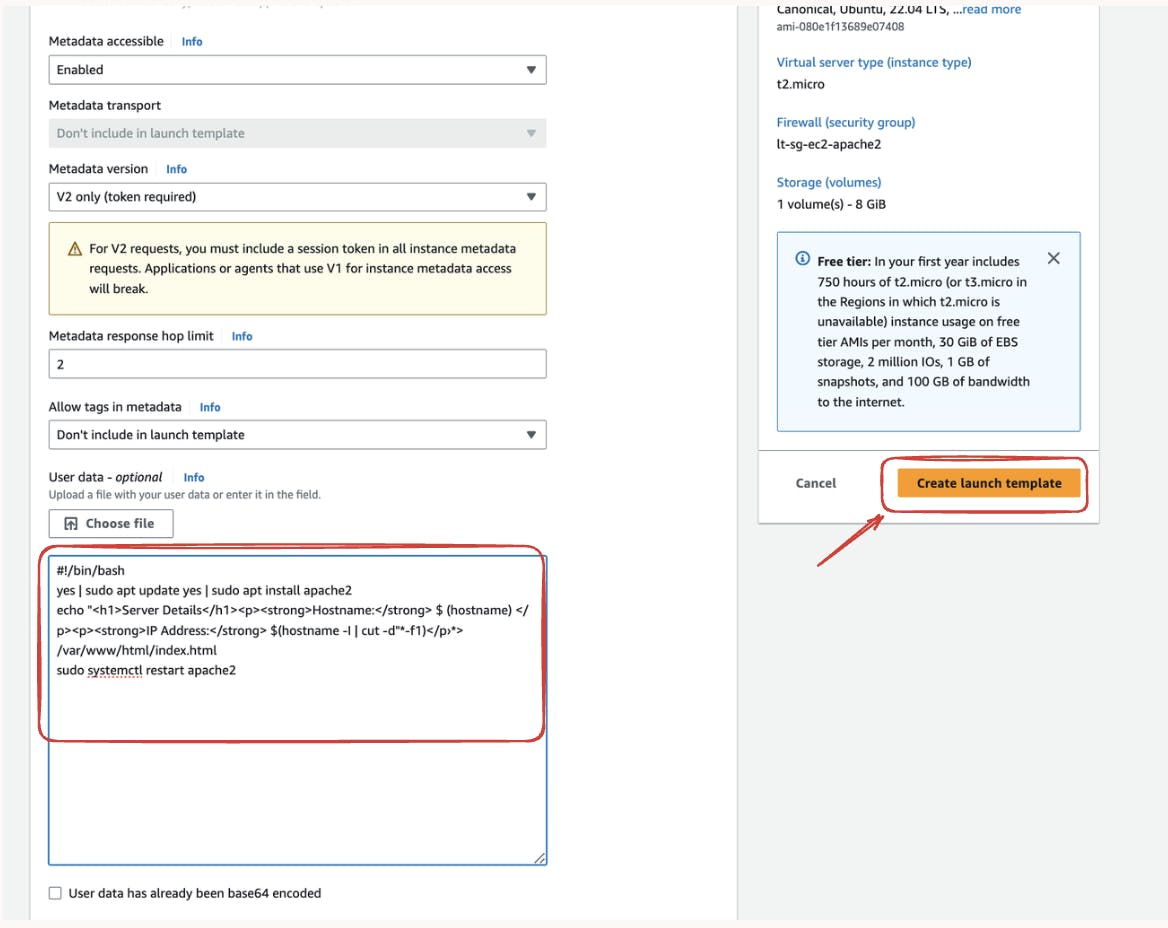
Any finally our Launch Template is created and ready to use.
Creating AutoScaling Groups
Additionally we also need to associate these newly create Launch Template to our Auto-Scaling Configuration for that we need to shift towards our Auto-scaling Group Tab and associated these newly created Template and then click on next.

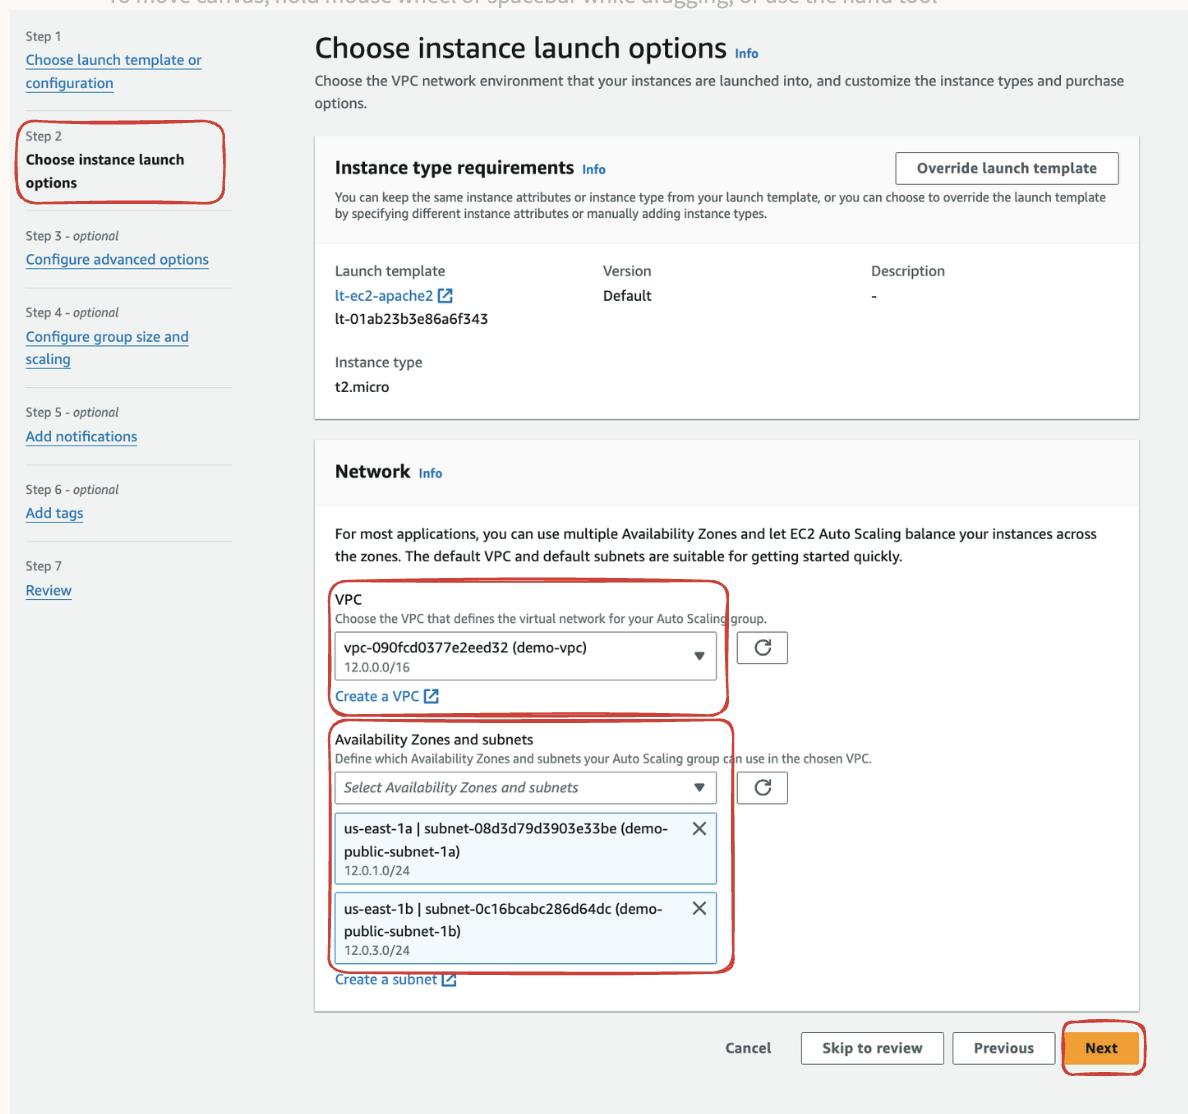
Further we need to configure our Network configuration also here we will select our demo-vpc and subnet associated with it
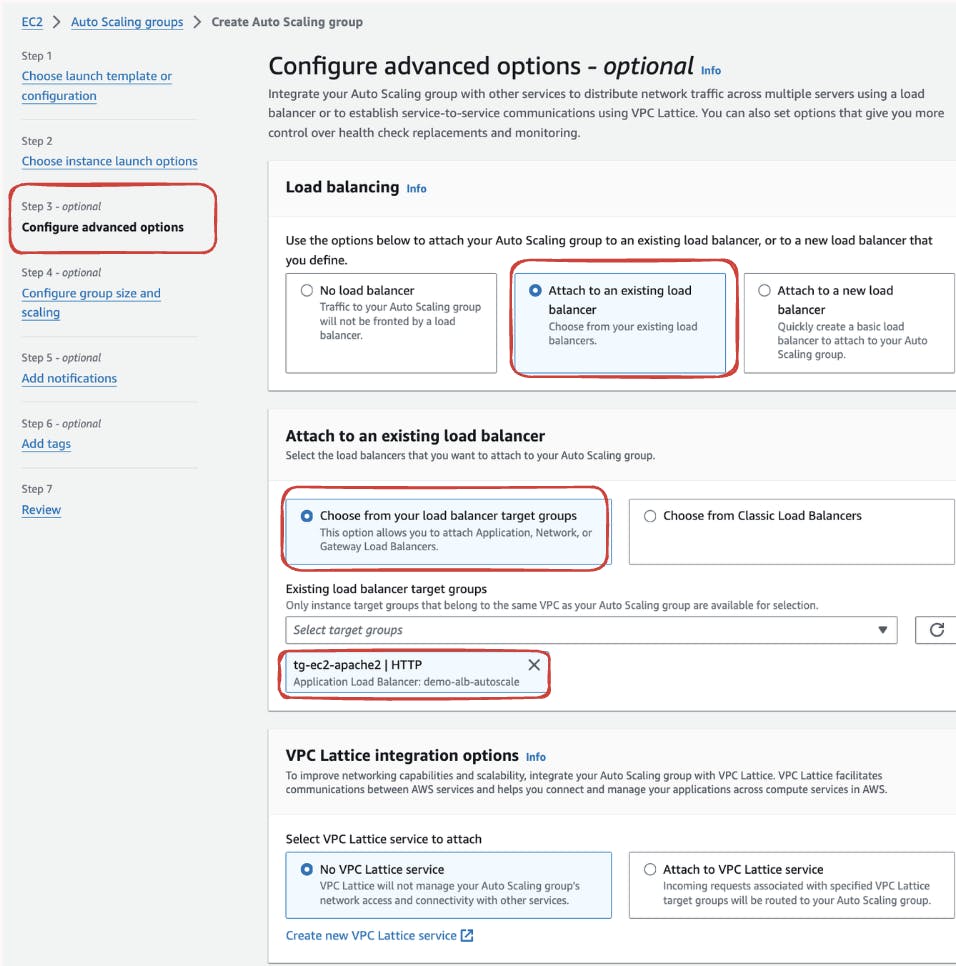
Now moving towards advanced options we need to attach our auto-scaling group with an LoadBalancer we create earlier so that we are able to see our application onto internet
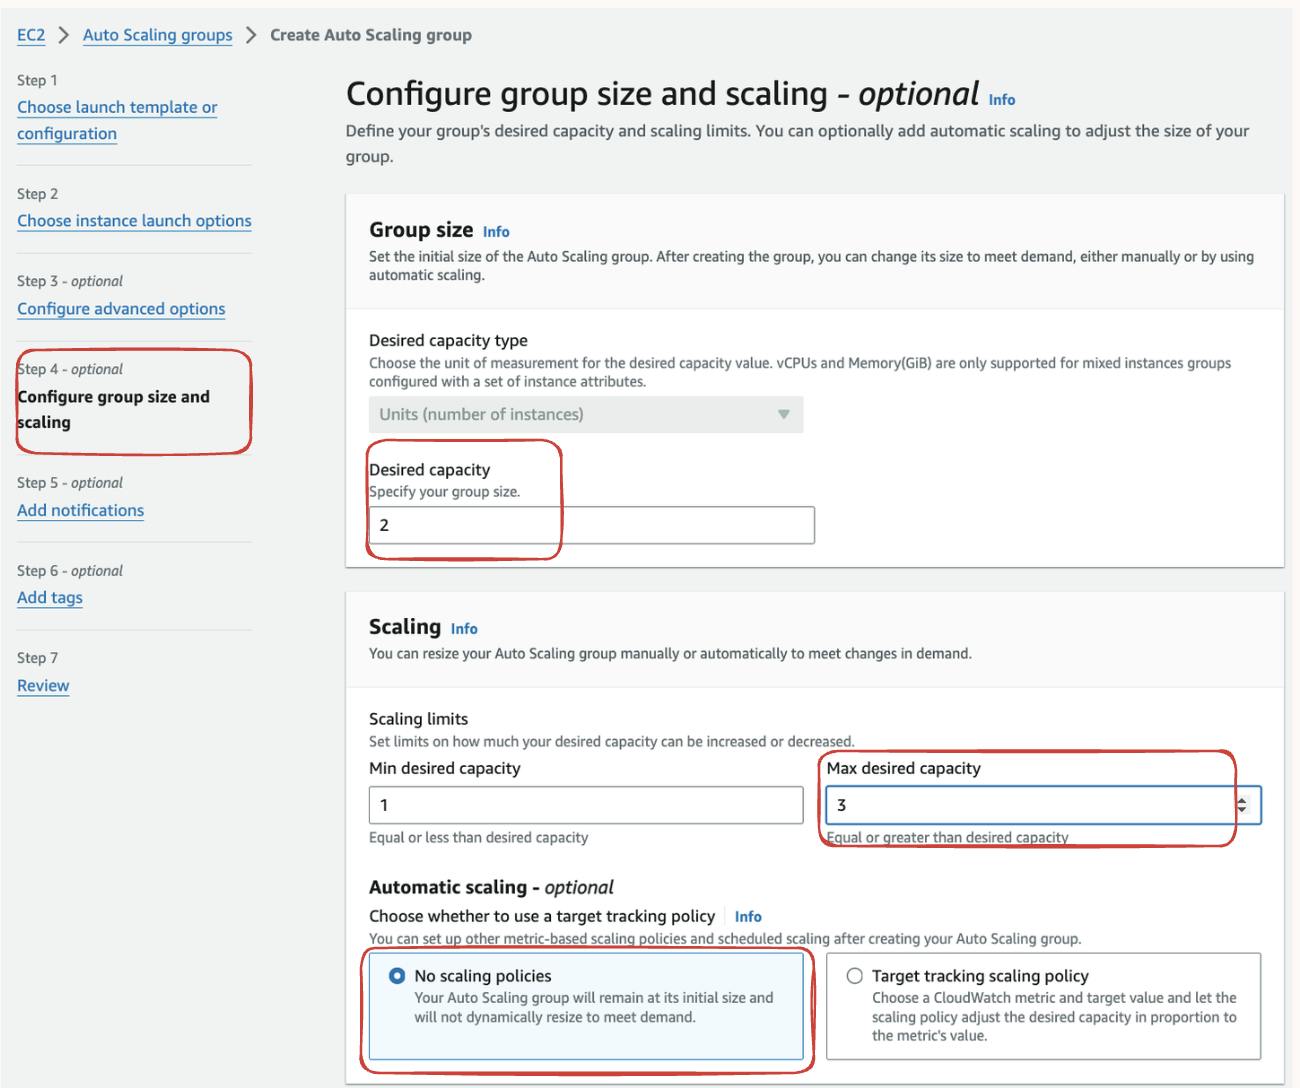
And atlast we need to configure the Max desired instance capacity here we are making sure that whenever traffic hits our instances will scale up to 3 and when traffic spike downs it will scale down to 1 respectively.
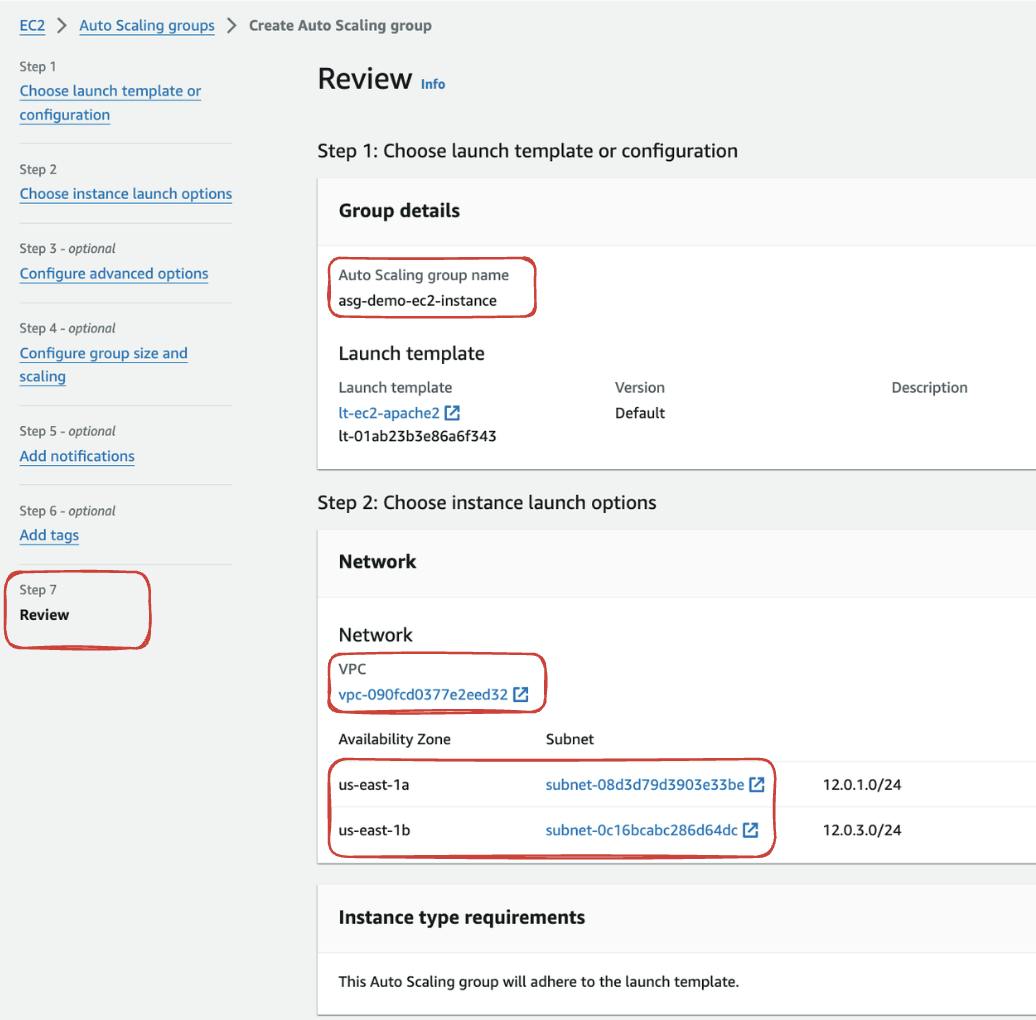
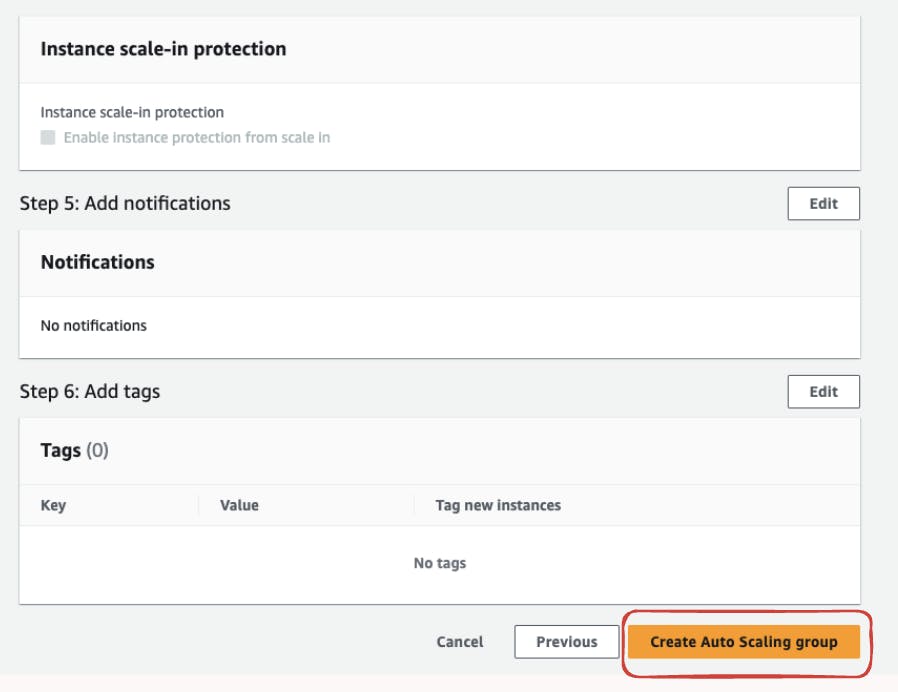
Finally review the Auto-scaling Group and click on "Create". Our Auto-scaling group will be up and running.
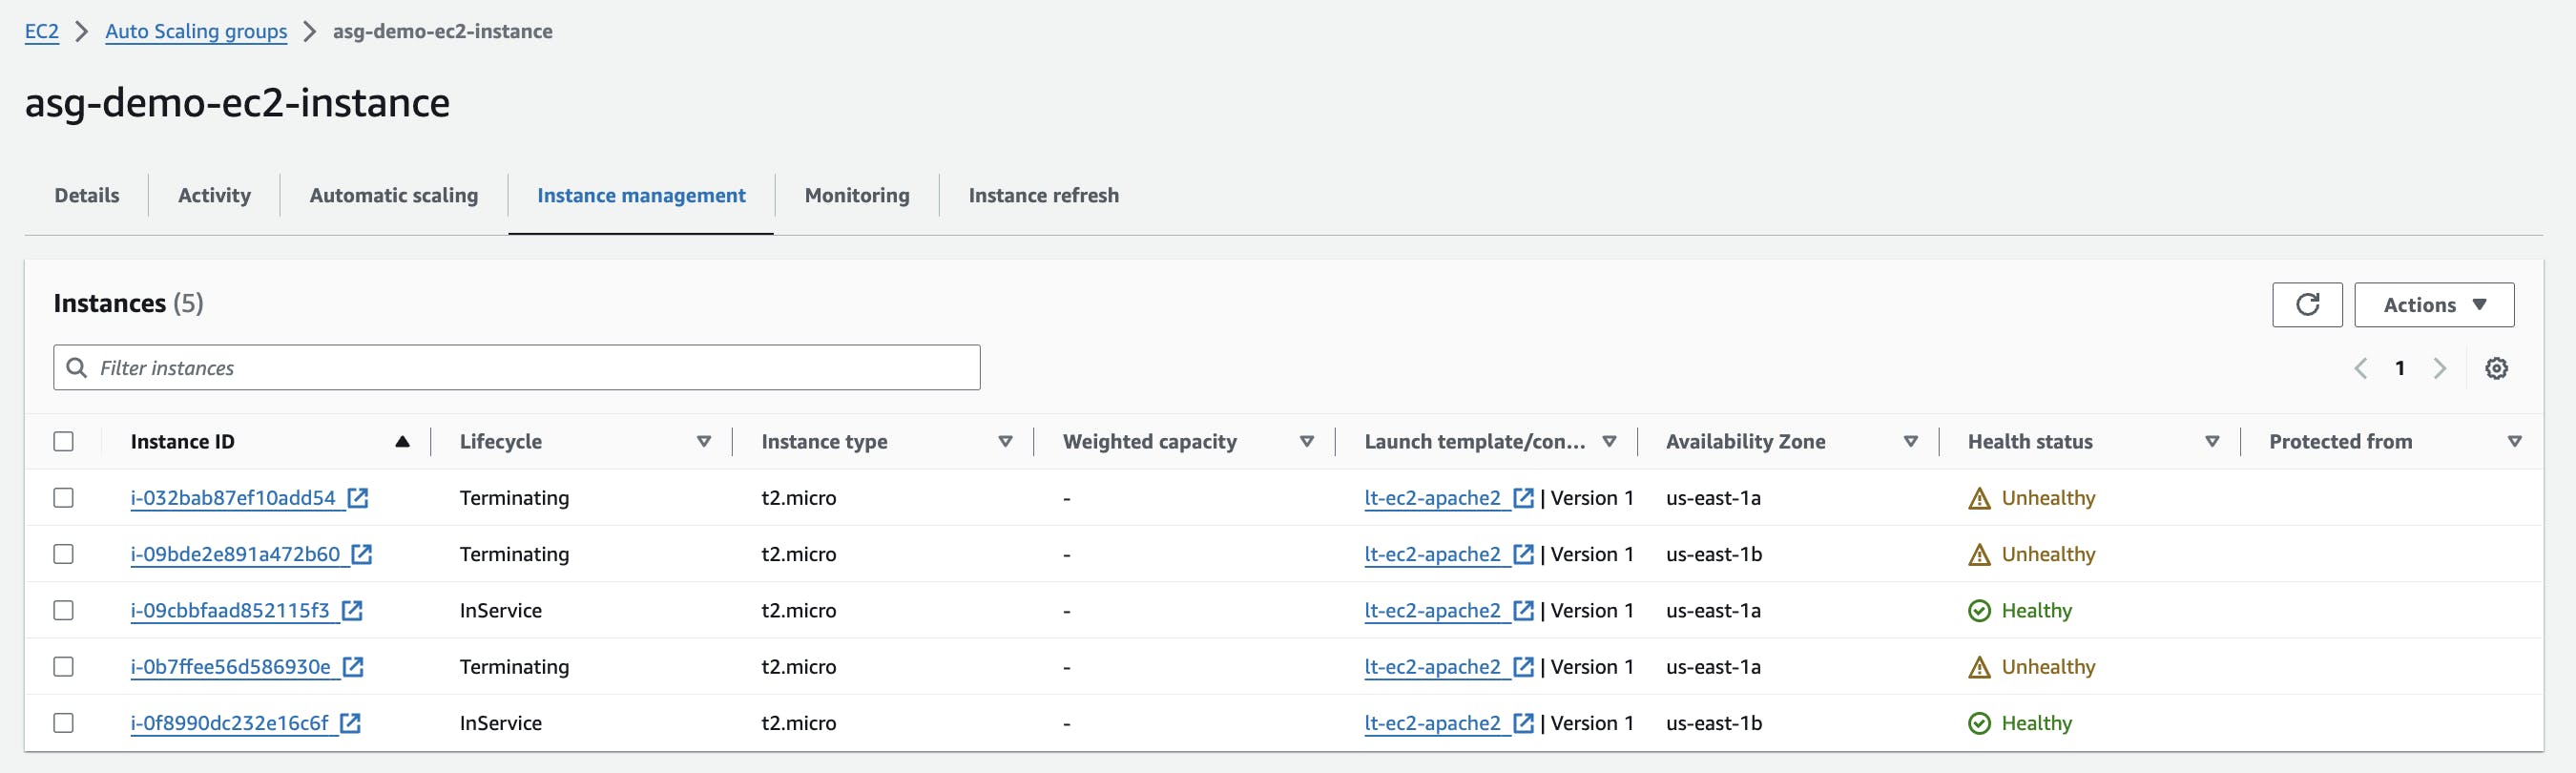
Accessing our Instances
After our Autoscaling group is up and running we can check whether it is able to handle the load or not for that we will go to our loadbalancer and copy the DNS name and paste it onto the web.
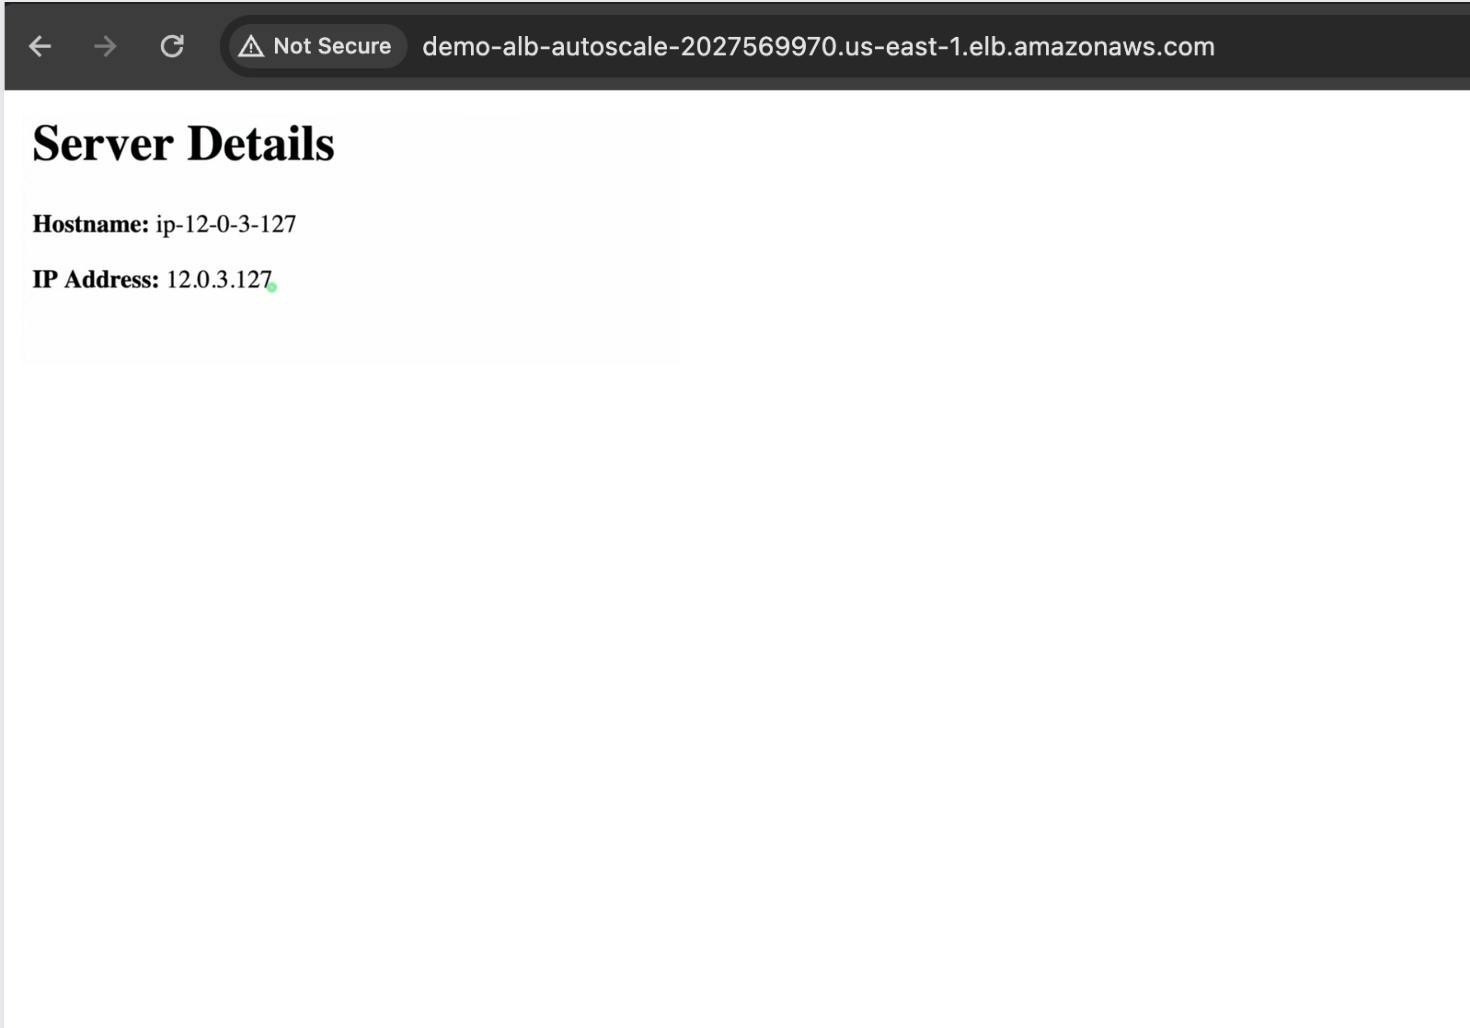
And if we see under the auto-scaling instance management we see that new instance get automatically scaled up based on the traffic hit onto the loadbalancer. and that how Auto-scaling works onto EC2 instances
Conclusion
In wrapping up, AWS AutoScaling Groups stand as the unsung heroes of cloud computing, ensuring your applications remain responsive and cost-effective in the face of fluctuating demand. From managing e-commerce spikes to handling streaming surges, AutoScaling Groups keep your infrastructure running smoothly.
As we've explored their capabilities, it's evident that AutoScaling Groups are not just tools but essential components for modern cloud applications. By harnessing their power, you can streamline operations, optimize costs, and deliver a seamless user experience.
Connect with me on Twitter, LinkedIn, and GitHub to stay up-to-date with my latest blog posts and hands-on tutorials.