AWS CodeCommit, CodeBuild, and CodeDeploy: The Dynamic Trio for Reliable Code Deployment
Reliable, Secure & Serverless Continuous Integration and Delivery


Hello everyone! 👋 In this blog, we'll explore the powerful AWS services called CodeCommit, CodeBuild, and CodeDeploy with a hands-on experience that can greatly enhance your software development and deployment process. These services provide a streamlined and efficient way to build, test, and release your code reliably. Let's dive in 🚀
Note: Before getting started with the Project you need to have an AWS Tier account for setting up your AWS account if you are using it for the first time, you can check out this video
Github Repo: Repository
Introduction
AWS CodeCommit and AWS CodeBuild are powerful, fully-managed services that revolutionize the way you develop, package, and deploy your applications in a safe and reliable manner.

CodeBuild and CodeDeploy go beyond just building your deployment package. They also assist in creating and managing our infrastructure using Infrastructure Code tools like Terraform, CloudFormation, Serverless Framework, CDK, and more.
Importance of Continuous Integration & Delivery
Continuous Integration & Delivery is an integral aspect of modern software development. It streamlines the development process, allowing developers to focus on code quality and innovation, rather than time-consuming tasks like testing and deployment. By automating these processes, CI/CD ensures that code is delivered to production quickly, reliably, and without errors.
Moreover, it supports teams to work collaboratively and proactively identify potential issues before they become major problems, ultimately allowing for the delivery of high-quality software in a timely fashion. In short, embracing Continuous Integration & Delivery not only enhances efficiency but also results in better software
And that’s exactly what continuous integration & delivery services and platforms like AWS CodeBuild & CodePipeline are built for.
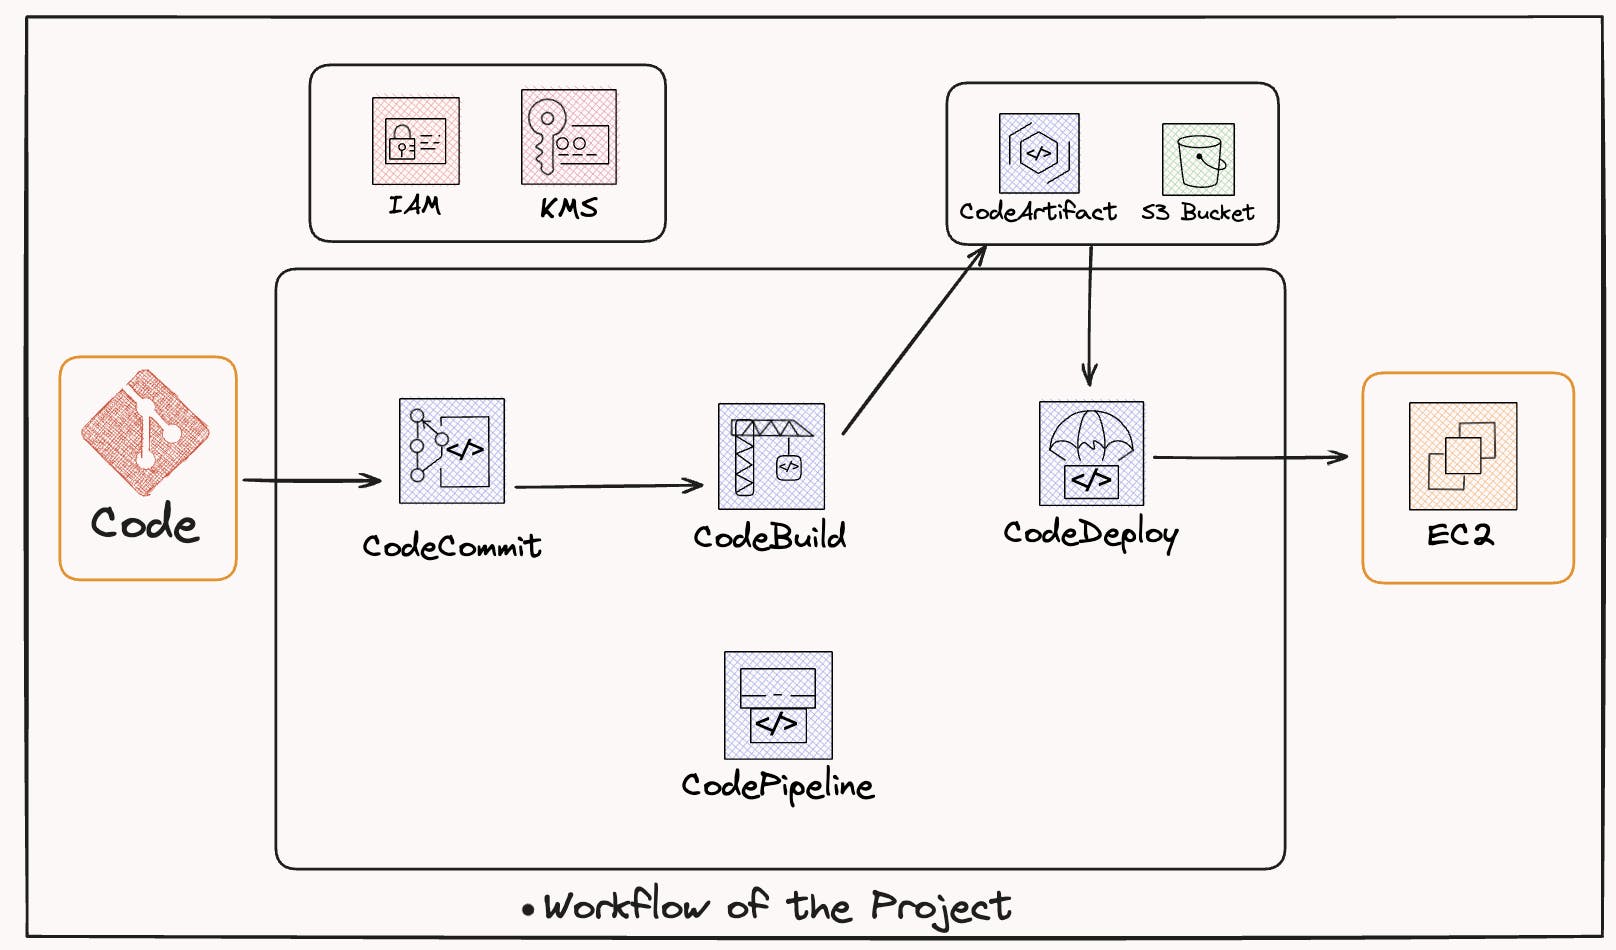
Symbiosis of AWS Developer tools
Code Commit
A fully-managed source code repository that allows you to store and manage your code securely, providing version control and collaboration features.
Code Build
A fully-managed build service that compiles your source code, runs tests, and produces deployable artifacts, automating the build process efficiently.
Code Artifacts
A secure artifact repository that stores and manages build artifacts, making them easily accessible for deployment and sharing across your development team.
Code Deploy
Automates the deployment of your applications to different environments, ensuring consistent and reliable releases, with features like rolling updates and deployment configurations.
Code Pipeline
An end-to-end continuous delivery service that orchestrates the entire software release process, from source code changes to production deployments, integrating all the other tools seamlessly.
These tools together form a powerful CI/CD ecosystem, enabling developers to streamline and automate their software delivery pipelines for faster and more reliable application development and deployment.
So let's get our hands dirty
CodeCommit
Let's start by setting up our Code Repository on CodeCommit
Sign in to your AWS Management Console and navigate toward the CodeCommit service.
Further, Click on "Create Repository" and provide a suitable name
Additionally, you can add any description to your repository(if required)

Now, let's configure an IAM user to connect it to our local machine
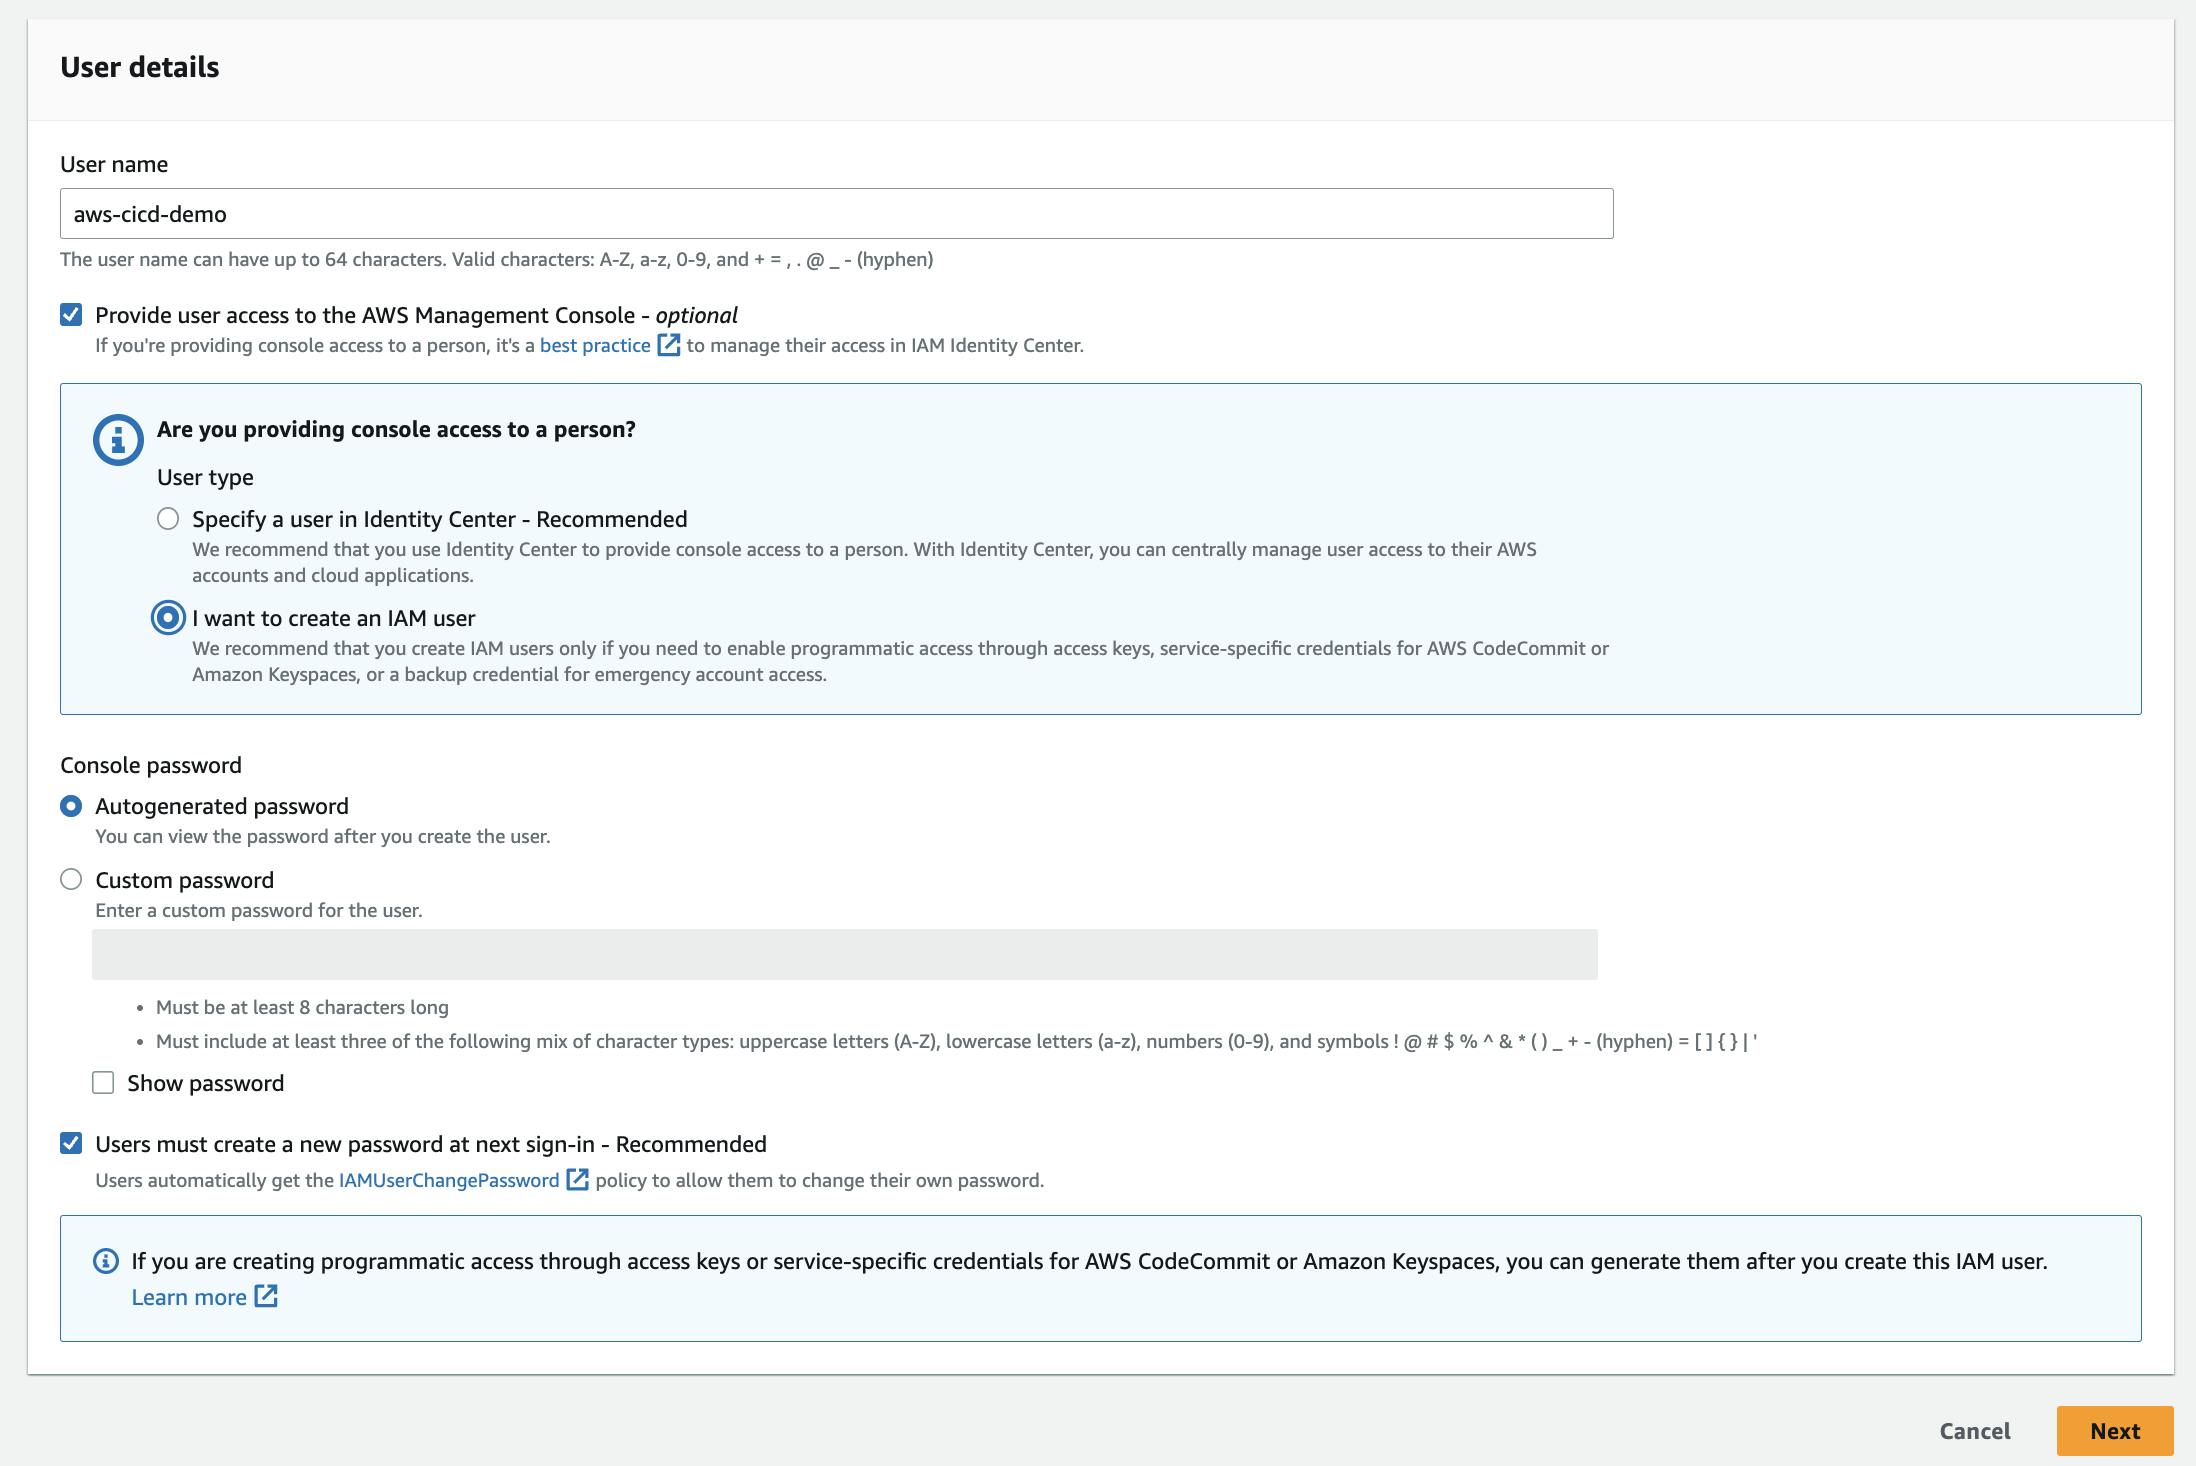
Open the AWS IAM console and navigate to the "users" section.
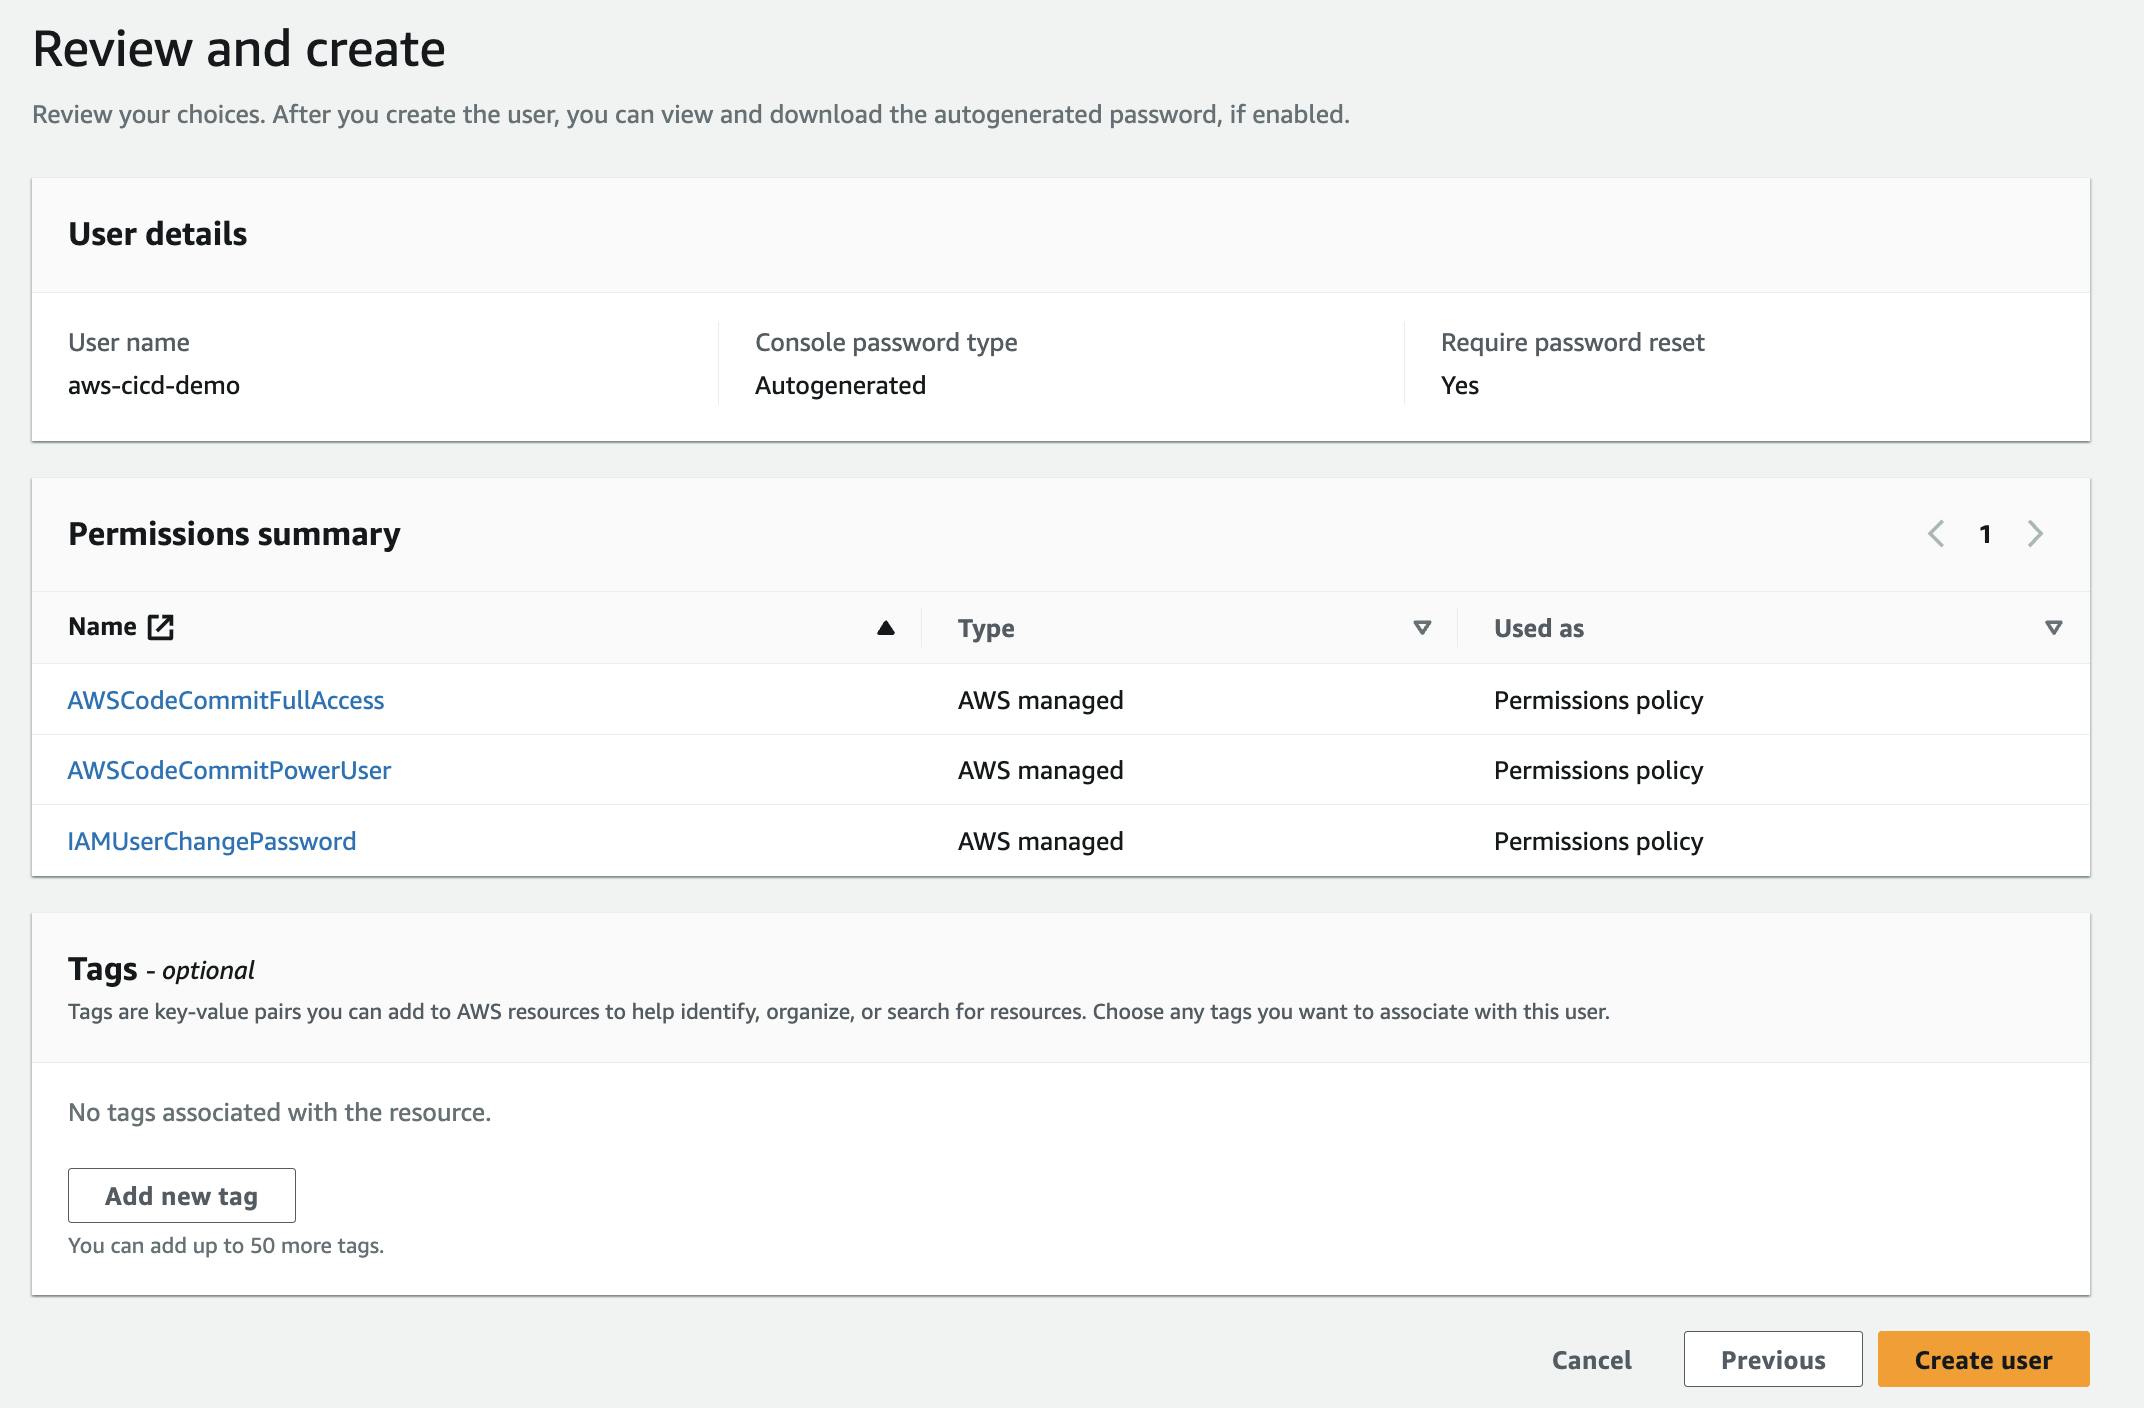
Locate your IAM user or create a new one if needed and attach it with the following code commit policy.
Further, under the "Security credentials" tab, click on "Create access key" to generate your access key ID and secret access key.
Save the access key ID and secret access key to a secure location.

Now, let's clone the repository from CodeCommit to your local machine:
Navigate to the desired directory on your local machine where you want to clone the repository.
Run the following Git command, replacing
<repository_url>with the URL of your CodeCommit repository:git clone <repository_url>Further, you will be prompted for your AWS IAM credentials. Paste the downloaded access key ID and secret access key generated earlier.
Aye! You have successfully set up a CodeCommit and cloned the repository in your local machine.
Now that you have cloned the repository on our local machine let's clone the required material we needed👨🏻💻
Open your preferred code editor and cloned the given Github Repository which contains all the files we required.
git clone https://github.com/YashPimple/Deployment-of-web-app-using-ECS-and-ECRAdditionally, commit all the changes to your local branch and push the local changes to your CodeCommit repository.
Run the following Git commands within the repository directory:
  git add .
  git commit -m "Add: Required Files"
  git push origin <branch_name>
Replace
<branch_name>with the name of the branch, you want to push the changes to. Typically, the default branch is "master" or "main"
CodeBuild
Now let's begin the process of using CodeBuild to streamline your build process.
CodeBuild acts as a service that compiles our source code run tests, and produces deployable artifacts, automating the build process efficiently.
To Create a CodeBuild Project we need to navigate towards the "CodeBuild" section in AWS and create a new build project.

Now give it a suitable name, such as "demo-cicd-build" and provide a descriptive description(if required)
Configure Source Provider: Select AWS CodeCommit as the source provider and choose the appropriate repository name.
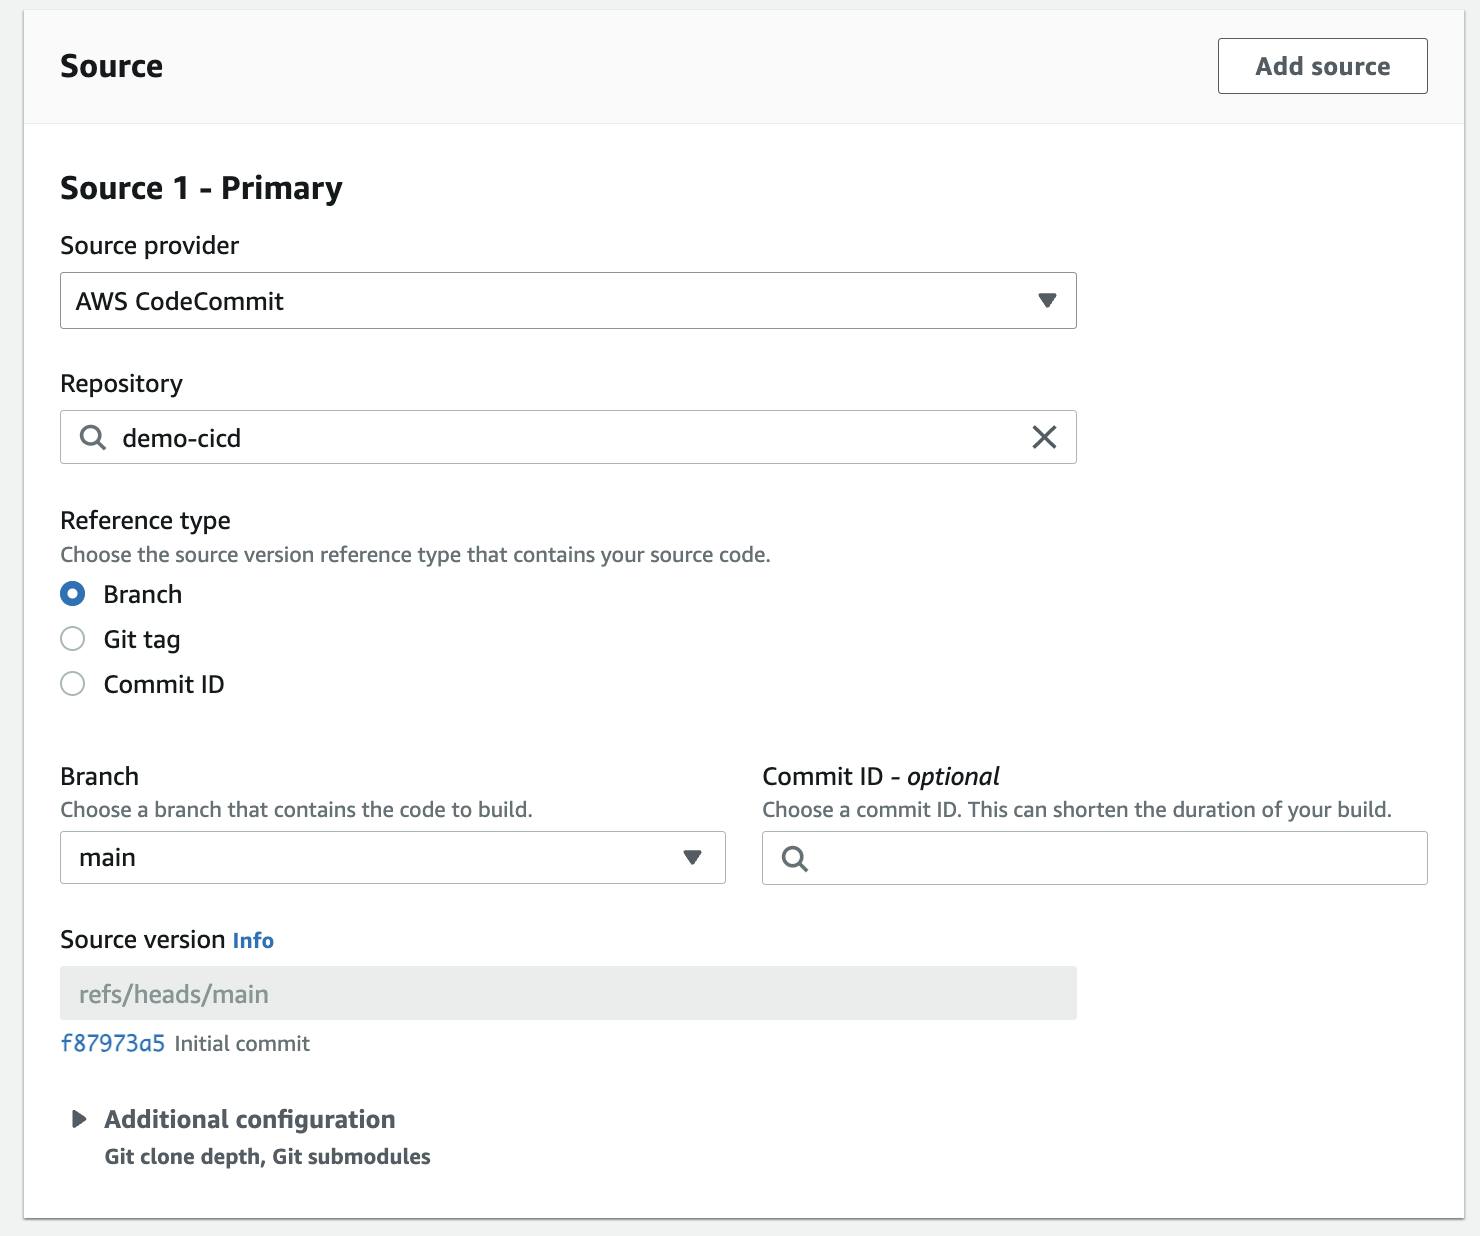
Specify Branch: Set the reference type to the master branch, which will be used for the build process.
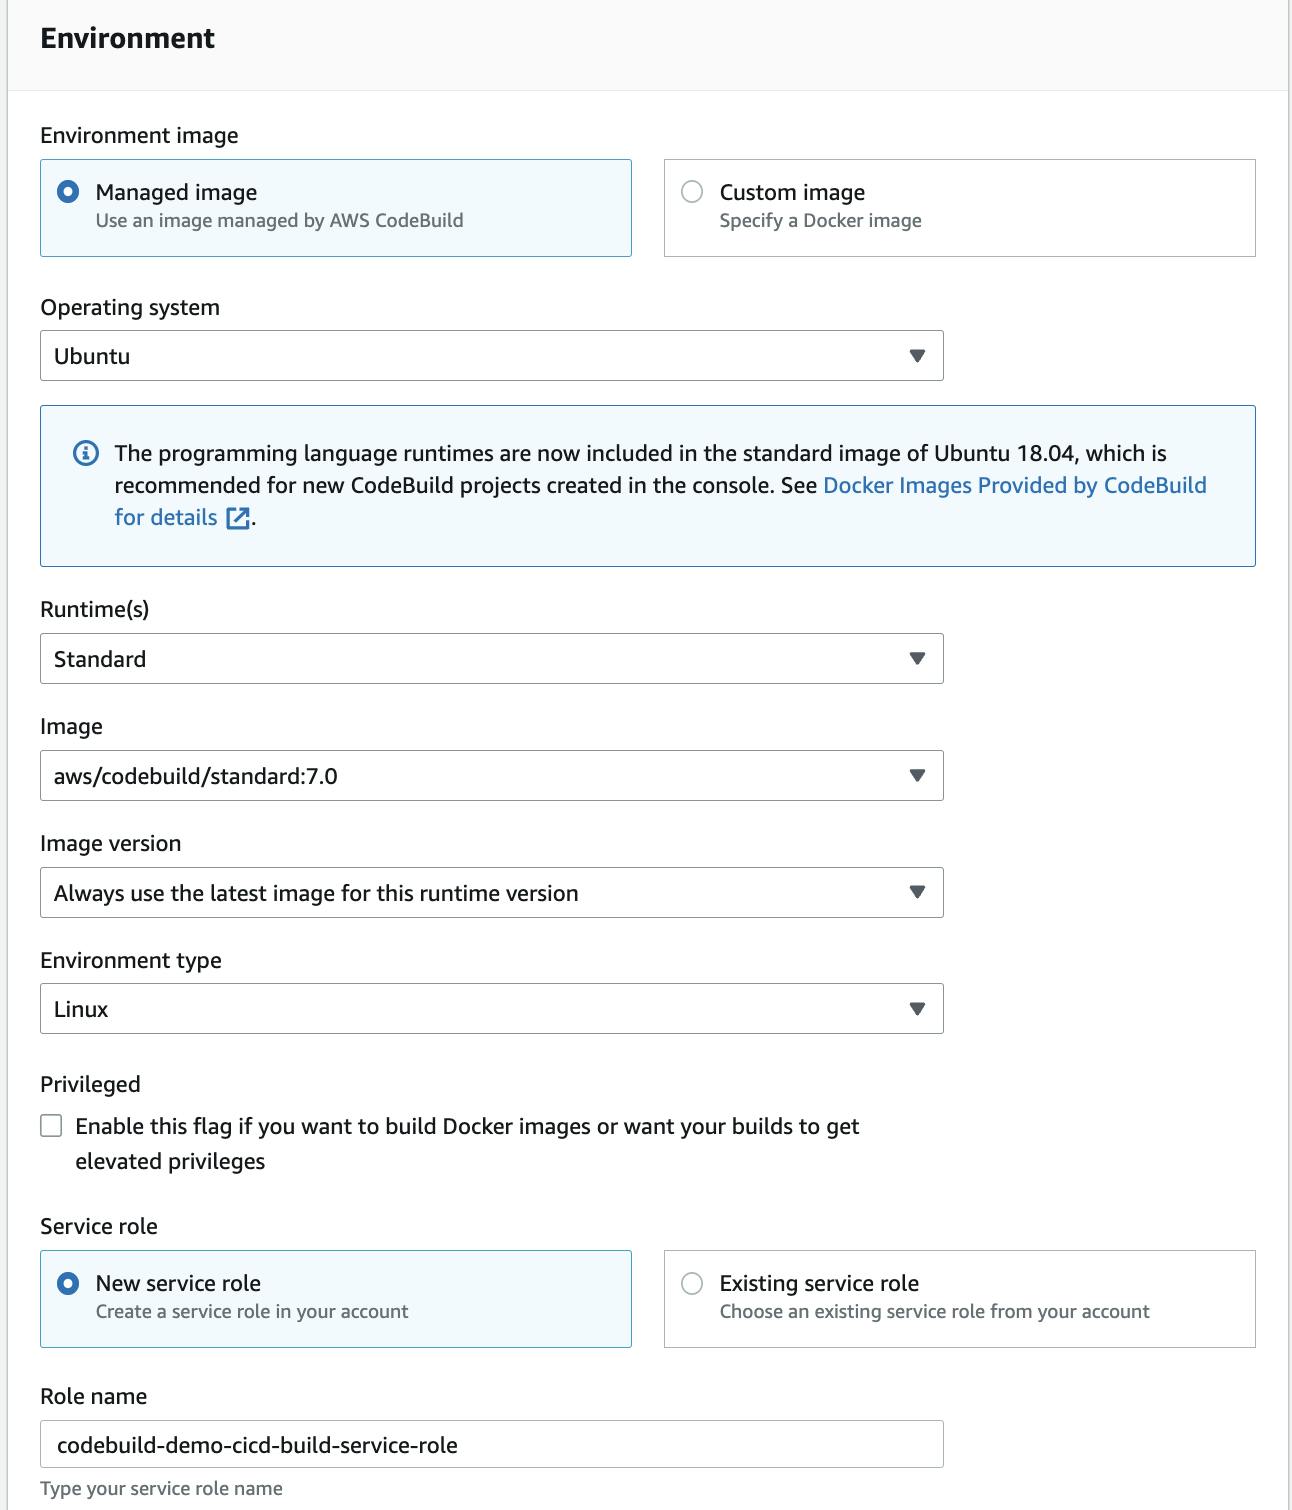
Configure Environment: Select Ubuntu as the operating system, and choose the runtime standard image as "aws/codebuild/standard:7.0"
Additionally, create a New Service Role: Specifying the name for the new service role, which will provide the necessary permissions for CodeBuild to perform its tasks.
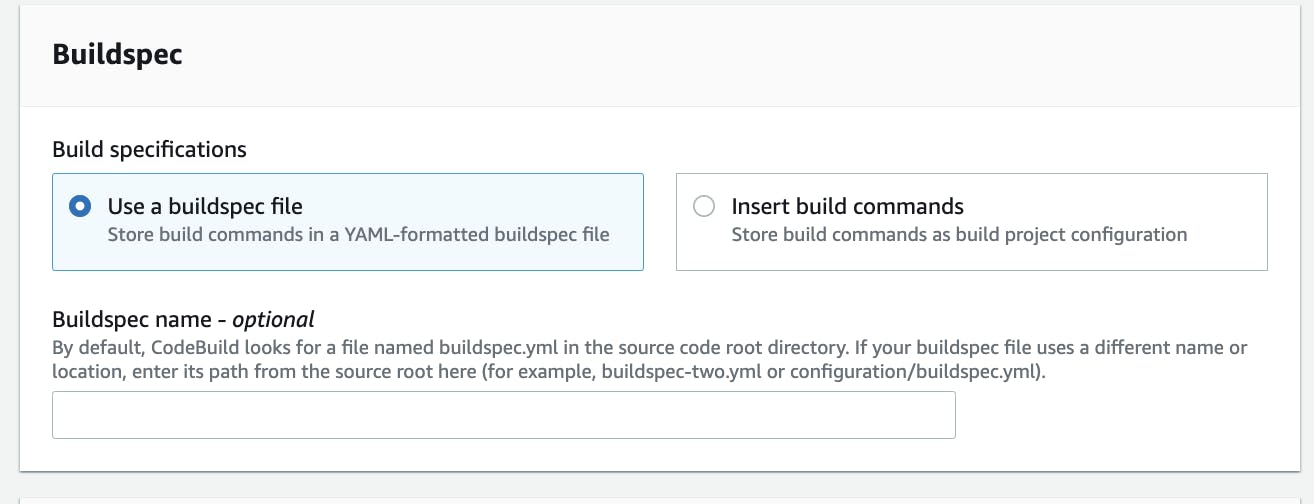
Further, the important aspect of CodeBuild is the presence of buildspec.yml
which can be considered as a file to execute the set of build processes.
You can provide your buildspec files either in your source code or provide a spec file when you create your build project. If provided via the source code, CodeBuild will look by default for buildspec.yml in the root directory, but you can adjust this at your build project. Your buildspec file can be organized via the different phases which are executed by CodeBuild.
Here's an example of the
buildspec.ymlfile we are using are is present in our local repositoryversion: 0.3 phases: pre_build: commands: - echo "Starting build" - echo "Installing nginx" - apt-get update - apt-get install -y nginx build: commands: - echo "Copying files to nginx directory" - cp index.html /var/www/html/index.html post_build: commands: - echo "Configuring nginx" - sed -i 's/80 default_server/8080 default_server/' /etc/nginx/sites-available/default - service nginx restart artifacts: files: - /**/*
Now click on "create build project" by following these steps, you will be able to effectively set up CodeBuild and configure the build process using the buildspec.yml file.

CodeArtifacts
- Further will create an S3 bucket where we can store our Code Artifacts(output) after the build gets finished.
CodeArtifacts: A secure artifact repository that stores and manages build artifacts, making them easily accessible for deployment and sharing across your development team.
Once you have completed the setup, click on "start build." This will initiate the build process and execute all the phases which are mentioned in
buildspecfile.
By following these simplified instructions, you can easily create a build project, configure CodeBuild, and initiate the build process.
CodeDeploy
Now let's take the next step and further dive into AWS CodeDeploy
CodeDeploy is used to automate the deployment of our applications to different environments, ensuring consistent and reliable releases, with features like rolling updates and deployment configurations.
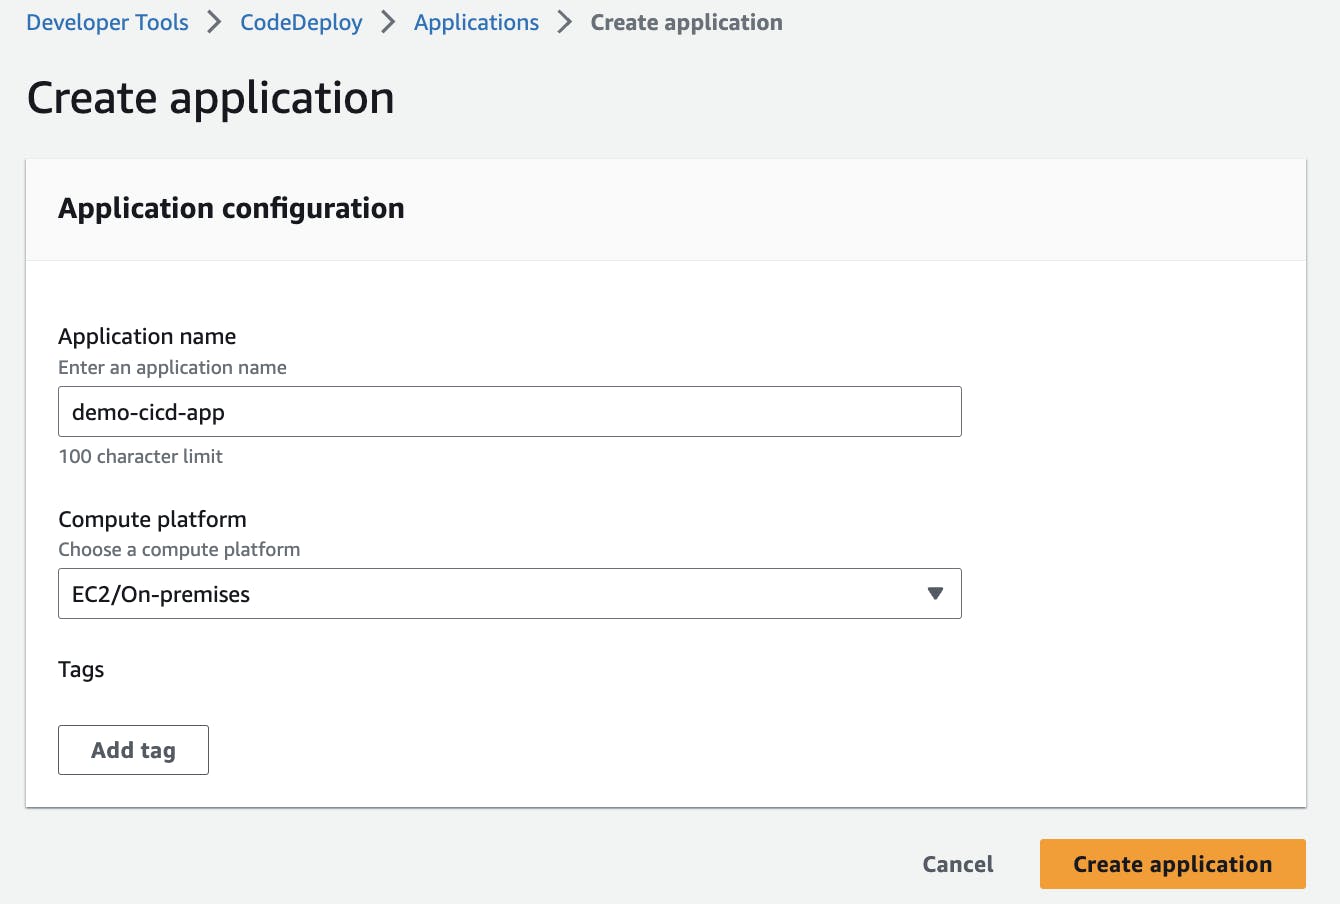
- Now let's set up CodeDeploy to create a new deployment for that we need to create an application in CodeDeploy and name it "demo-cicd-app" and Select the compute platform as EC2/On-premises.
Further, click on "create deployment group" and named it "demo-deploy-grp".
Deployment groups within CodeDeploy are used to specify the instances where our application will be deployed.

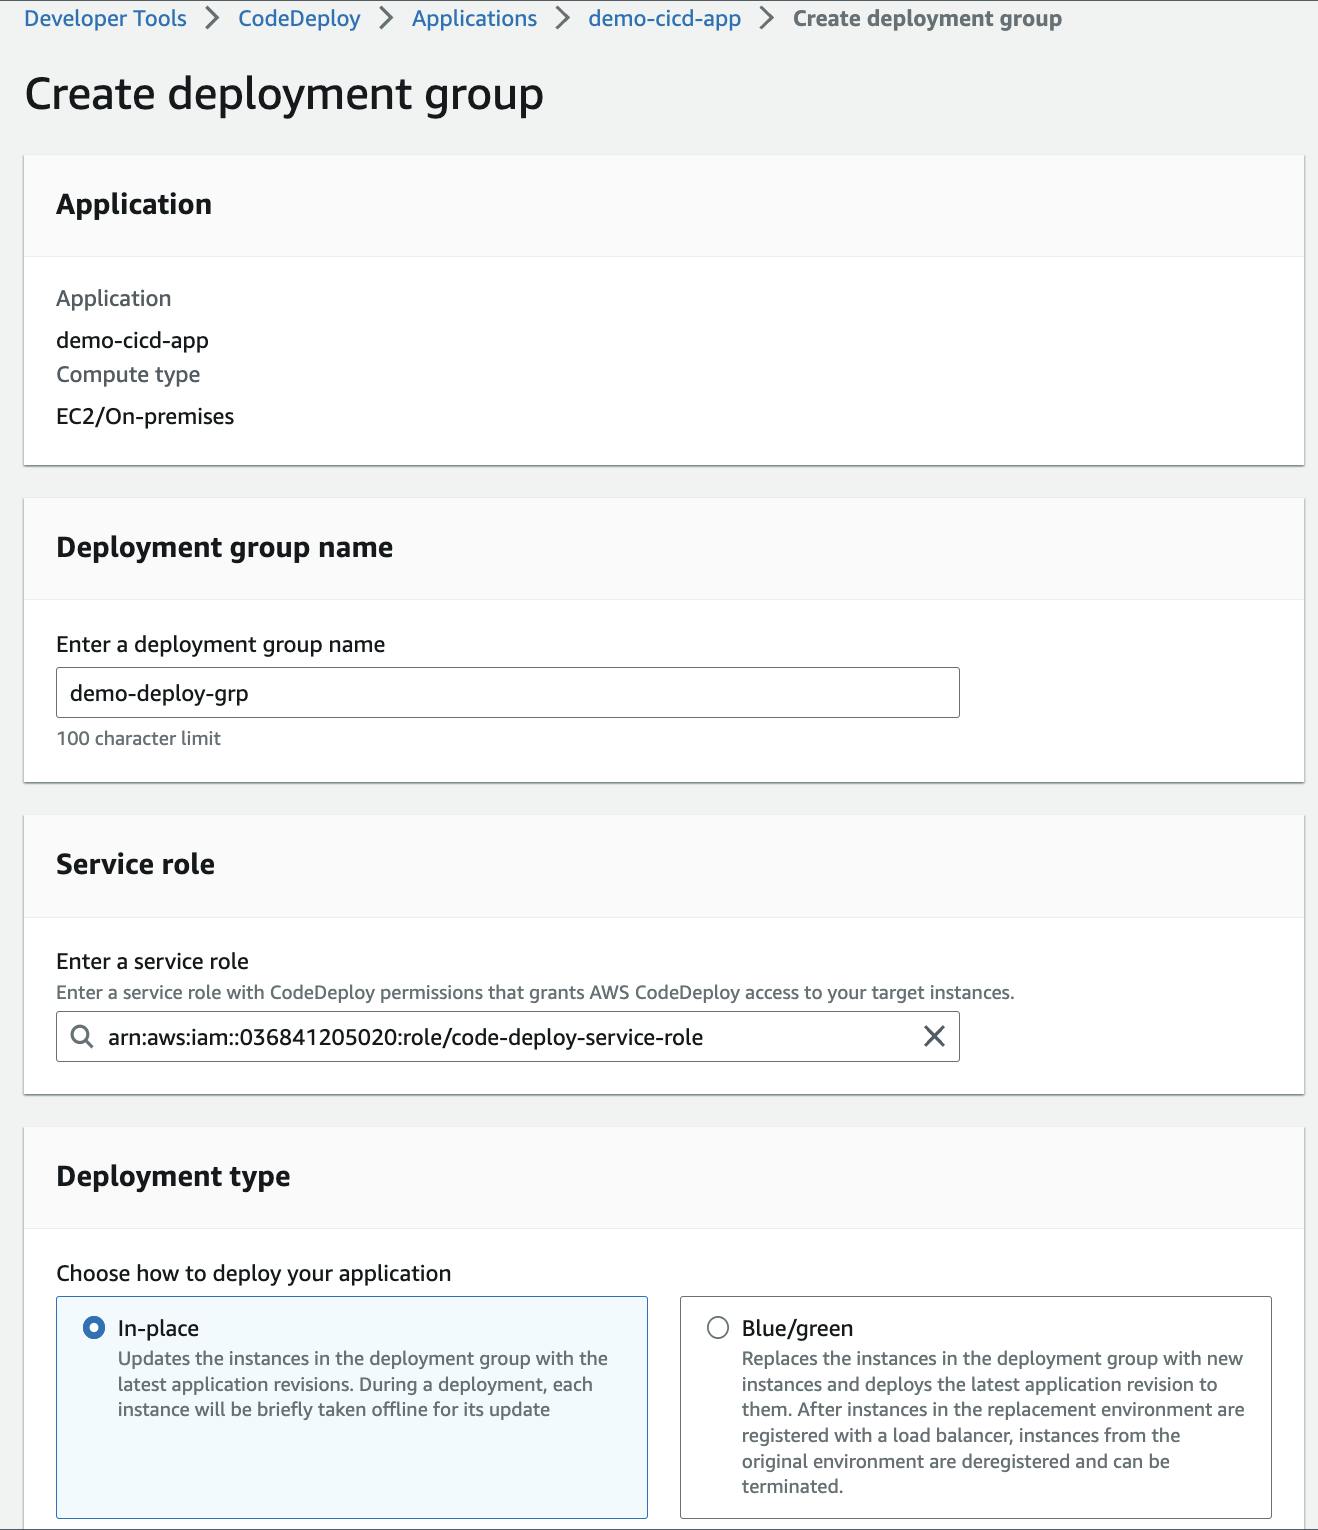
- Now we need to create a new service role for CodeDeploy so that our CodeDeploy agent can communicate with our EC2 instance which will be provisioned and then copy-paste the service role ARN
After setting up the service role now we need to setup an EC2 instance over which our application needs to be deployed.
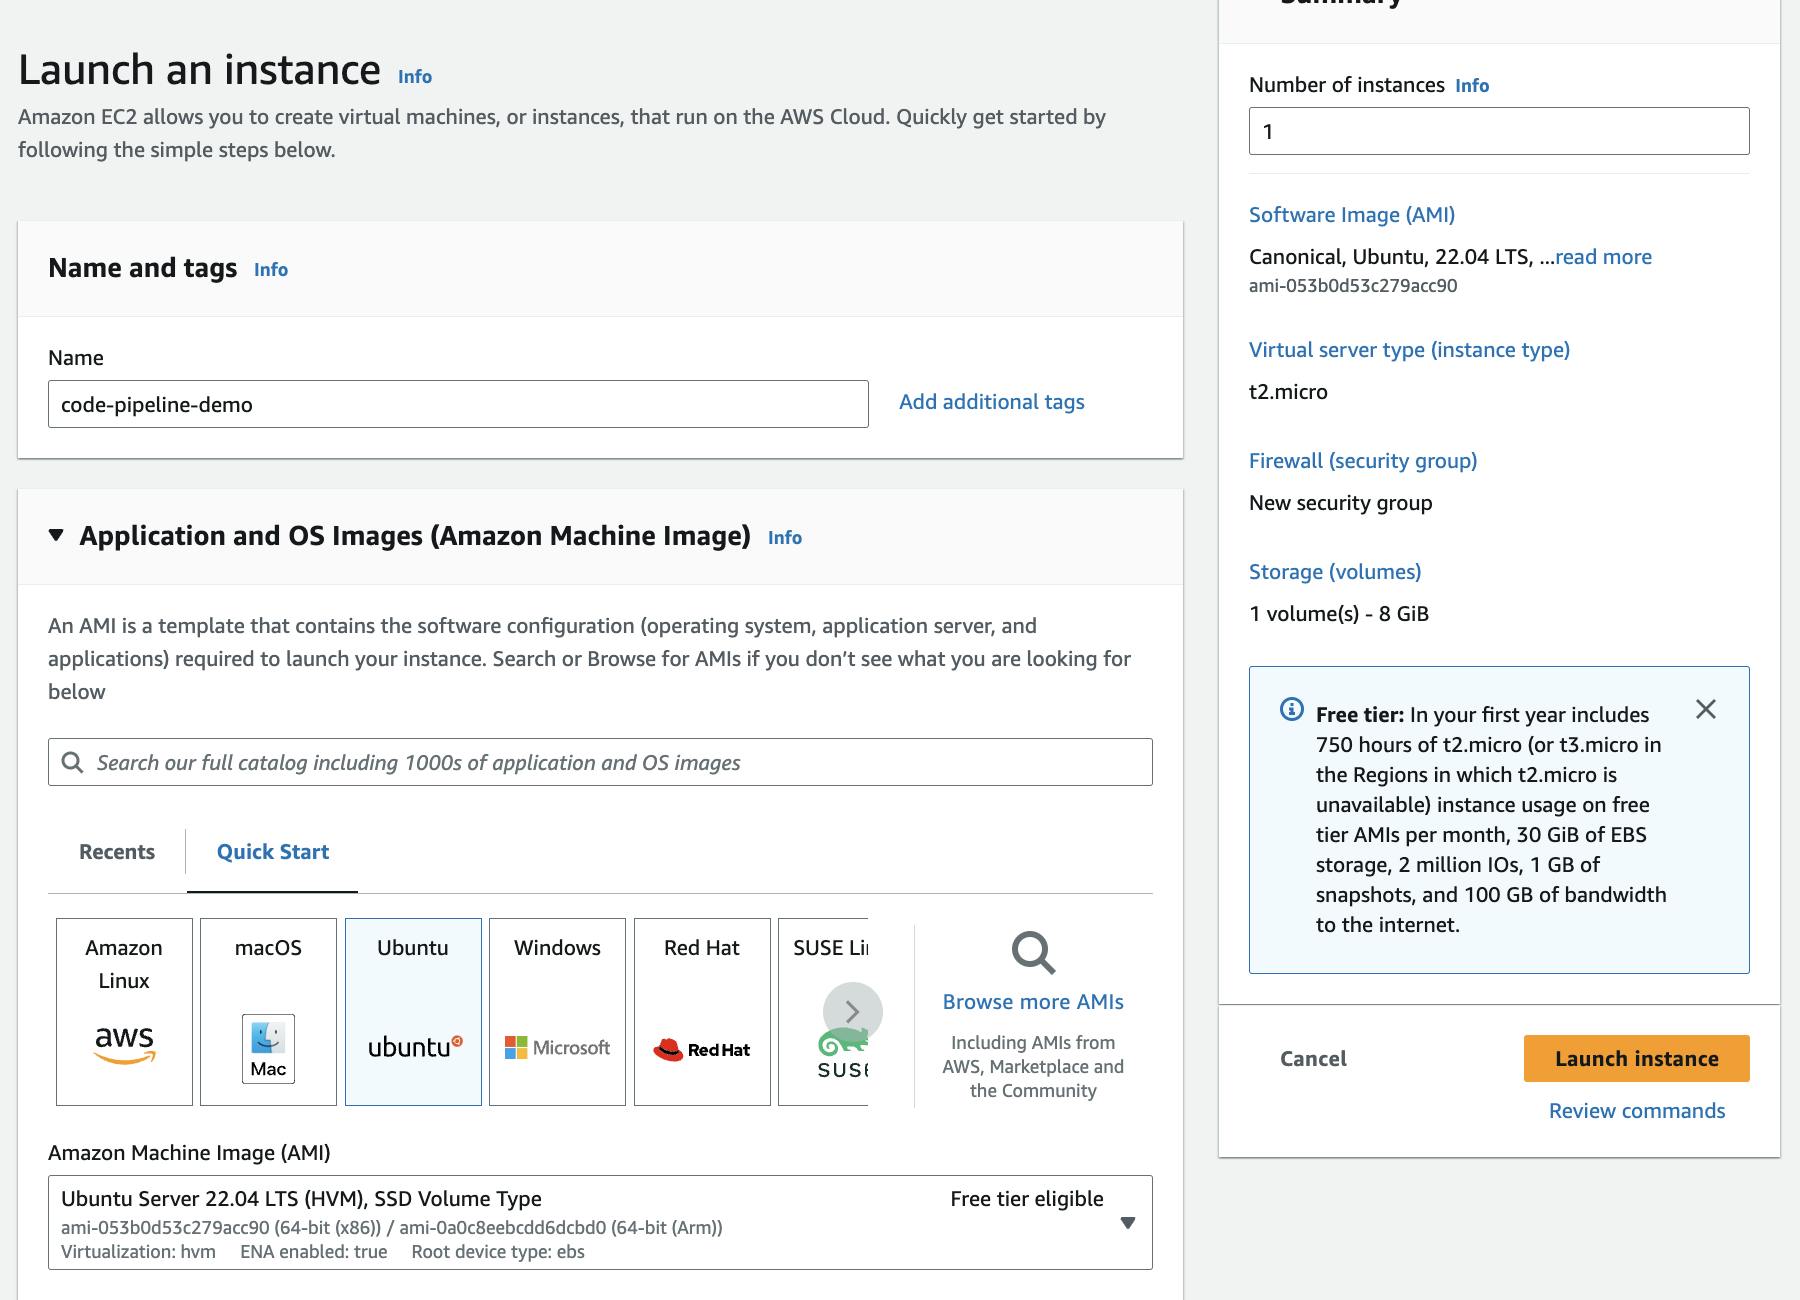
Further, come back over to the deployment group and configure the environment by selecting an EC2 instance. Selecting the appropriate named "code-pipeline-demo" EC2 instance.

Finally, click on "create deployment group" and our deployment group will be initialized.

Now let us install the CodeDeploy agent, in our EC2 instance which will establish a connection within the deployment group, and proceed with the installation process. Prior we need to execute the subsequent commands:
Run
viminstall.shand paste the script that contains all the required dependencies#!/bin/bash # This installs the CodeDeploy agent and its prerequisites on Ubuntu 22.04. sudo apt-get update sudo apt-get install ruby-full ruby-webrick wget -y cd /tmp wget https://aws-codedeploy-us-east-1.s3.us-east-1.amazonaws.com/releases/codedeploy-agent_1.3.2-1902_all.deb mkdir codedeploy-agent_1.3.2-1902_ubuntu22 dpkg-deb -R codedeploy-agent_1.3.2-1902_all.deb codedeploy-agent_1.3.2-1902_ubuntu22 sed 's/Depends:.*/Depends:ruby3.0/' -i ./codedeploy-agent_1.3.2-1902_ubuntu22/DEBIAN/control dpkg-deb -b codedeploy-agent_1.3.2-1902_ubuntu22/ sudo dpkg -i codedeploy-agent_1.3.2-1902_ubuntu22.deb systemctl list-units --type=service | grep codedeploy sudo service codedeploy-agent statusExecute the
bashinstall.shon the EC2 instance to install the dependencies.The main component in CodeDeploy is the presence on
appspec.ymlfile.
The
appspec.ymlfile is like a set of instructions for deploying an application. It tells the deployment tool where to put the files, which scripts to run, and how to start the application.It's like a recipe that guides the deployment process.
    version: 0.0
    os: linux
    files:
      - source: /
        destination: /var/www/html
    hooks:
      AfterInstall:
        - location: scripts/install-nginx.sh
          timeout: 300
          runas: root
      ApplicationStart:
        - location: scripts/start-nginx.sh
          timeout: 300
          runas: root
Let's now deploy our application using CodeDeploy. Prior to that, we need to create a deployment select the deployment group created earlier and choose the revision type as "Amazon S3" and paste the copied URL of the S3 bucket over there to initiate the deployment.

Alongside we also need to grant permissions to EC2 for that we need to assign the "ec2-code-deploy" IAM role to the EC2 instance to grant necessary permissions.
The IAM Role includes:

Additionally, we need to make sure the created IAM Role must be attached to our created EC2 instance which can be done by the following process
Select the instance > Actions > security > Modify IAM role
Now we need to update our EC2 instance and run the command
sudo service codedeploy-agent restartto restart the CodeDeploy agent since we added need IAM role to our Instance.Finally, check the Deployment Status and it should show as "deployed" upon successful completion.
Here's the Output:
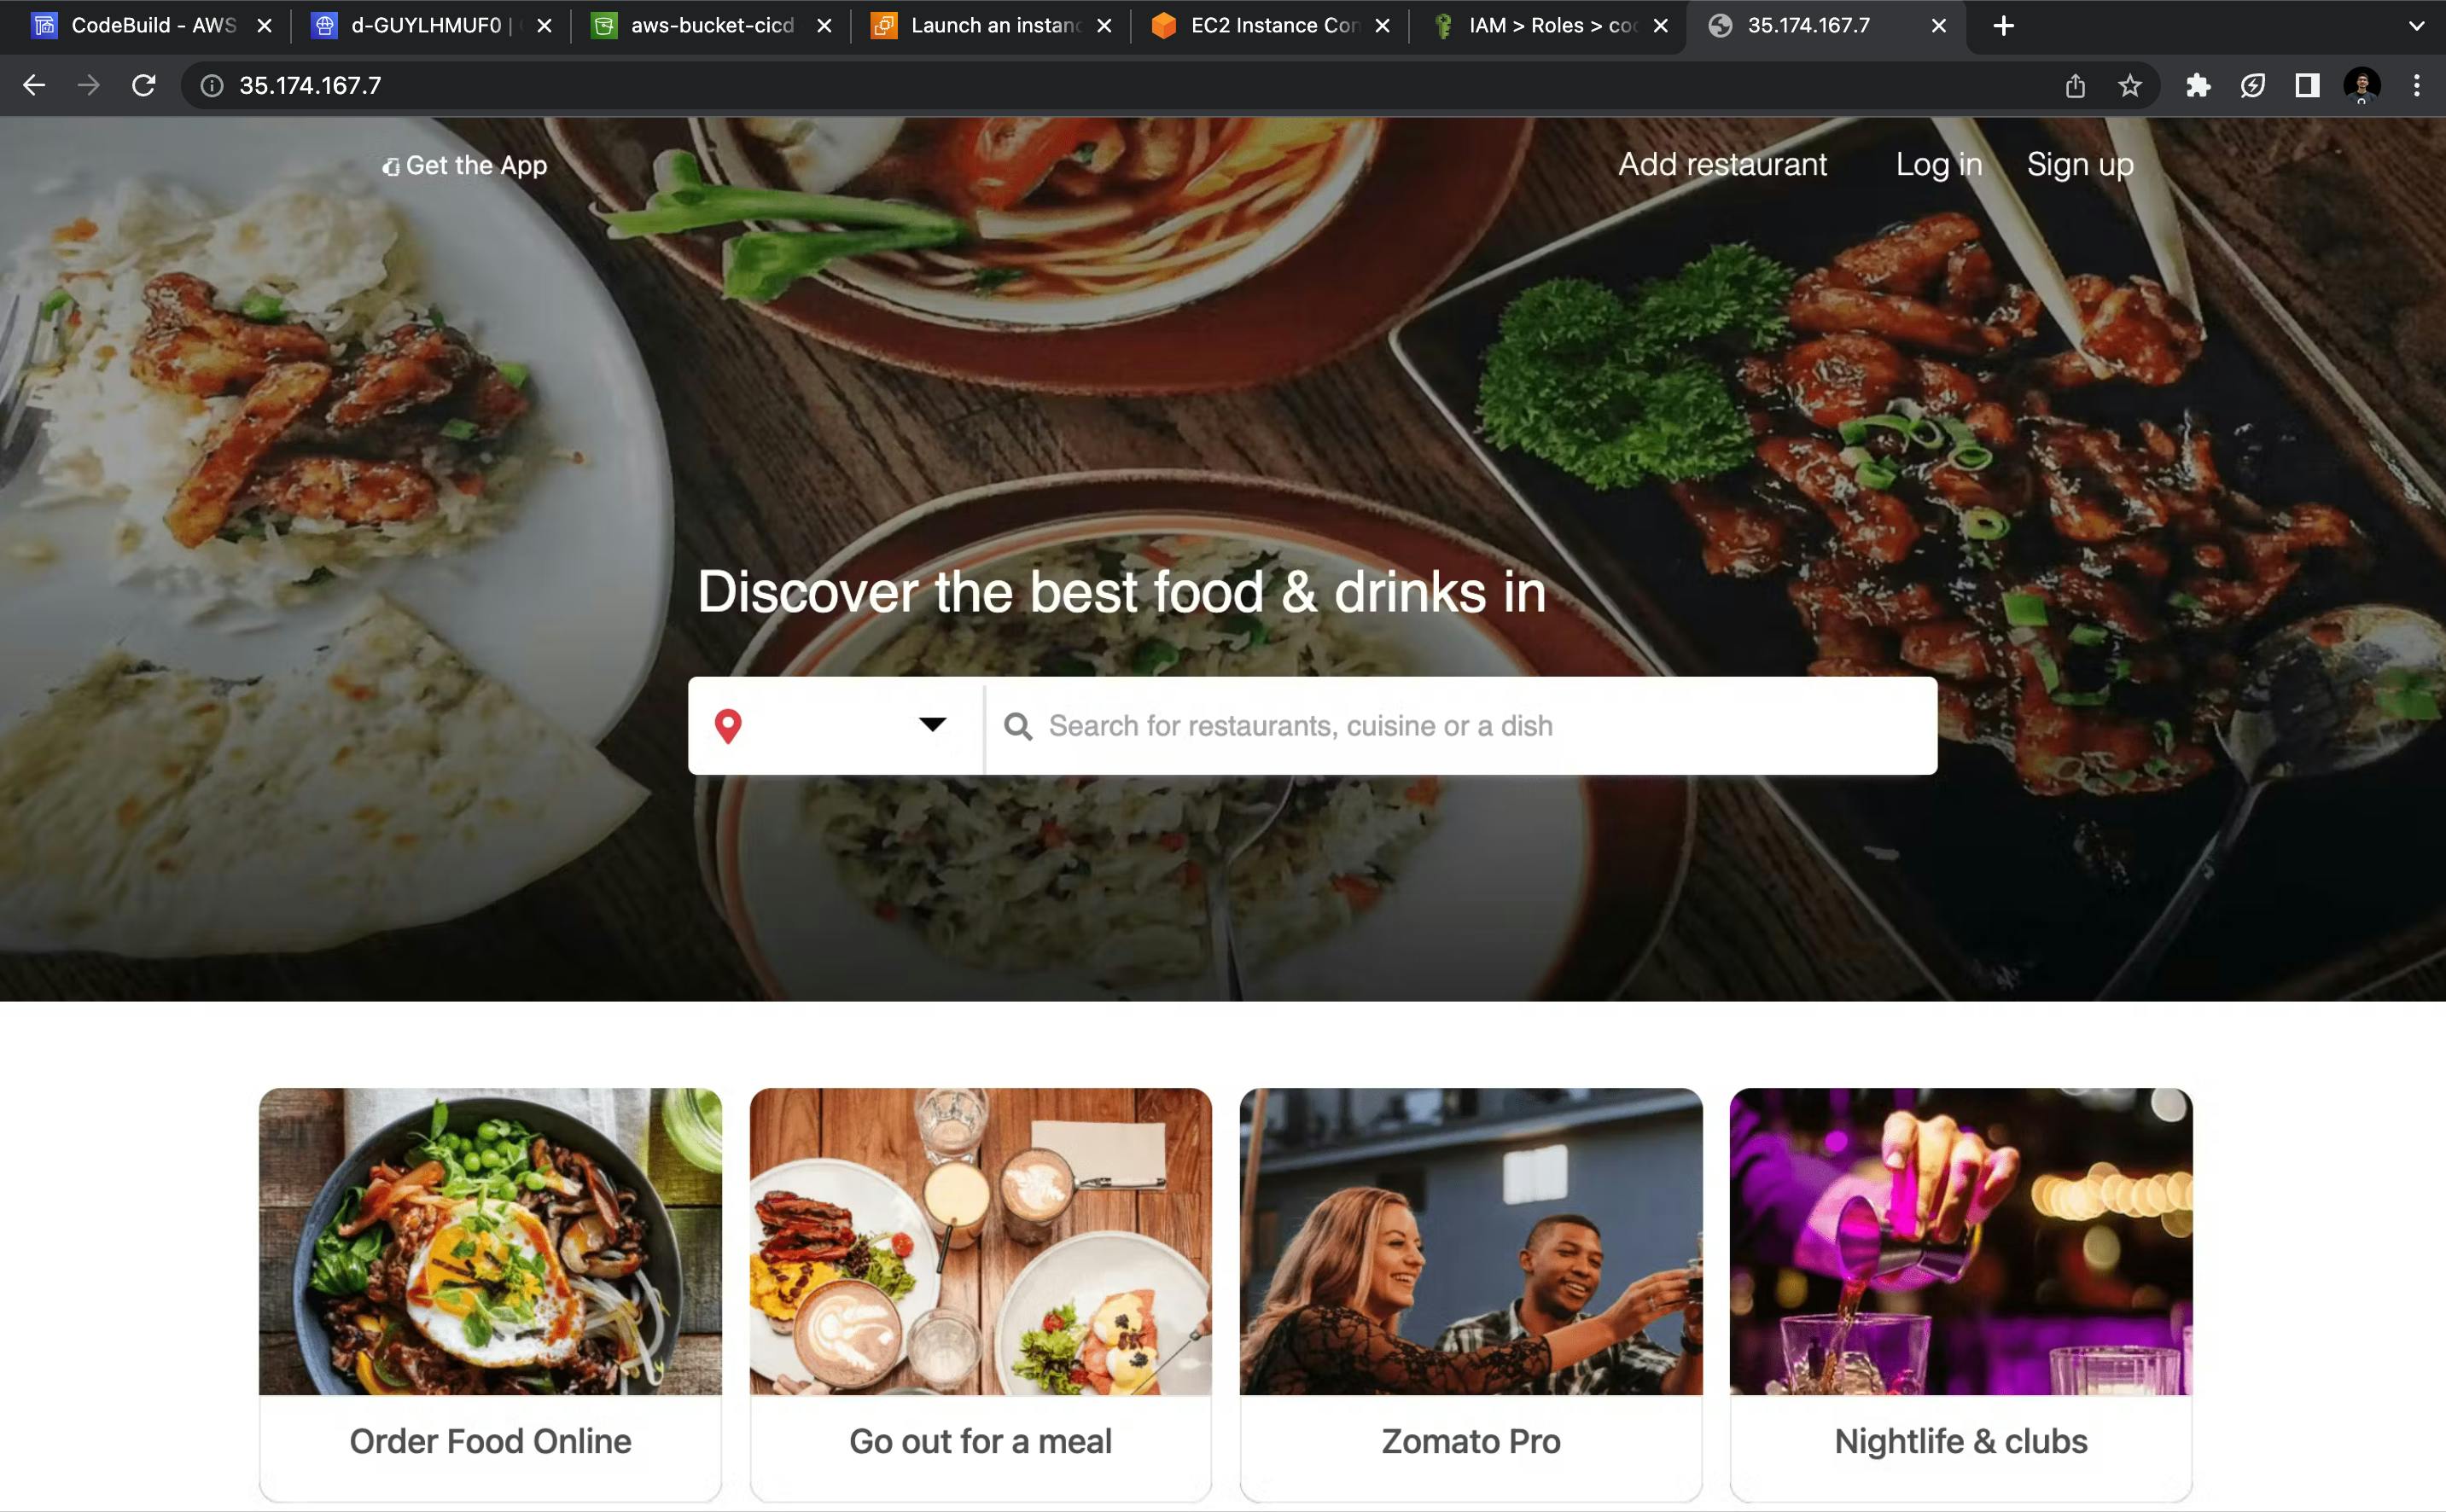
Inconclusion
In summary, AWS CodeCommit, CodeBuild, and CodeDeploy are the superhero trio that can transform your software development and deployment process. With their streamlined approach, you can build, test, and release code reliably, enhancing efficiency and saving time.
Thanks for reading any Feedback are welcome!! :)
Follow me here on Hashnode or Twitter/LinkedIn to stay up-to-date with my latest blog posts and hands-on tutorials.