

Scaling Your Containers with Amazon ECS and ECR: A Practical Tutorial
Using Amazon Container services to deploy a web based application to AWS


Hello Everyone 👋 In this blog, we are going to deploy a simple web-based application built on an AWS ECS & ECR. Deploying a web application on AWS ECS (Elastic Container Service) and ECR (Elastic Container Registry) can be a powerful way to streamline your software development and deployment process. With the ability to deploy applications as containers, ECS and ECR make it easier to build, test, and release code quickly and reliably.
Note: Before getting started with the Project you need to have an AWS Tier account for setting up your AWS account if you are using it for the first time, you can check out this video
Github Repo: Repository
So let's get started
Let's start by creating an EC2 instance
Now let's launch an instance by clicking on 'Launch instances'
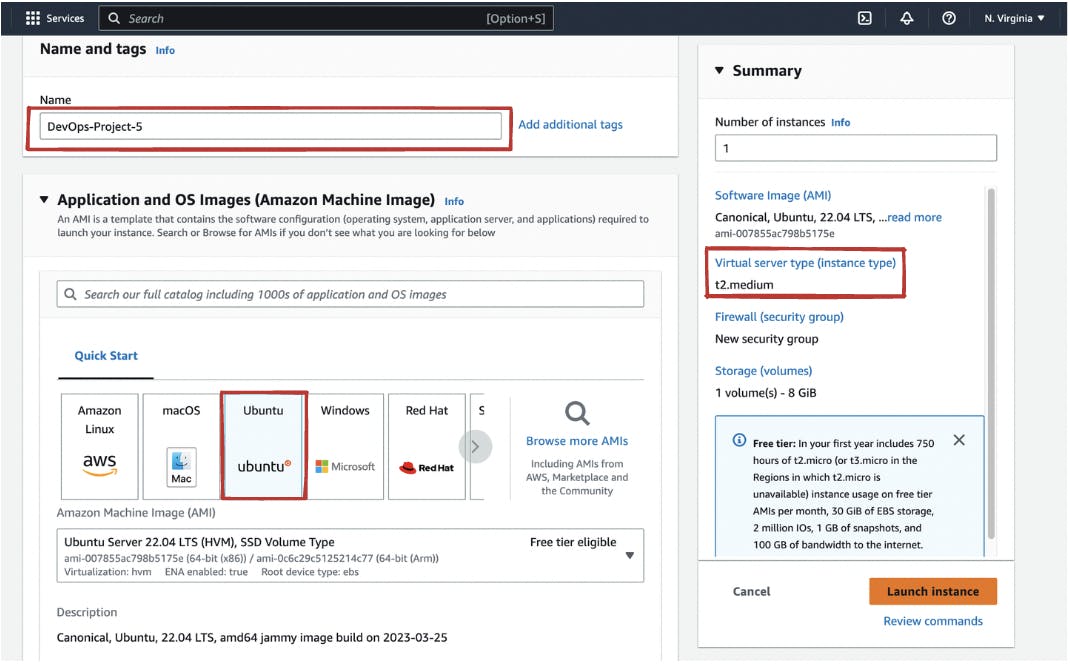
Now, enter some details for your instance, name it 'DevOps_Project-5'
I am opting for Ubuntu Server(free tier) here.
Make sure that the selected server you are opting for lies in the free tier
Choose the size of the instance "t2.medium".
And now Let's create a key pair for your instance, name it
aws-jenkinsto choose ".pem", if you are going to use SSH to connect to your instance, or ".ppk" if you are using putty & download it and now launch the instance.Click on “Connect” and select the "EC2 instance connect” option to connect with our instance.
Other Requirements Installing AWS CLI and Configure
Make sure you have AWS CLI configured. You can read more on how to download and configure AWS CLI here or else Let us get the installation done for AWS CLI 2
curl "https://awscli.amazonaws.com/awscli-exe-linux-x86_64.zip" -o "awscliv2.zip"
sudo apt install unzip
unzip awscliv2.zip
sudo ./aws/install
aws --version
ubuntu@ip-172-31-86-45:~$ aws --version

aws-cli/2.11.16 Python/3.11.3 Linux/5.15.0-1031-aws exe/x86_64.ubuntu.22 prompt/off
ubuntu@ip-172-31-86-45:~$ aws configure
AWS Access Key ID [None]: <Access_key>
AWS Secret Access Key [None]: <Secret_key>
Default region name [None]: us-east-1
Default output format [None]:
Our next course of action involves Installing Docker on the instance so that we can push the Docker image into the AWS container registry ☁️
#Installing Docker
sudo apt-get update
sudo apt-get install docker.io -y
sudo usermod -aG docker $USER
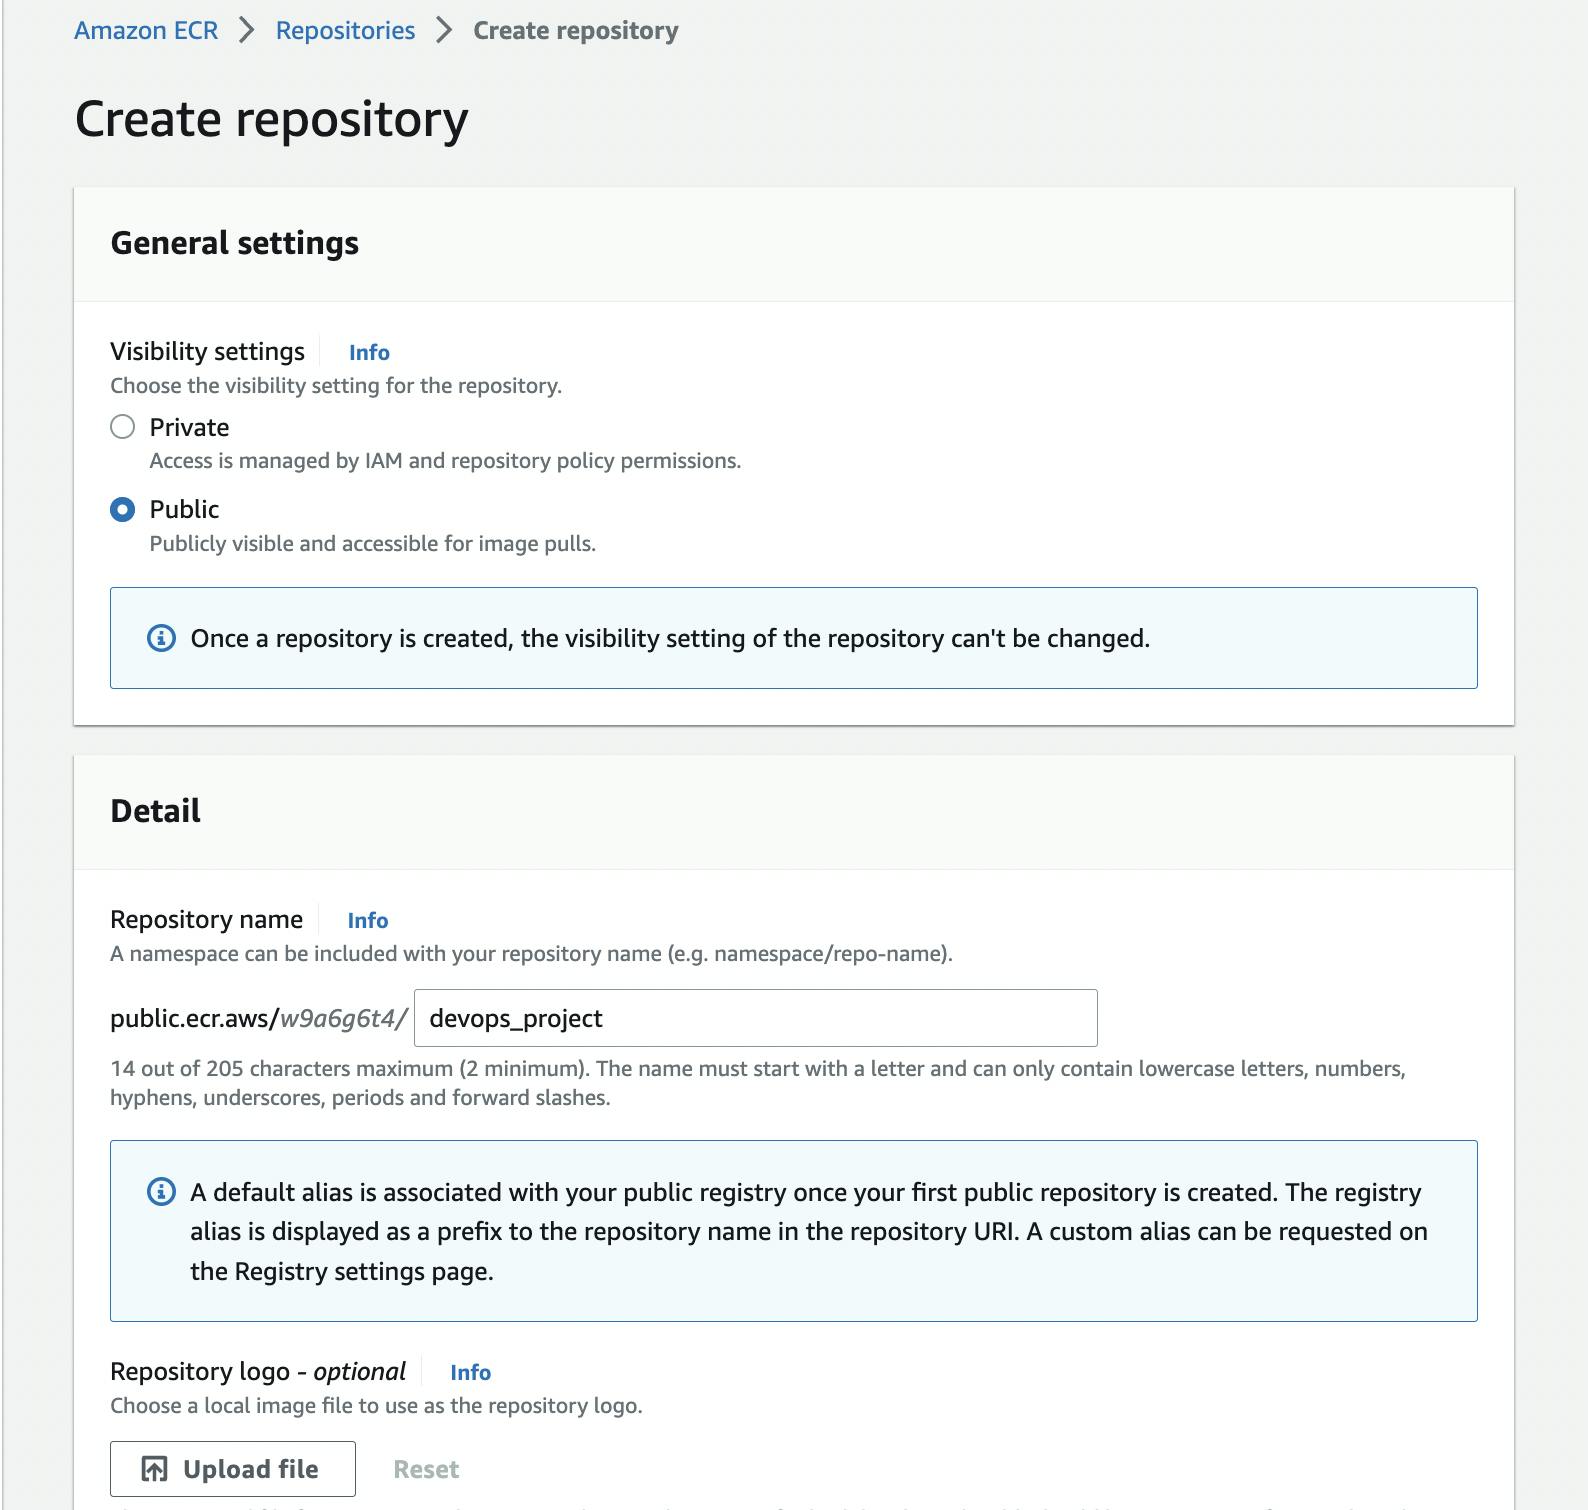
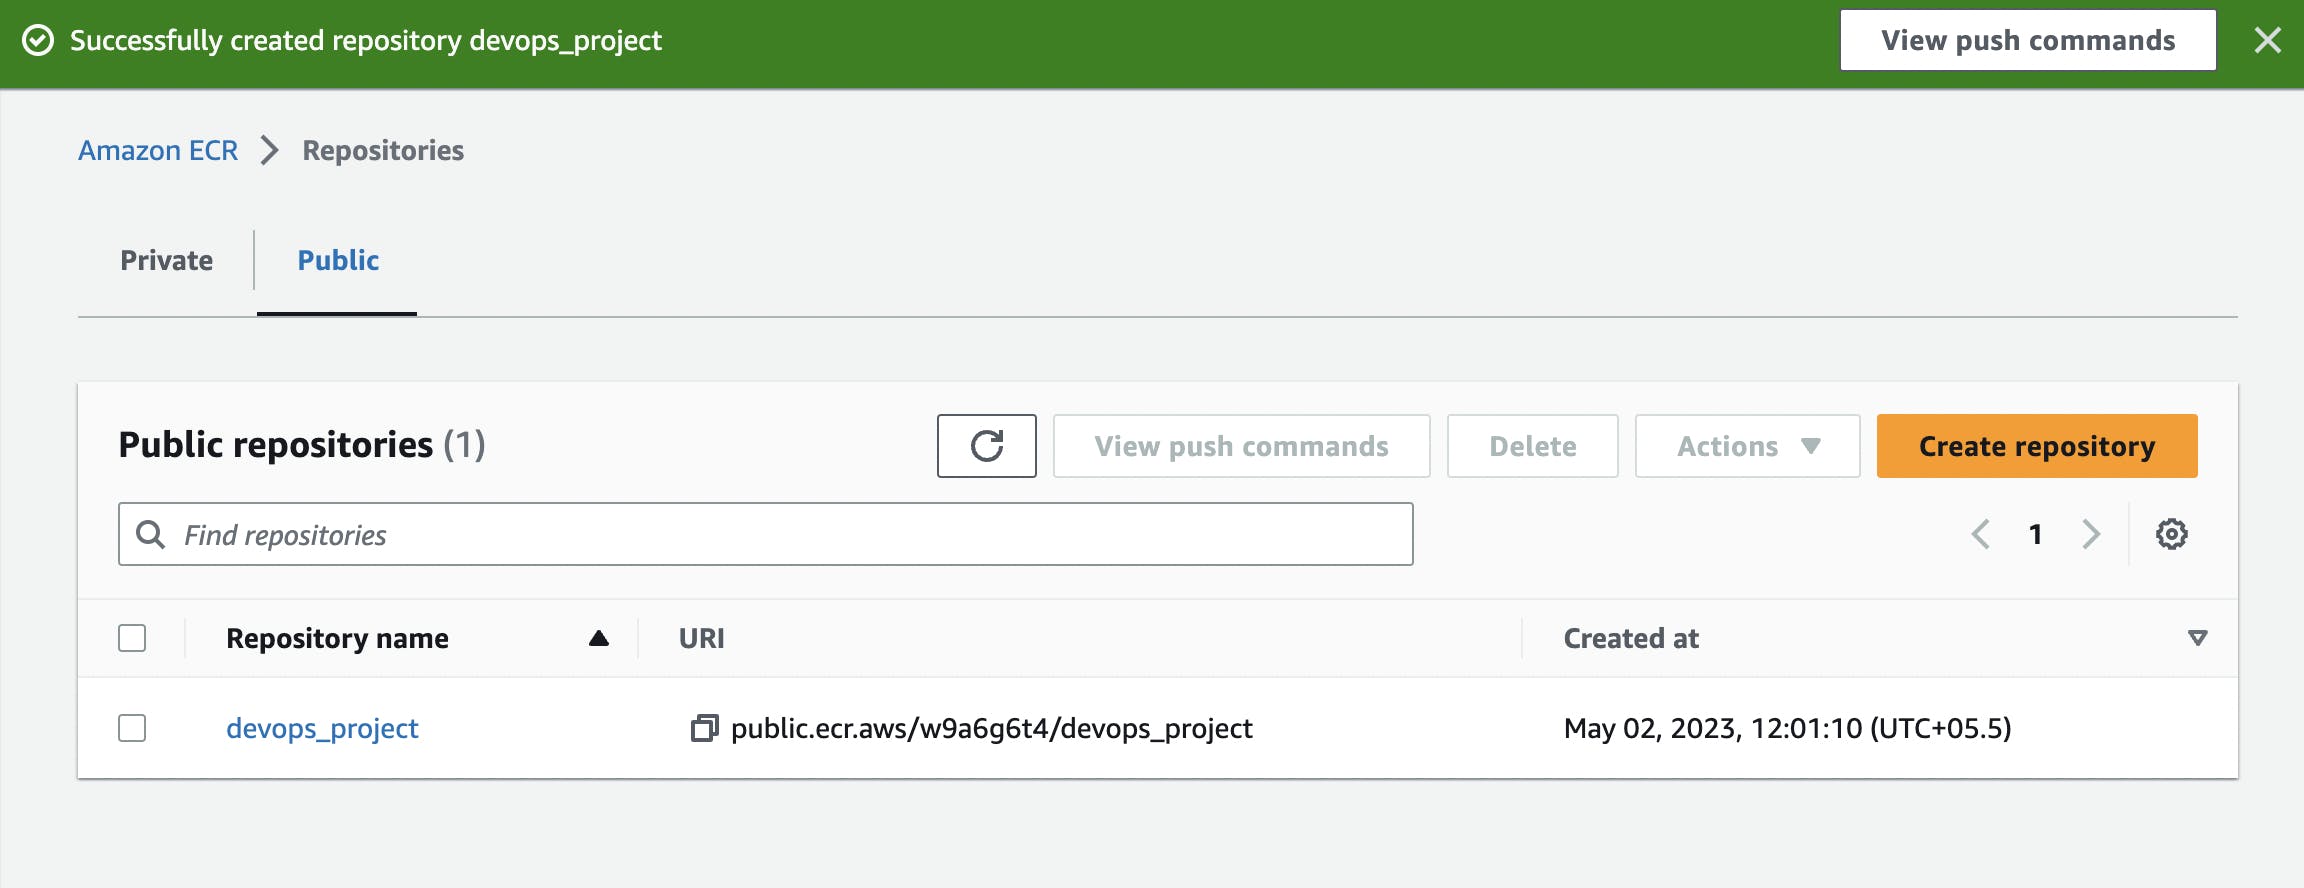
Additionally Clone the Repository and After setting up the AWS CLI configuration. Now we need to navigate to ECR and start creating a Repository.
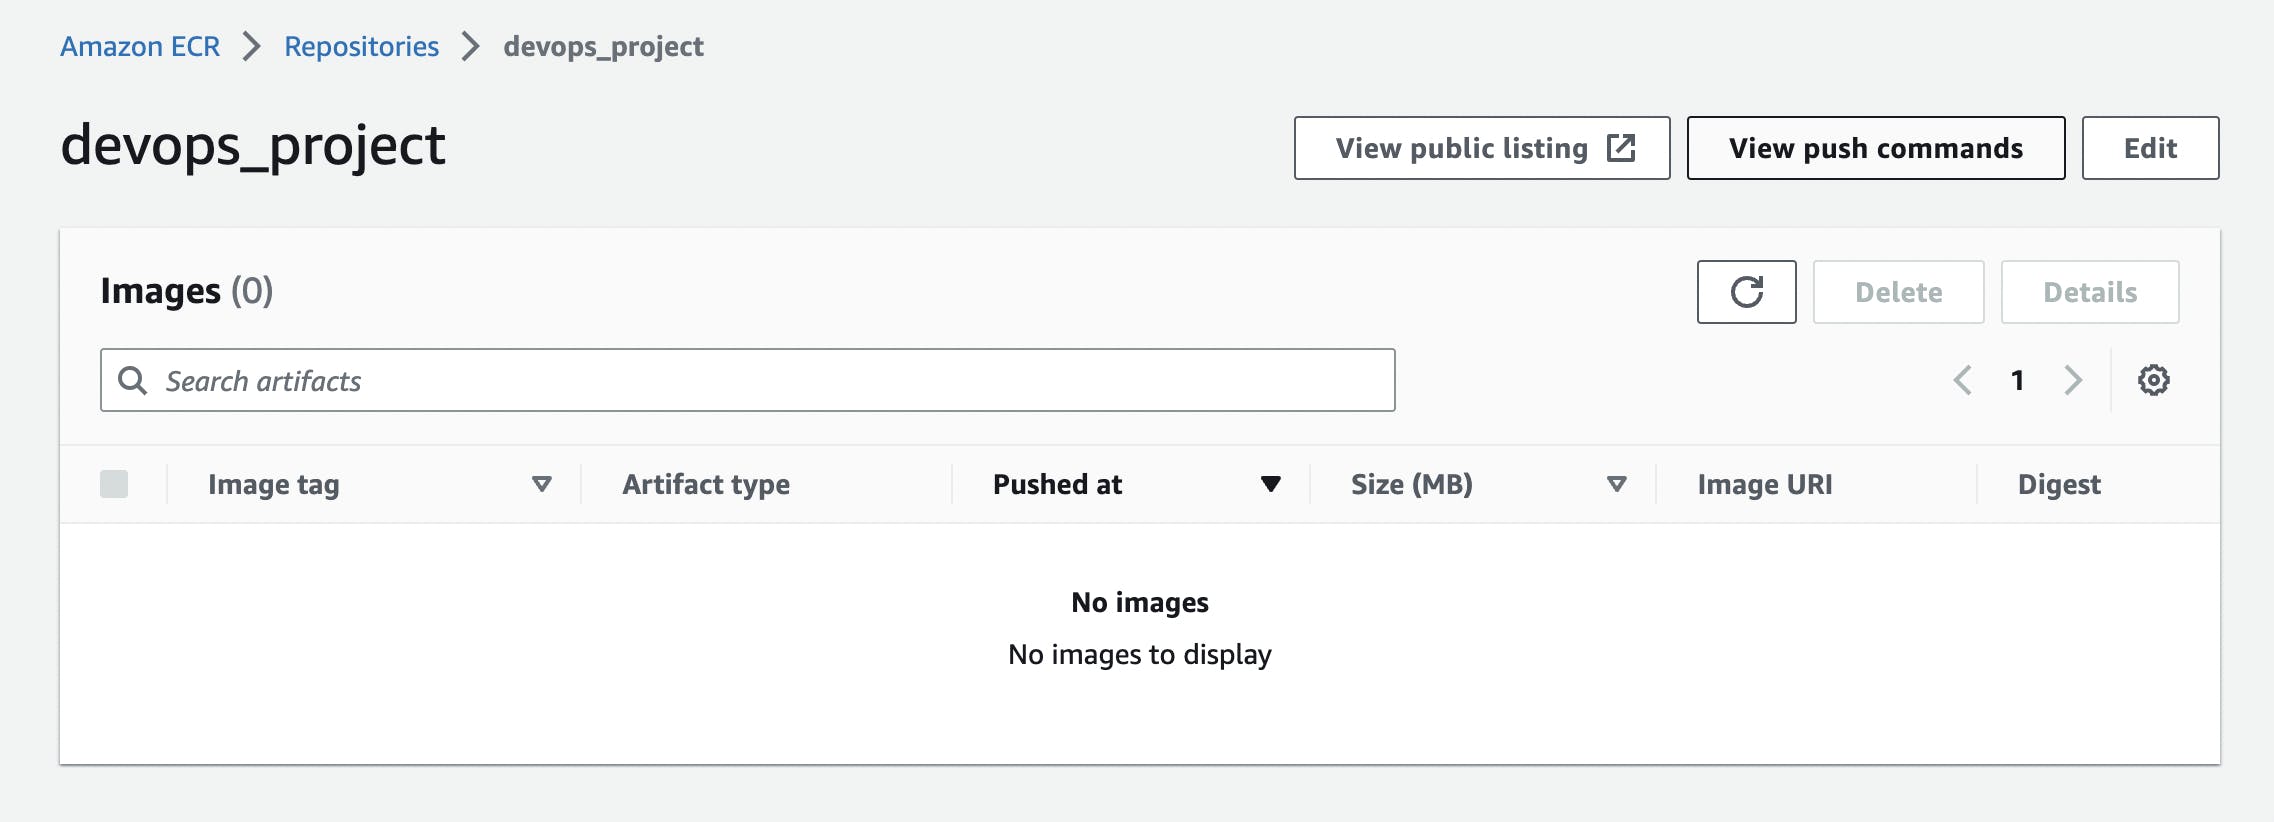
After successfully creating Repository now click on 'view push commands' and proceed to copy and paste those commands one by one onto each instance individually to build and push our docker image into the AWS container registry.
After running all the commands successfully, verify if the latest image has been pushed.

Now let's move on to setting up the Amazon ECS cluster
Click on "Clusters" in the left-hand menu and then click on "Create Cluster"
Configure your cluster details, including the name of your cluster, and networking details, including VPC and subnets (gets created by default)
And leave the rest configuration to default itself
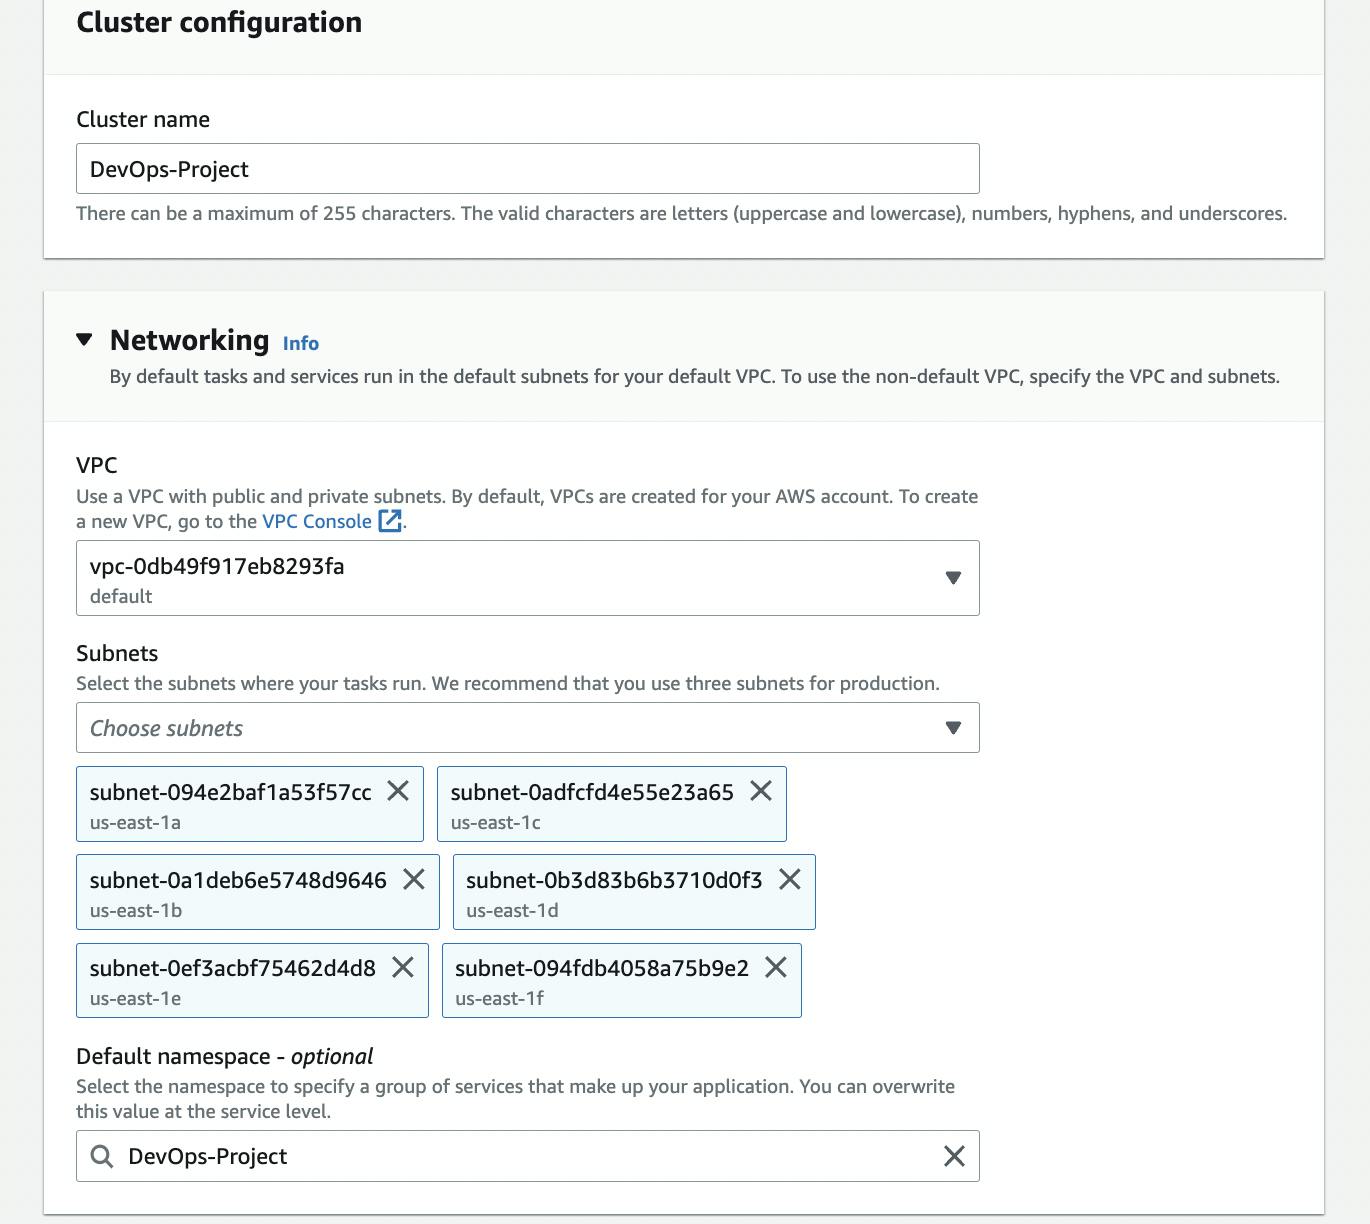
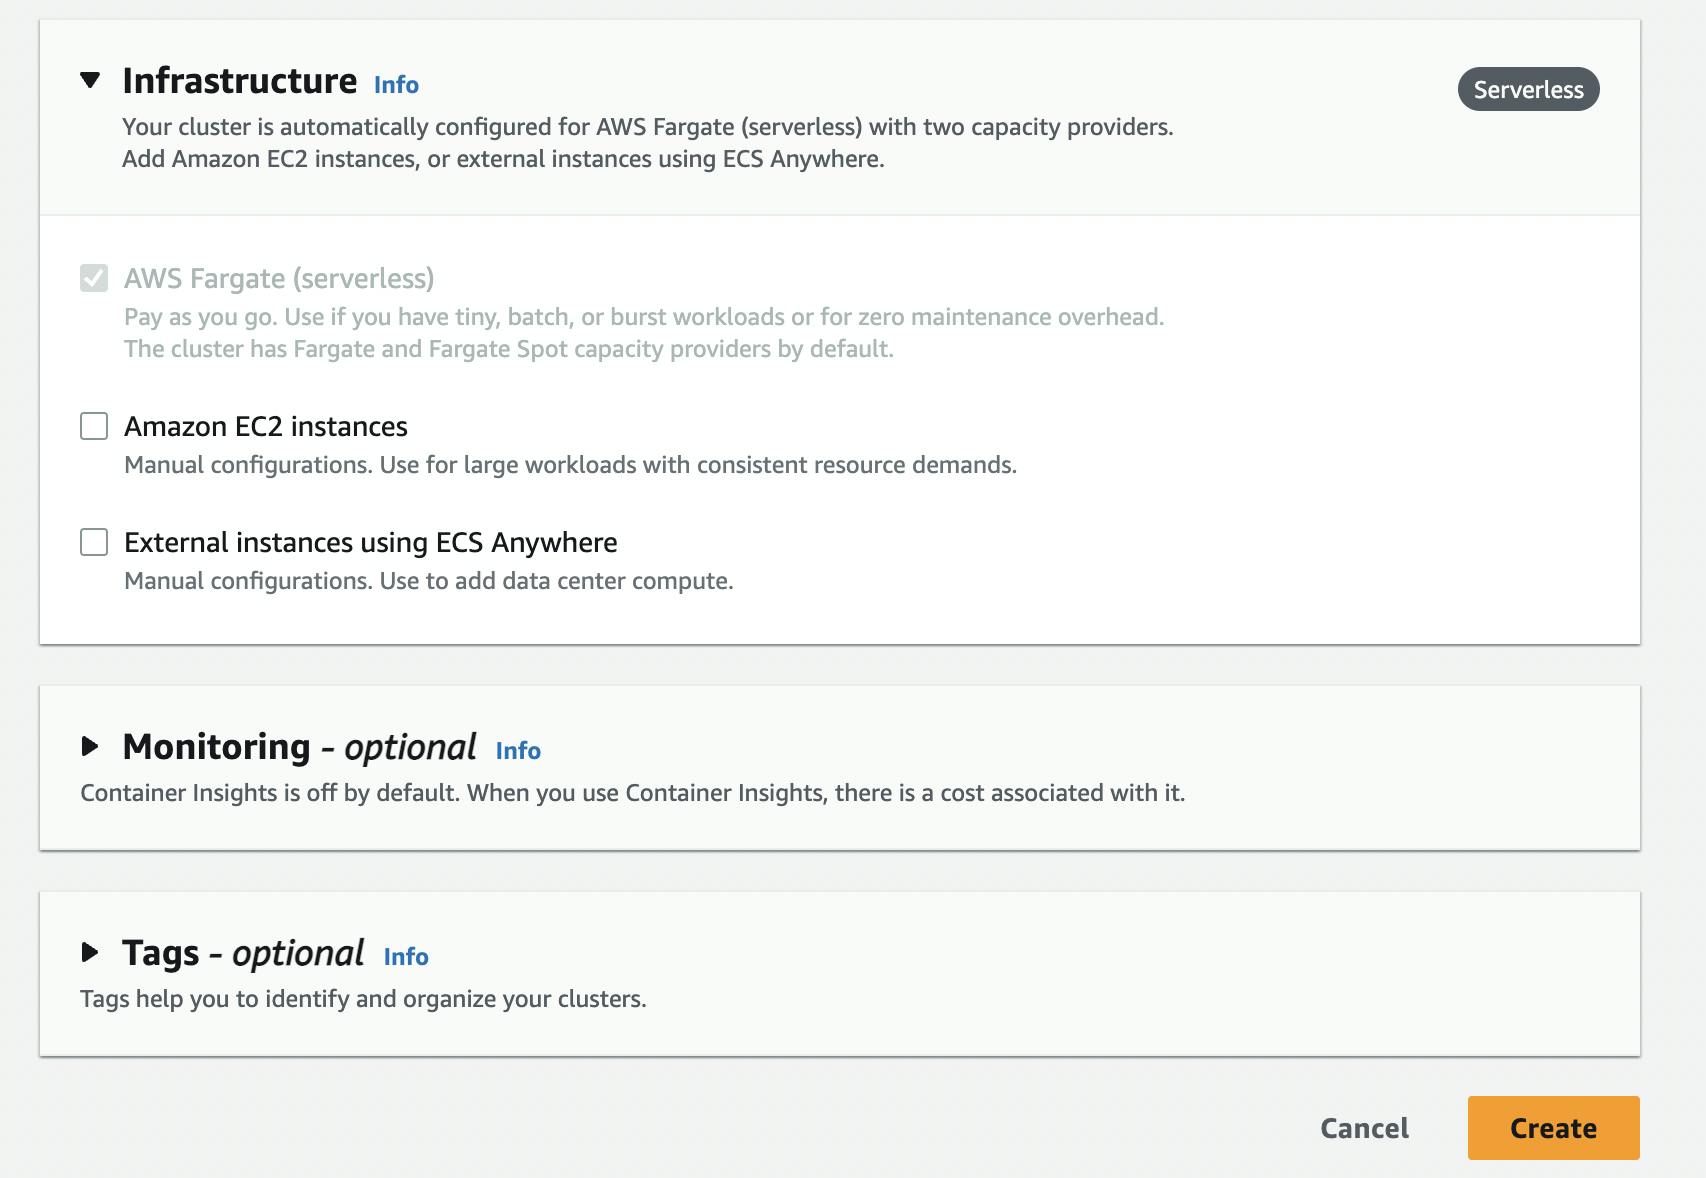
Click on 'Create'
After successfully creating and ensuring the ECS cluster is operational without any issues, the next step is to start running tasks on it.
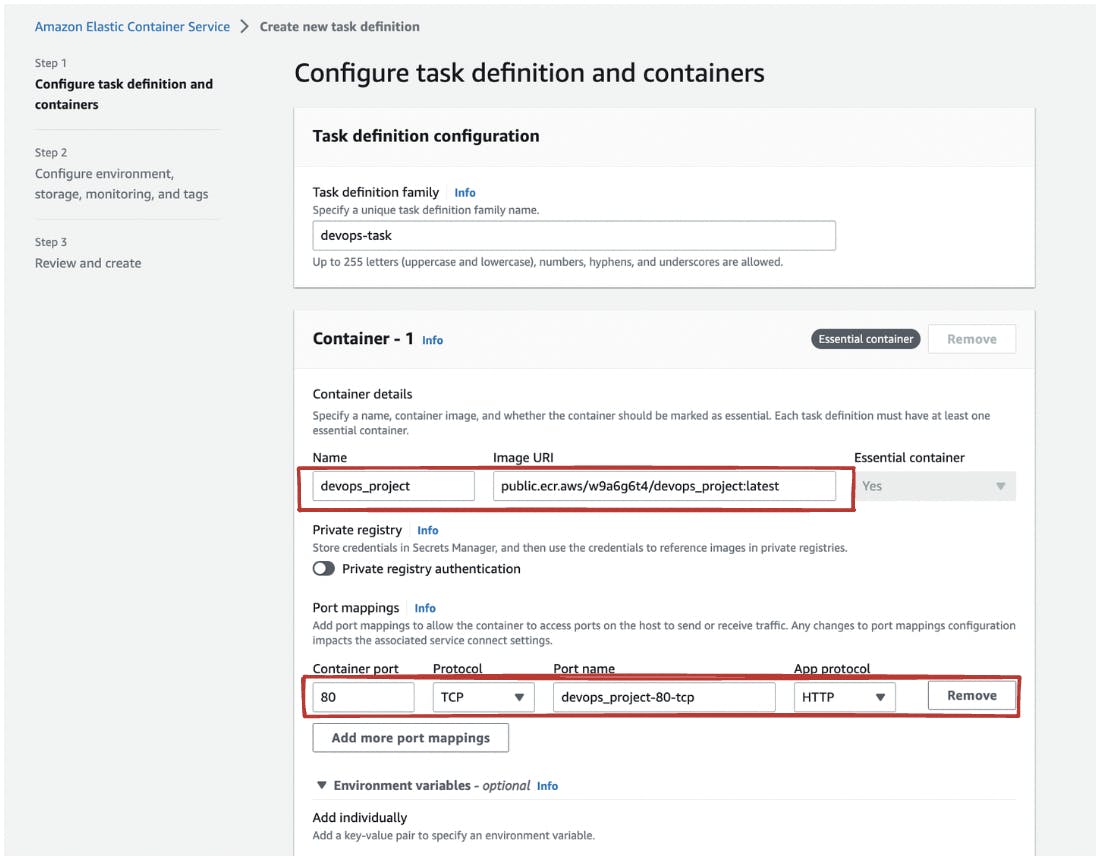
Now, the focus should be on creating a task definition for the application, which will define the Docker image and other specific configurations necessary to run our application. To begin, we need to configure the task definition by assigning a task name and including the image URL from our Amazon ECR, along with the necessary port number, and click on “Create”.
Configure environment, storage, monitoring, and tags

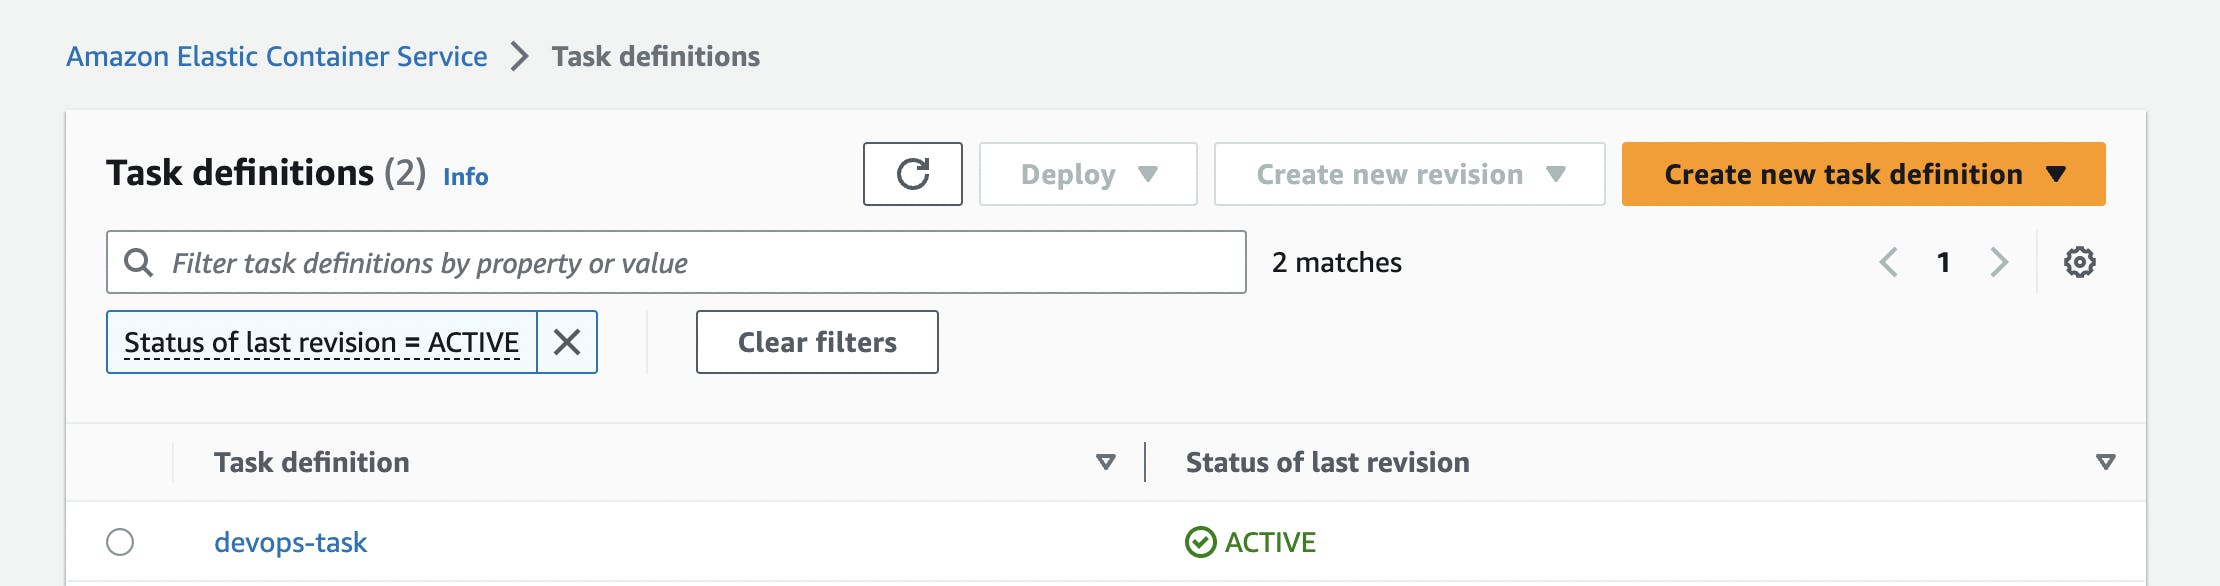
After reviewing and refining our Task definition, we were able to 'create' it successfully and it is currently active.
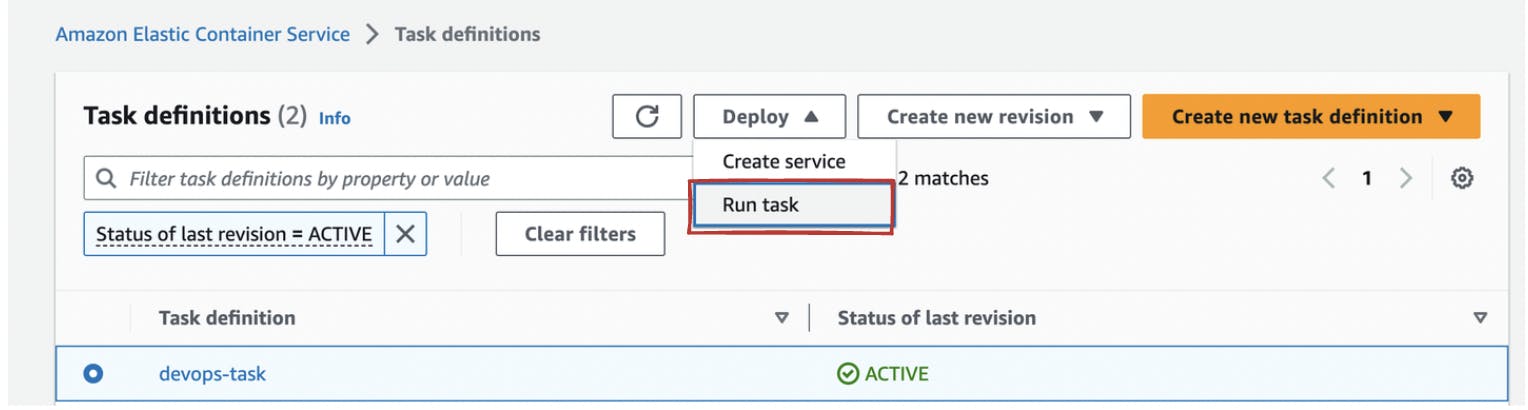
After successfully creating our task definition now we need to run our task to deploy and manage containers for our applications in a scalable and efficient manner.
Further, select the task and click on “Run Task”.
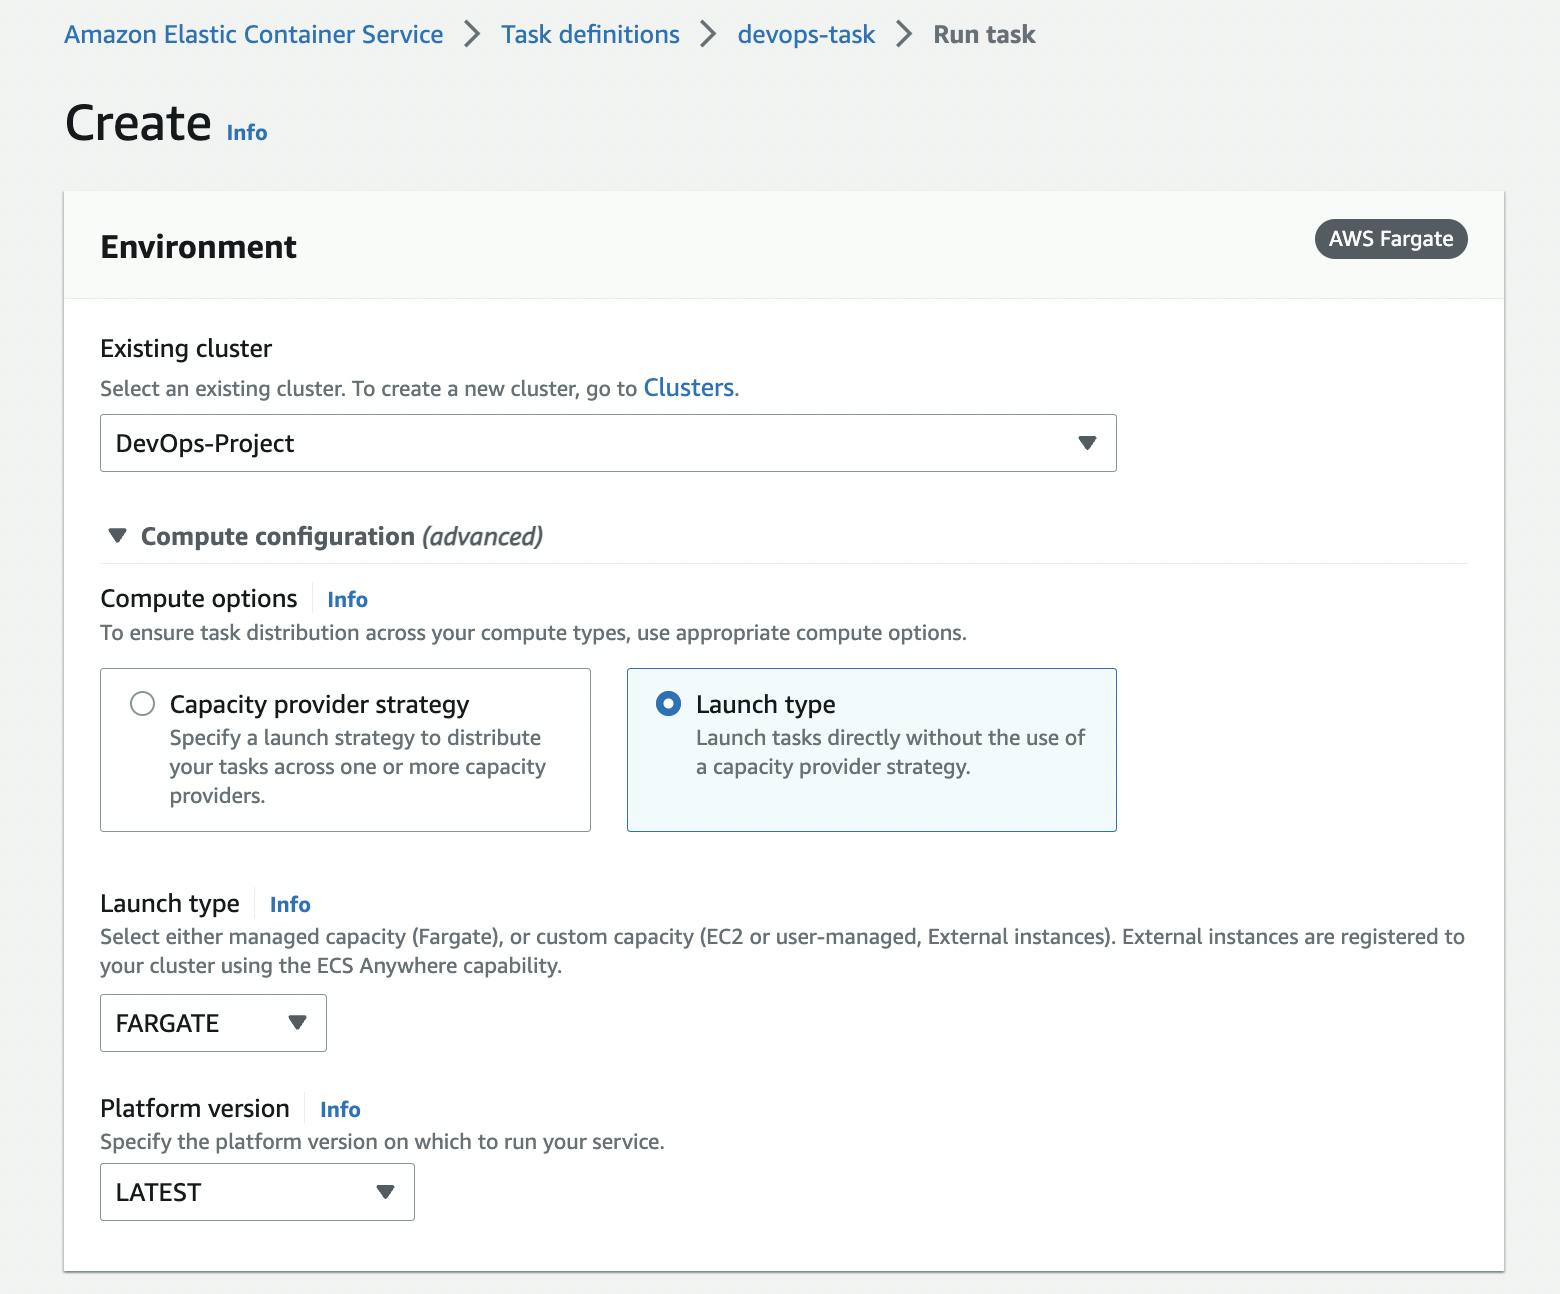
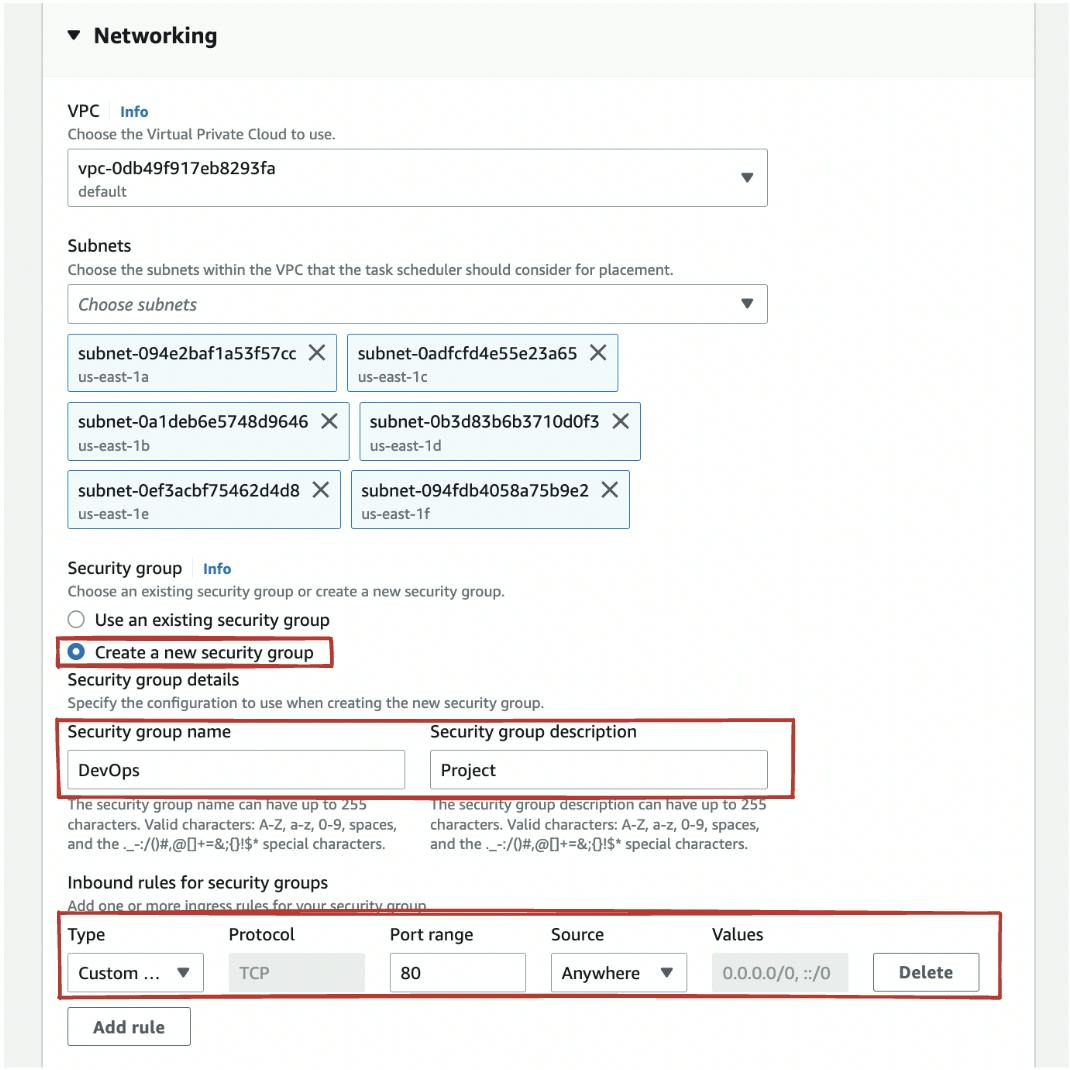
Here select the 'DevOps-Project' cluster from the existing ones and proceed to create a new security group that permits access to port 80.
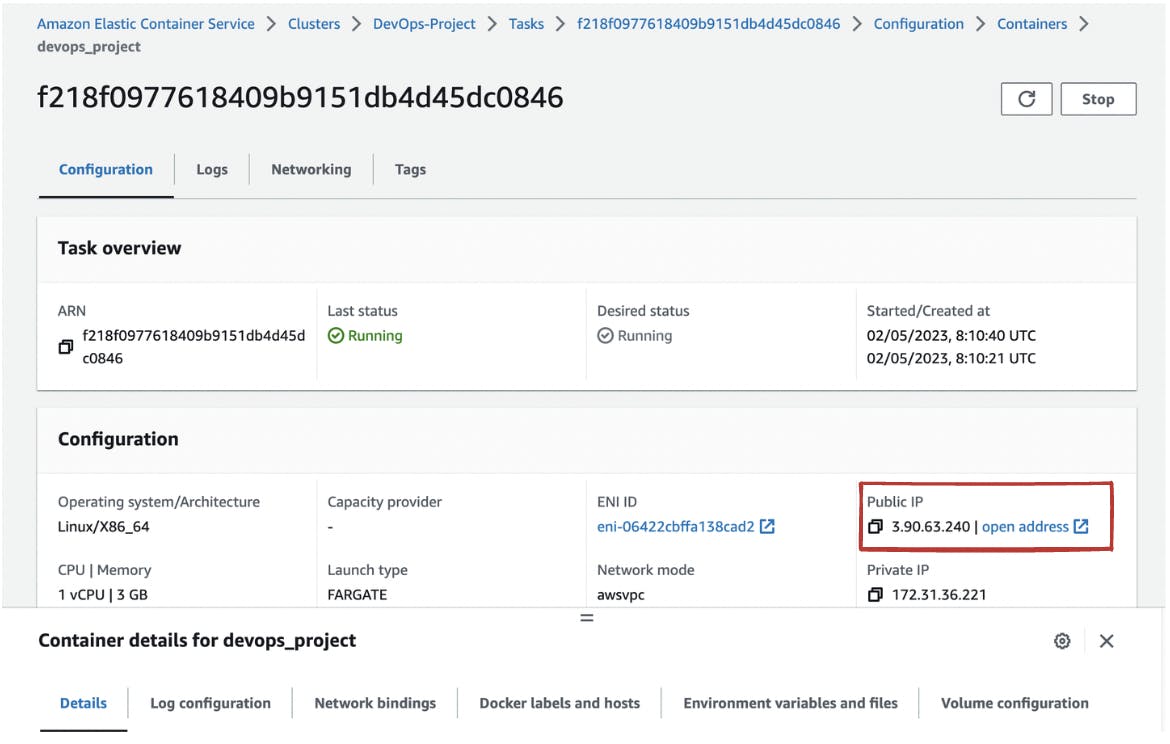
After saving it, the task within the container's "Task Definition" will initiate and start running.
Next, you will need to copy Public IP address of the container, and then your website will be live and accessible.
Here's the output💪🏻
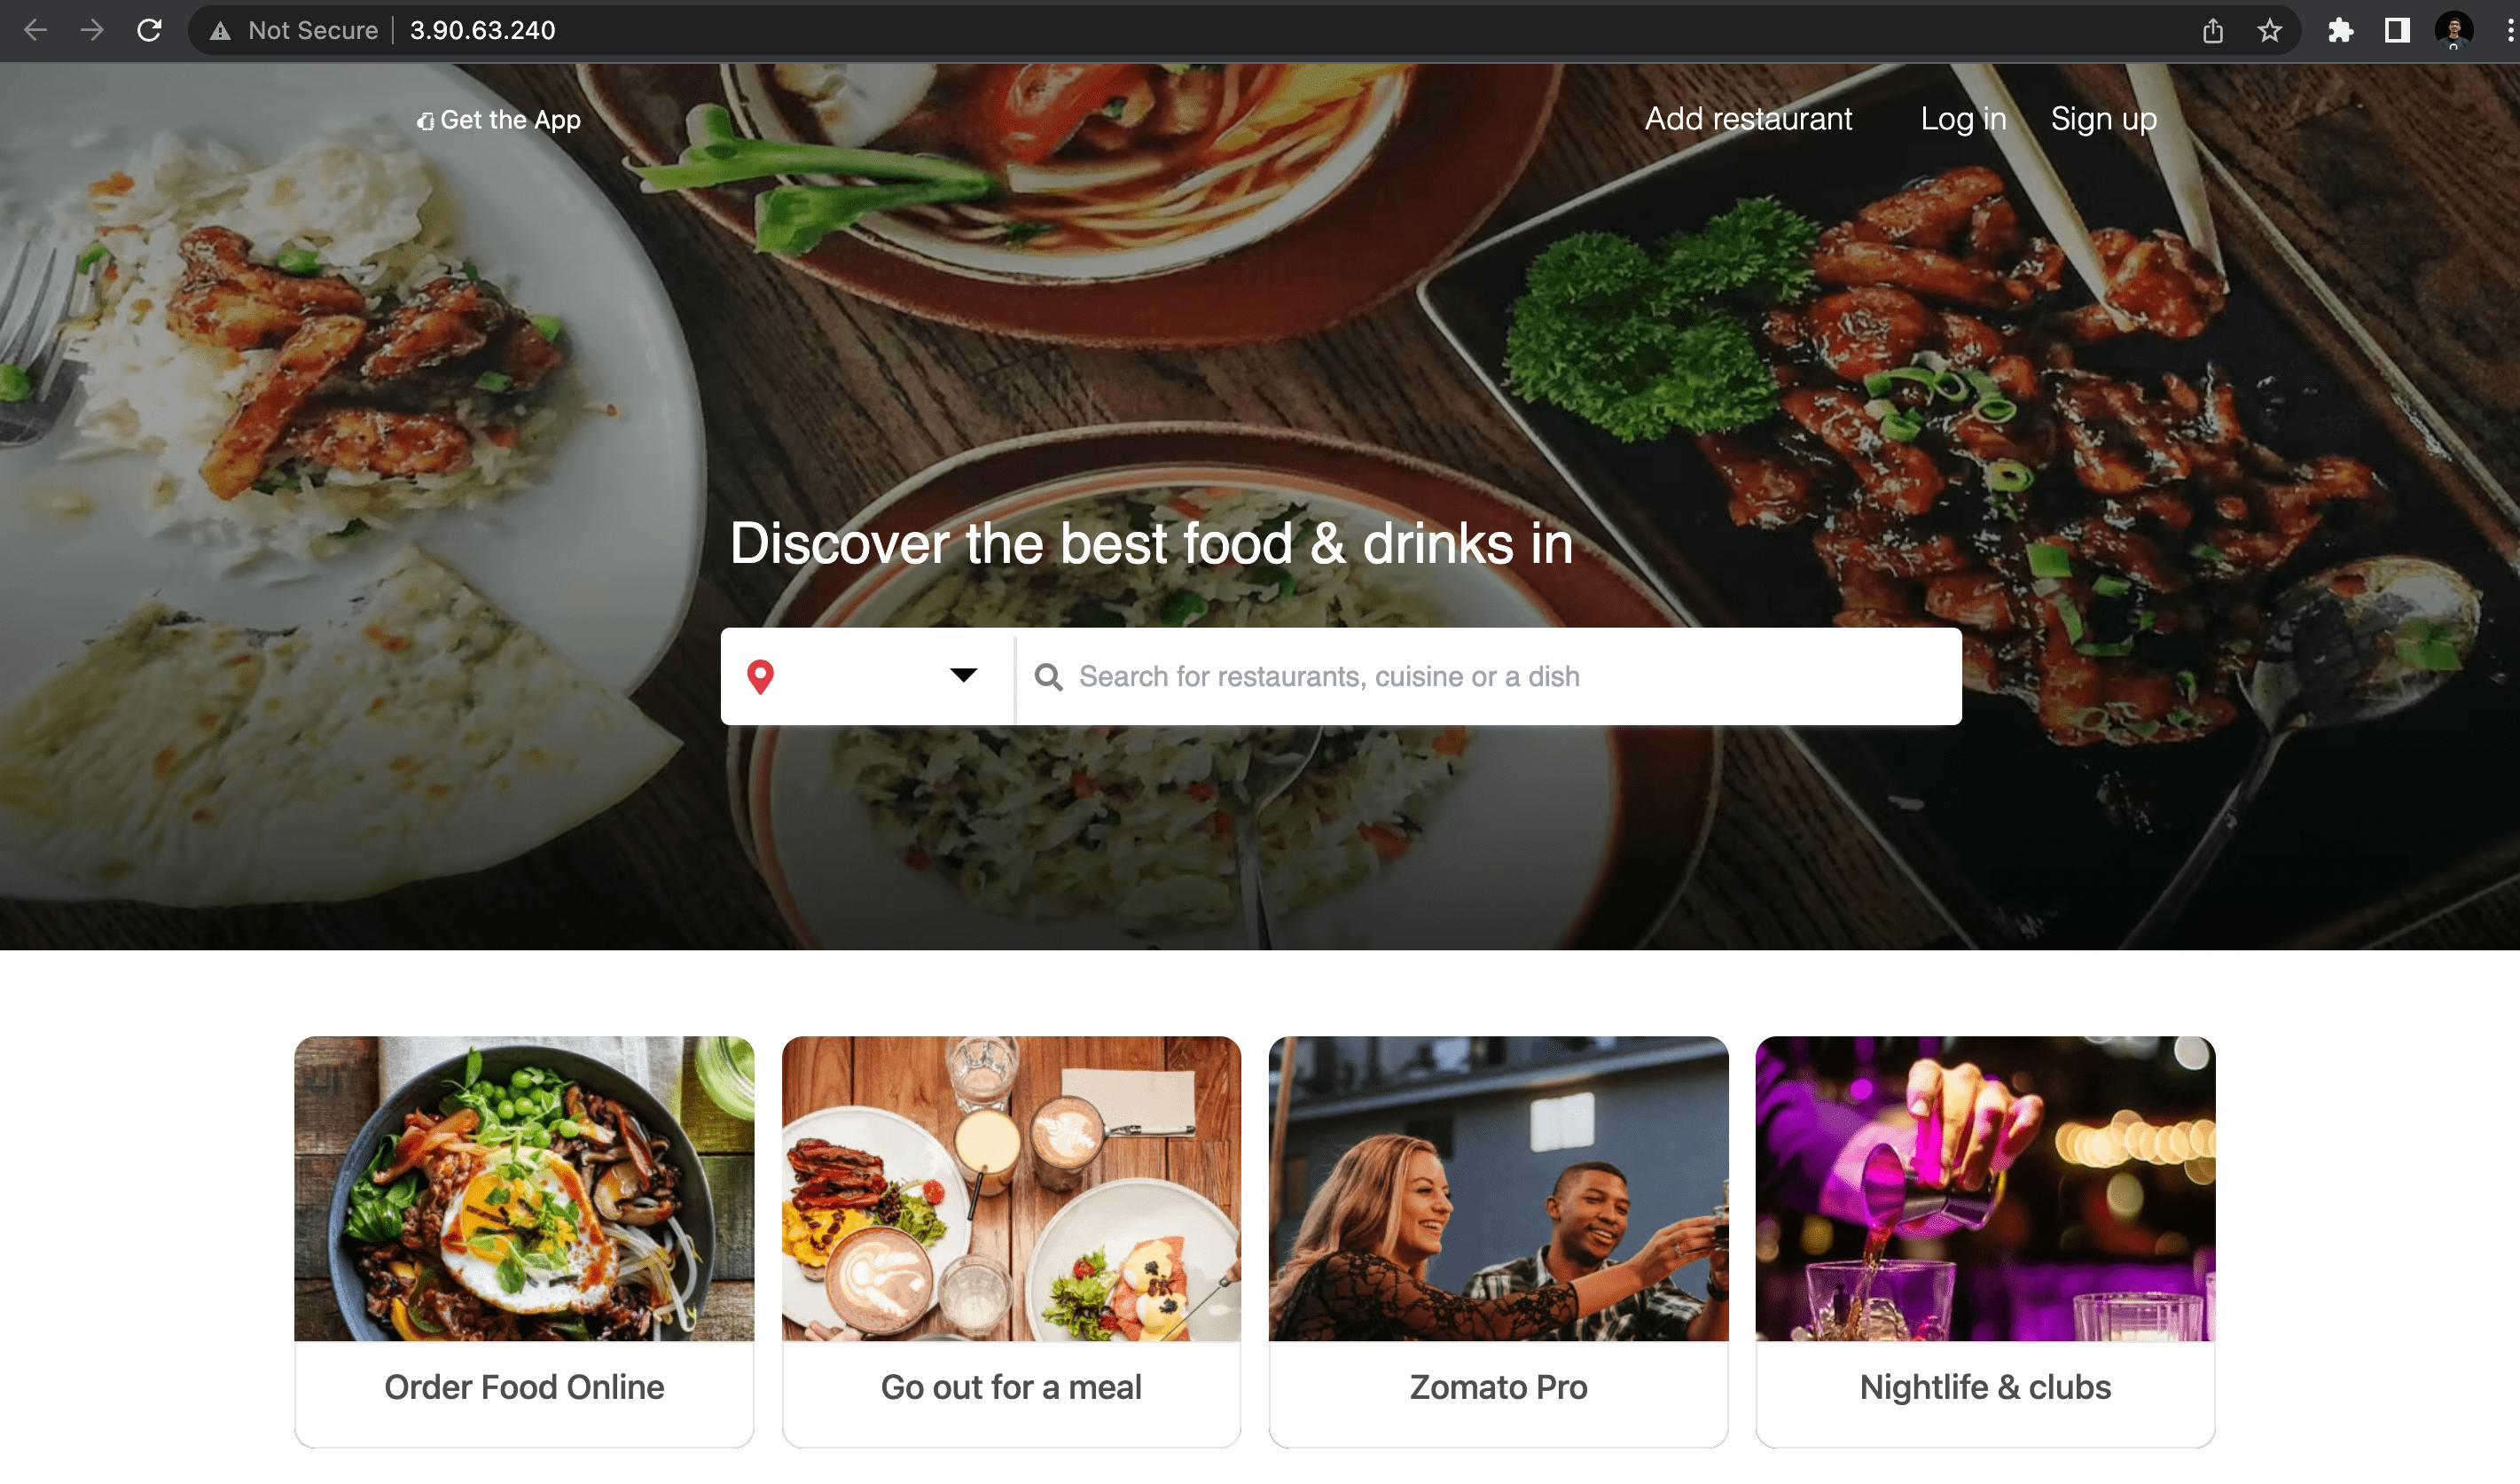
Aye! We have our Zomato clone web application running on AWS with the help of Amazon ECR and ECS!
To sum it up, scaling containers with Amazon ECS and ECR is critical in optimizing your application infrastructure on the cloud. Whether you're new to Amazon ECS and ECR or have used them before, this blog post has shown you how to use these services to deploy a web-based application to AWS. Thanks for reading any Feedback are welcome!! :)
Follow me here on Hashnode or Twitter/LinkedIn to stay up-to-date with my latest blog posts and hands-on tutorials.